Connecting the printer and power on, Setup – Panasonic KX-P6100 User Manual
Page 11
Attention! The text in this document has been recognized automatically. To view the original document, you can use the "Original mode".
Setup
Close the left cover
Notes:
• PLEASE DO NOT THROW AWAY THE PACK
ING MATERIALS YOU MAY NEED THEM TO
SHIP OR TRANSPORT THE PRINTER
• TO PROVIDE OPTIMUM PRINT QUALITY THE
UNIT MUST BE UPRIGHT AND KEPT LEVEL
AT ALL TIMES
Connecting the Printer and Power On
This printer IS equipped with bidirectional parallel interface If you do not have an interface cable, you will need to
purchase one from your local computer store or dealer
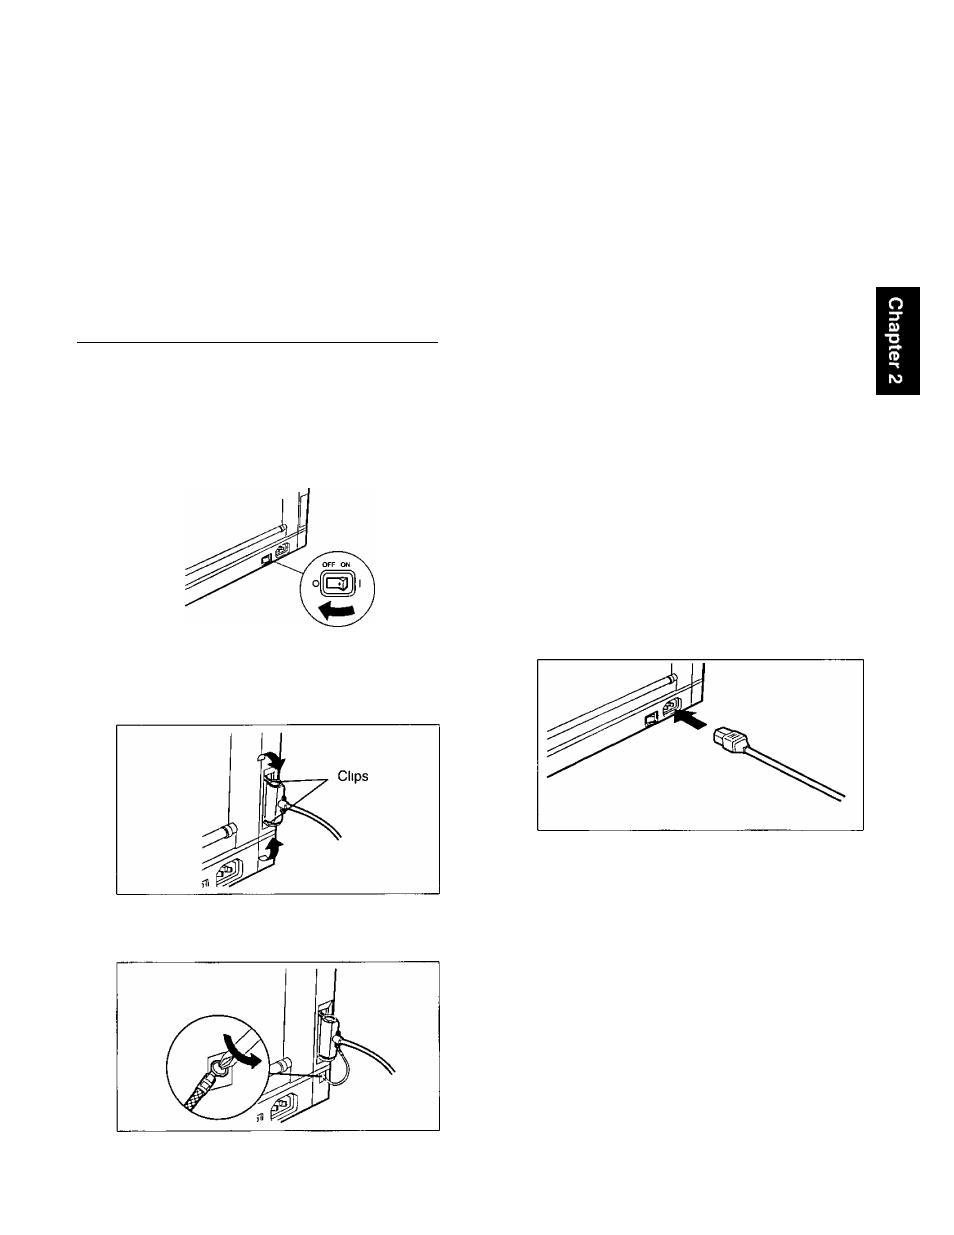
1 Turn OFF both the printer and computer
power switches.
Plug the other end of the cable into the
connector at the computer.
2 Plug one end of the cable into the parallel
interface connector of the printer.
Snap the clips into place
If the cable has a frame ground wire, connect
It to the frame ground terminal
Note:
• The actual connector on the computer
may differ depending on the manufac
turer of the computer
^ Connect the power cord into the printer’s
power connector plug.
Plug the power cord into a 3-prong AC wall
socket
0 Turn ON both the printer and computer
power switches
^ The printer is warming up
The READY indicator is blinking fast
0 The printer is ready for printing
The READY indicator is on
3
(D
CO
fi)
3
a
U)
fi>
3
a
o
o
(D
V)
V)
c
3
3
(A
tt
U
5
'
3
o
o
3
3
o
o
3*
(Q
0)
3
a
■0
o
€
o
O
3
11