BendixKing SKYMAP IIIC User Manual
Page 63
DETAILED OPERATION
In the example shown in the illustration for Screen 12, moving the joystick down would
move the cursor down over 01 (or Waypoint 1) but would leave the “LEG” arrow positioned
as it was. The distance shown next to the word LEG also would remain unchanged,
showing the leg distance from the flight plan start point to Waypoint 01 (01). Moving the
joystick down again would move the cursor down to 02, move the leg arrow down so that it
is pointing between 01 and 02 and the figures next to the word LEG would then show the
distance from 01 to 02 and so on. The number next to the word FPLN is the total flight
plan length from start to finish.
In addition, as the cursor is moved up and down the flight plan, the MSA for that leg is shown
in a box below the LEG and FPLN info box as [LEG MSA: XXXX]. This value is the highest
Grid MORA found along a ten-mile wide corridor (including five miles past the waypoint)
centred along each leg. Also shown is the [FPLN MSA: XXXX], which is the highest value
leg MSA for the entire flight plan.
An extra waypoint can be inserted at any place in the flight plan (assuming the flight plan is
not full). To do this, you position the cursor over the appropriate point in the flight plan and
press Key 2, INSERT ITEM. For example, if you placed the cursor over 02, the new item
would become 02 and the existing 02 would become 03, etc. In a similar manner items
may be deleted from the flight plan by positioning the cursor and pressing Key 3, DELETE
ITEM. Key 4 inverts or reverses the flight plan. Key 5, FLY FPLN, throws the unit into
Map Mode (Screen 47) with the selected flight plan active.
Manually Inserting a Waypoint into a Flight Plan and Manual DIRECT TO
DETAILE
D
OPE
RATION
A Waypoint can be inserted into a flight plan by using a two-step process, which is started
by pressing Key 2, INSERT ITEM. The same process is followed when Key 5, DIRECT
TO is selected in Screen 38, MAP Mode when the joystick is not active.
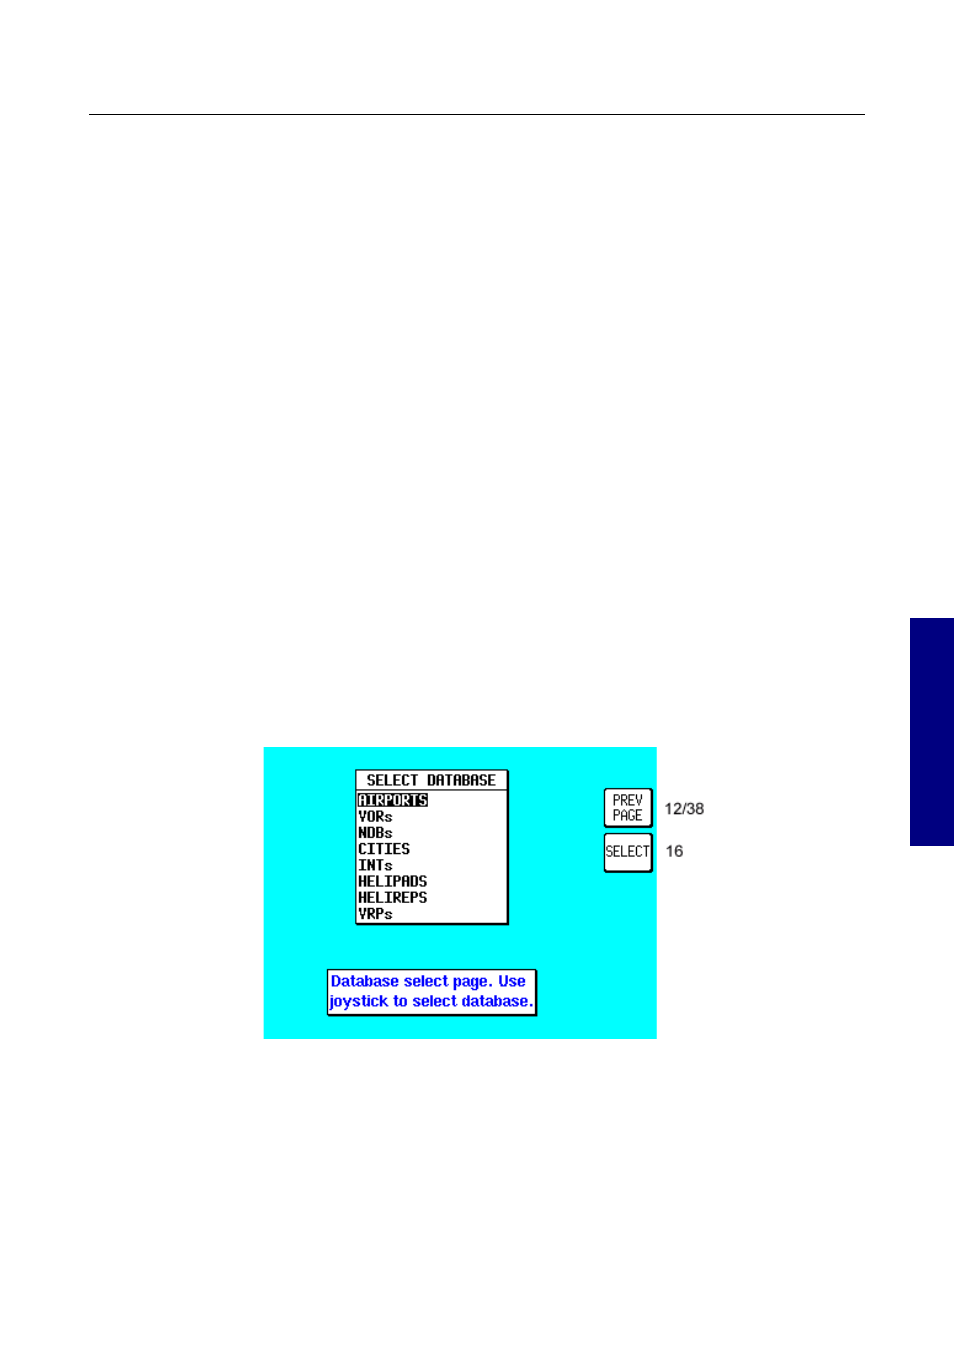
Step 1. Selecting data source
Screen 13: Database Selection Screen
This Screen shows a list of data libraries and you will find a cursor positioned over the
word AIRPORTS. You can use the joystick to move the cursor up and down the list of
databases. Keys 3, 4 and 5 only appear if this Screen is called from Screen 38, MAP
Mode as a DIRECT TO.
By moving the cursor you select the database that contains the item you are looking for,
whether to insert into your flight plan or to use as a DIRECT TO destination. Once you
Rev 9 Jul 2006
3-20
Skymap/Tracker IIIC Pilot's Guide