Installation guidelines – Waterworks R.W. Atlas Low Profile Concealed Tub Filler With Handshower and Metal Lever Handles User Manual
Page 3
PRODUCT SUPPORT 800.927.2120 8am - 6pm EST
RW ATLAS
Low Profile Concealed Tub Filler with Handshower
INSTALLATION GUIDELINES
Page 3 of 3
1.15.2013
These guidelines have been prepared for the professional contractor to aid in the installation of:
RW ATLAS LOW PROFILE CONCEALED TUB FILLER WITH HANDSHOWER WITH METAL WHEEL
HANDLES (STYLE# RWTF01) & METAL LEVER HANDLES (STYLE # RWTF10).
All dimensions are based on original specification and are subject to change and variation.
Please consult your Design Associate for current specifications.
SEE SERVICE PART DOCUMENT FOR PART ORDERING, AVAILABLE ON WATERWORKS.COM
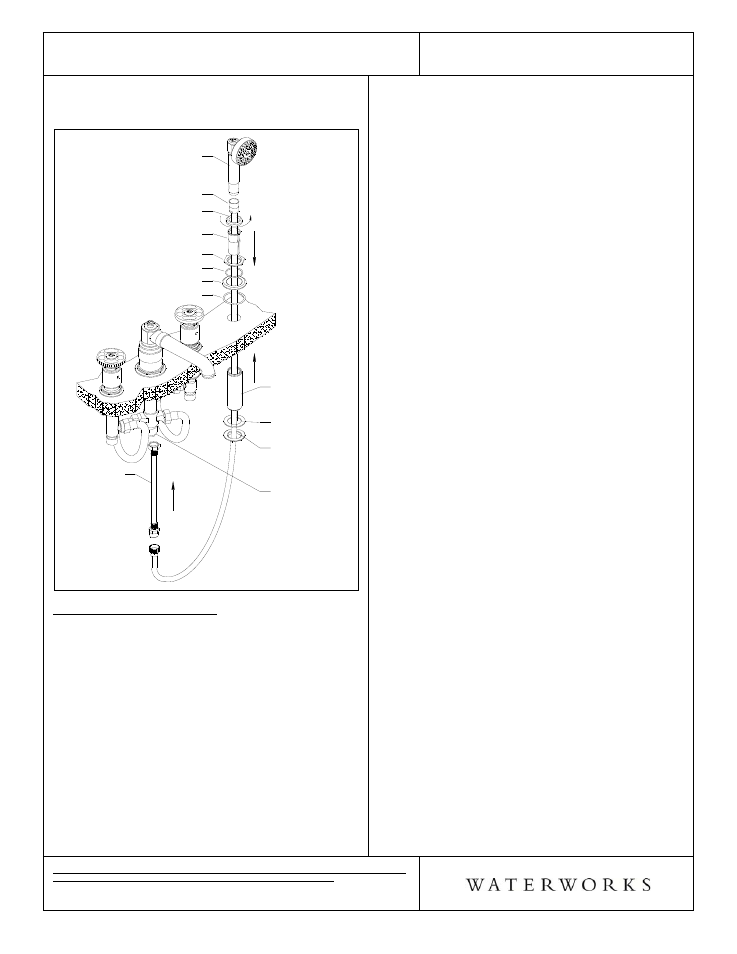
knurled end of the handshower hose to the male end
of the flex hose.
Figure - 03
THREADED
TUBE
HANDSHOWER
HANDSHOWER HOSE
RETAINING COLLAR
HEX COLLAR
HEX COLLAR O-RING
ESCUTCHEON
O-RING
PLASTIC SLEEVE
RUBBER
WASHER
NUT
FLEX HOSE
CHECK VALVE
HOUSING
INSPECT THE INSTALLATION:
19. Inspect all connections for leaks.
20. Make sure the hoses are tight and are not
pinched/kinked.
¾ The hex collars on the bottoms of the handle
assembly, the bottom of the spout assembly, and
the bottom of the handshower deck return can be
rotated after installation to orientate the hexes so
they are straight.
¾ The handle barrels can also be rotated to the proper
orientation to align the "H" & "C".
¾ NOTE: The screw on the top of the handle assembly,
on the front of the handle assembly, on the top of
the spout assembly, and on top of the handshower
are aesthetic and do not serve any mechanical
purpose and should not be removed.
* Putty contains oils and can cause permanent
discoloration on certain materials such as marble,
granite and any porous surface.
¾ If further assistance is required, please contact
Product Support at 1-800-927-2120 (8am-6pm EST).
¾ See service part document for parts ordering,
available on WATERWORKS.COM.