Casio SERIES FX-9860G User Manual
Page 476
20070201
3. Use the cursor keys to move the cell cursor to the cell from which you want to paste the
data.
• If you selected a range of cells in step 1, the cell you select with the cell cursor will be
the upper left cell of the paste range. If you copy the A1:B2 range of cells, locating the
cell cursor at cell C1 will paste the cells at C1:D2.
4. Press
1(PASTE).
• This will paste the data in the cells you selected in step 1 at the location you selected
in step 3.
5. The calculator will remain in the paste mode, so you could repeat steps 3 and 4 to
paste the same data at other locations, if you want.
6. After you are fi nish pasting the data where you want, press
J to exit the paste mode.
9-4-18
Inputting and Editing Cell Data
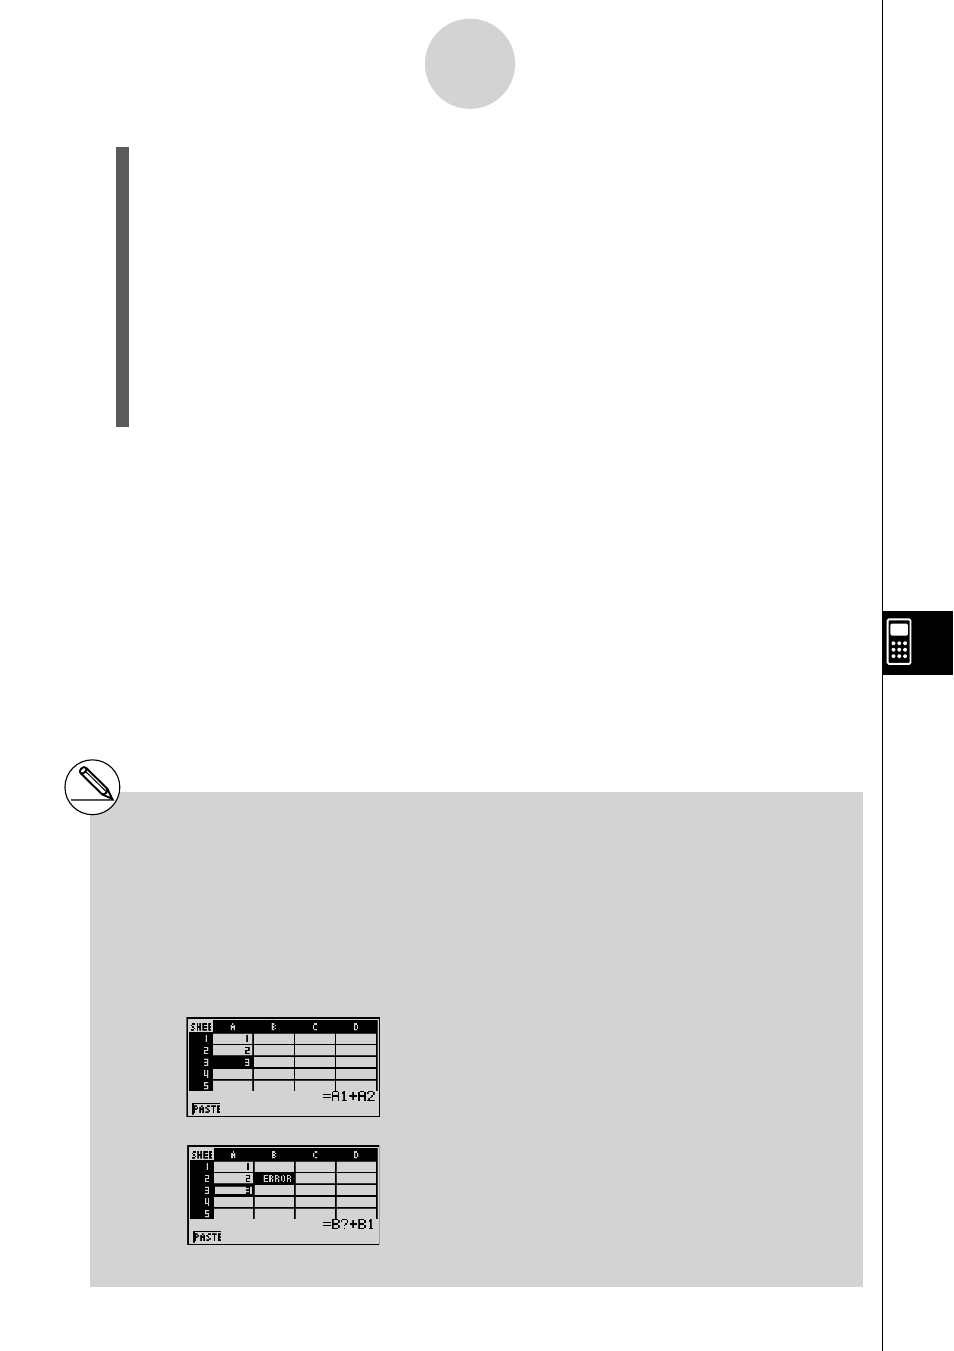
# If any cell in the paste area already contains
data, the existing data is replaced by the
pasted data.
# If a copy and paste operation causes a relative
cell reference to become an illegal reference,
the illegal reference will be replaced by “?”
in the cell where it is pasted. Let’s say, for
example, that you copy the contents of cell A3
(=A1+A2) and paste it in cell B2.
⇓⇓
When the A1 relative cell reference in A3 (which
effectively means “two cells up”) is pasted into
cell B2, it becomes an illegal reference because
there is no cell located two cells up from cell B2.
This will cause the cell reference to change to
“B?” when it is pasted in cell B2, and “ERROR”
will be displayed in place of the cell B2 contents.
# If “On” is selected for the “Auto Calc” setting on
the Setup screen (page 1-8-5), “ERROR” will
appear as soon as the data is pasted. If “Auto
Calc” is turned off, the contents of the cell will
not be performed when they are pasted, so
the destination cell (B2) will display the same
data as the original source cell (A3) until the
contents of the spreadsheet are re-calculated
and updated.