Rally Armor 10-13 Mazda3/Speed3 User Manual
Page 4
IMF17
Version 1.0 Release Date 5.28.2010
4
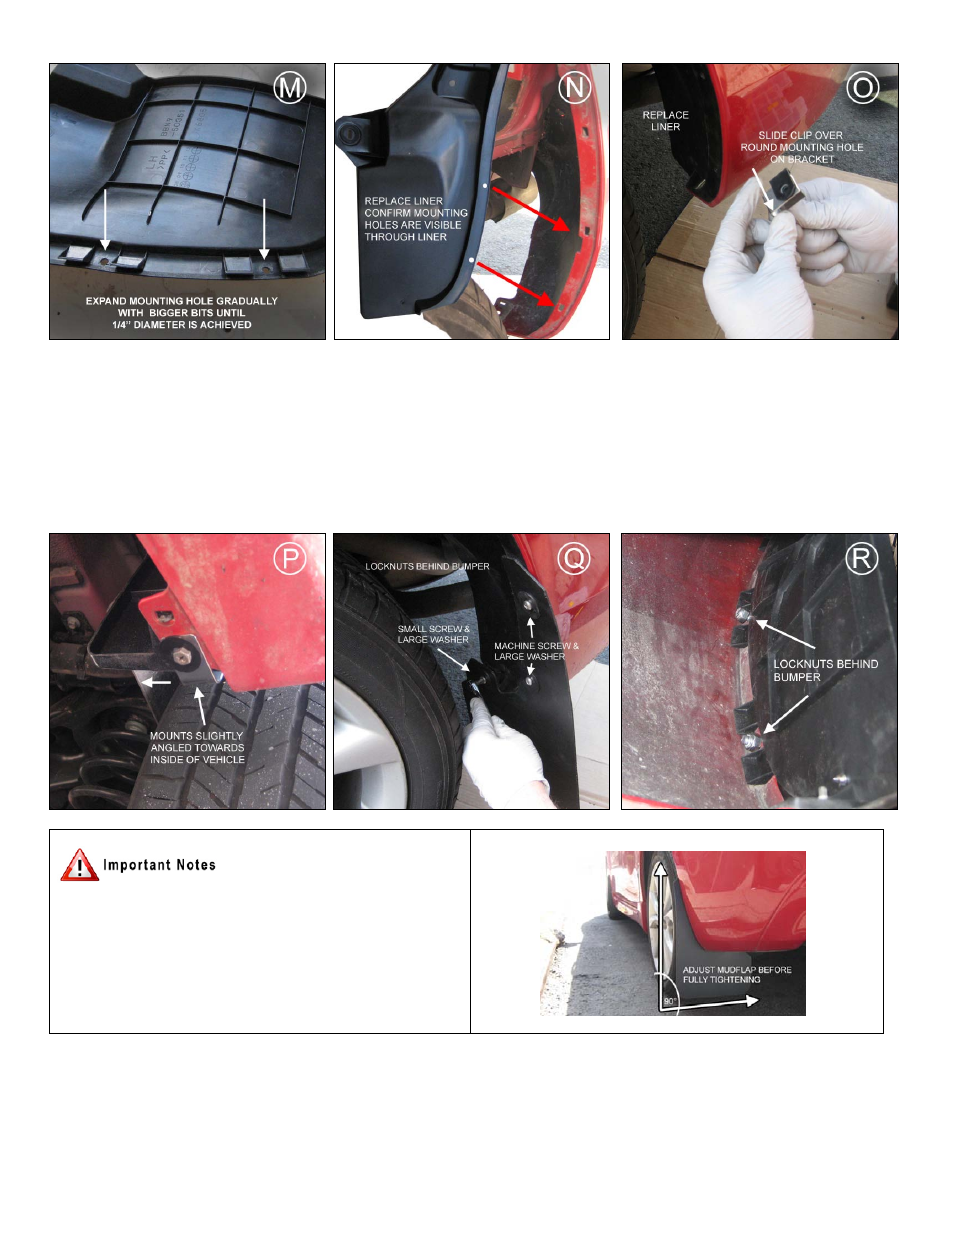
• (Figure P) Mount bracket to liner and bumper using existing liner bolt placed through the slotted hole on the bracket. Do not fully
tighten.
• (Figure Q) Position the rear mud flap with logo facing the rear of the vehicle. Thread a machine screw (1MCHSS) and a washer
(Wash), through the mud flap mounting point in to each of the two outer bumper mounting points. Use a small screw (1SS) and a
washer (Wash) on the innermost bracket mounting point. Small screw tip can slightly pierce liner; this is normal.
Adjust mud flap and bracket first before tightening all mounting points.
• (Figure R) Secure each of the two outer machine screw mounting points behind the rear bumper mount with a locknut. A socket or
wrench can be utilized to hold locknut while tightening screw.
Align outer edge of the flaps by incrementally adjusting the side to
side, lower/upper portion of the flap and walking away from the
vehicle until the flap is perpendicular to even ground. Tighten all
mounting screws only until snug against washer. Do not over
tighten.
All content including text, graphics, and logos are property of Rally Armor® LLC.