Rally Armor 2014+ Mazda 3 User Manual
Imf31 imf 31
IMF31
IMF 31
Version 1.1
1
2014+ MAZDA3 MUD FLAP INSTALLATION INSTRUCTIONS
For high resolution color images of these instructions, please visi
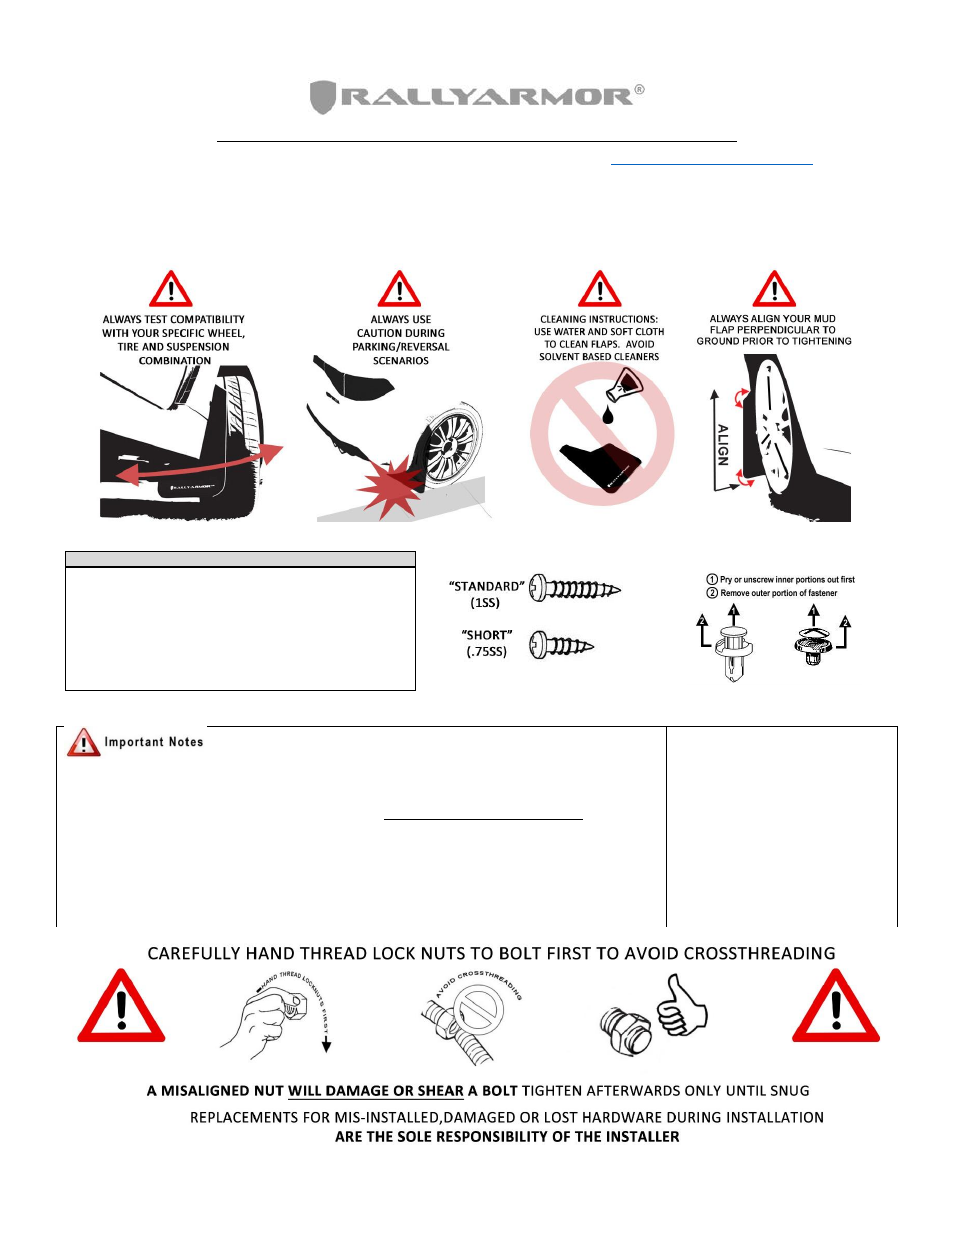
Check wheel clearance after installation, especially vehicles outfitted with non-OEM wheels and suspensions.
To protect your Rally Armor mud flap set, care must be taken during parking and reversing.
Rally Armor is not responsible for damage or loss of installed flaps.
YOUR MOUNTING HARDWARE CONSISTS OF:
GUIDE TO SCREWS PROVIDED:
HOW TO REMOVE STOCK FASTENERS:
Quantity
Hardware Item
Item ID
10
Flat U Clips
UClip
12
Small Washers
SmWash
2
Lock Nuts
SSLnut
2
Short Screws
.75SS
8
Standard Screws
1SS
2
Inserts
Ins3
2
Front Mounting Brackets
HMF31-FR-BR
2
Rear Mounting Brackets
HMF14/16-R-BR
Recommended tools: Offset, ratcheting or stubby Phillips screwdriver, small flat head screwdriver, drill and bit
assortment, 7/16
”
wrench, marker.
Cautionary Tip: The hardware is strong and self-threading but over-tightening the clips is not advised.
Installation Tip: To ease installation and avoid damage to existing OEM clips during removal, a well-lit, climate
controlled installation environment is recommended.
Parking and Reversing: Any extended mud flap application can be damaged or dislodged should they get caught in
between a tire and a curb or object. To protect your Rally Armor mud flap set, care must be taken during parking and
reversing.
To the customer: Retain these
instructions after installation. They may
be necessary for installing other optional
parts or removal of this accessory.
To the installer: Please return these
instructions to the customer after
installation. Always test and check wheel
clearance before returning vehicle