Rally Armor 2014+ Mazda 3 User Manual
Page 3
IMF31
IMF 31
Version 1.1
3
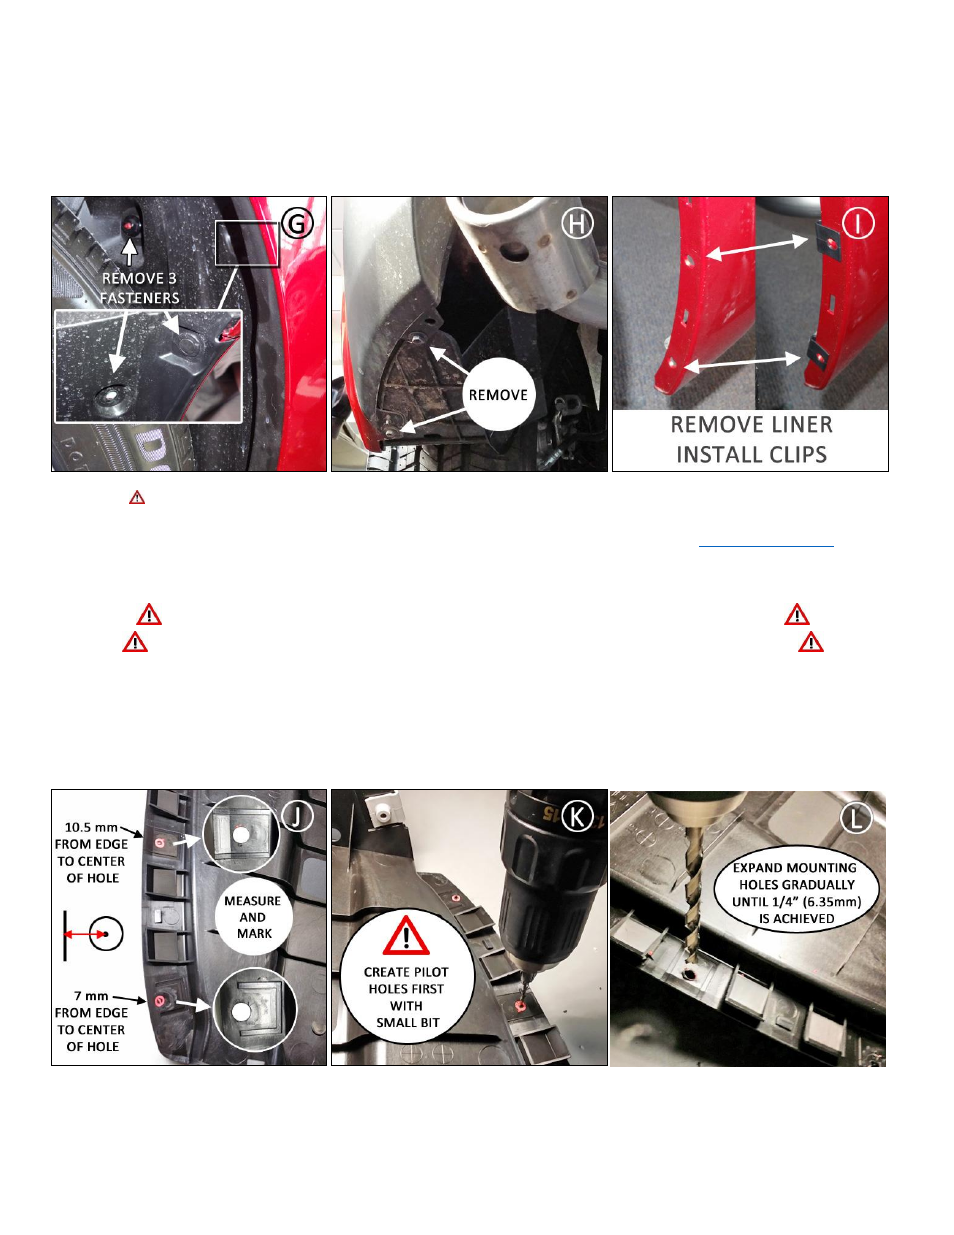
• (Figure G) Removal of rear wheel is not necessary, but can ease installation. An alternative is to jack up the rear of the vehicle
enough to lower the tire and enable access to the rear wheel well area. Remove the three fasteners from the inside of the upper
rear wheel well area. (Large plastic inner nut, screw and fastener)
• (Figure H) Working from underneath the rear of the vehicle, remove the two wheel well liner bolts.
• (Figure I) Completely uninstall the liner. Place two UClips over each of the round mounting points.
• (Figure J)
This process can be best performed with the liner still installed on the vehicle (prior to installing the clips), using a
marker, the existing holes on the bumper as a guide and marking them from underneath the rear of the bumper. Otherwise mark
the mounting point locations as shown in the pictures below. High resolution images are available o
. Note
the bottom mounting point is not exactly center of the “U” mark embedded on the liner.
BEST PERFORMED BY MARKING HOLE LOCATIONS WITH LINER STILL ON THE CAR
You must match the two existing mounting points found on the bumper behind liner.
• (Figure K) Drill a small pilot hole in the exact center your marking left using a small bit (1/16” for example).
• (Figure L) Gradually expand the holes with a slightly bigger bit at a time until 1/4" hole is achieved. Reinstall liner and confirm
inner holes on bumper are now visible through the liner. You can always expand the hole slightly bigger to confirm visibility of the
inside mounting points.
• (Figure M) Mount the rear bracket to liner and bumper with the previously removed liner bolt placed through the slotted hole on
the bracket. Do not fully tighten. Place UClip over the inside mounting point from the top. Flat side of clip towards front of vehicle.