Front mud flap installation, Rear mud flap installation – Rally Armor 2014+ Mazda 3 User Manual
Page 2
IMF31
IMF 31
Version 1.1
2
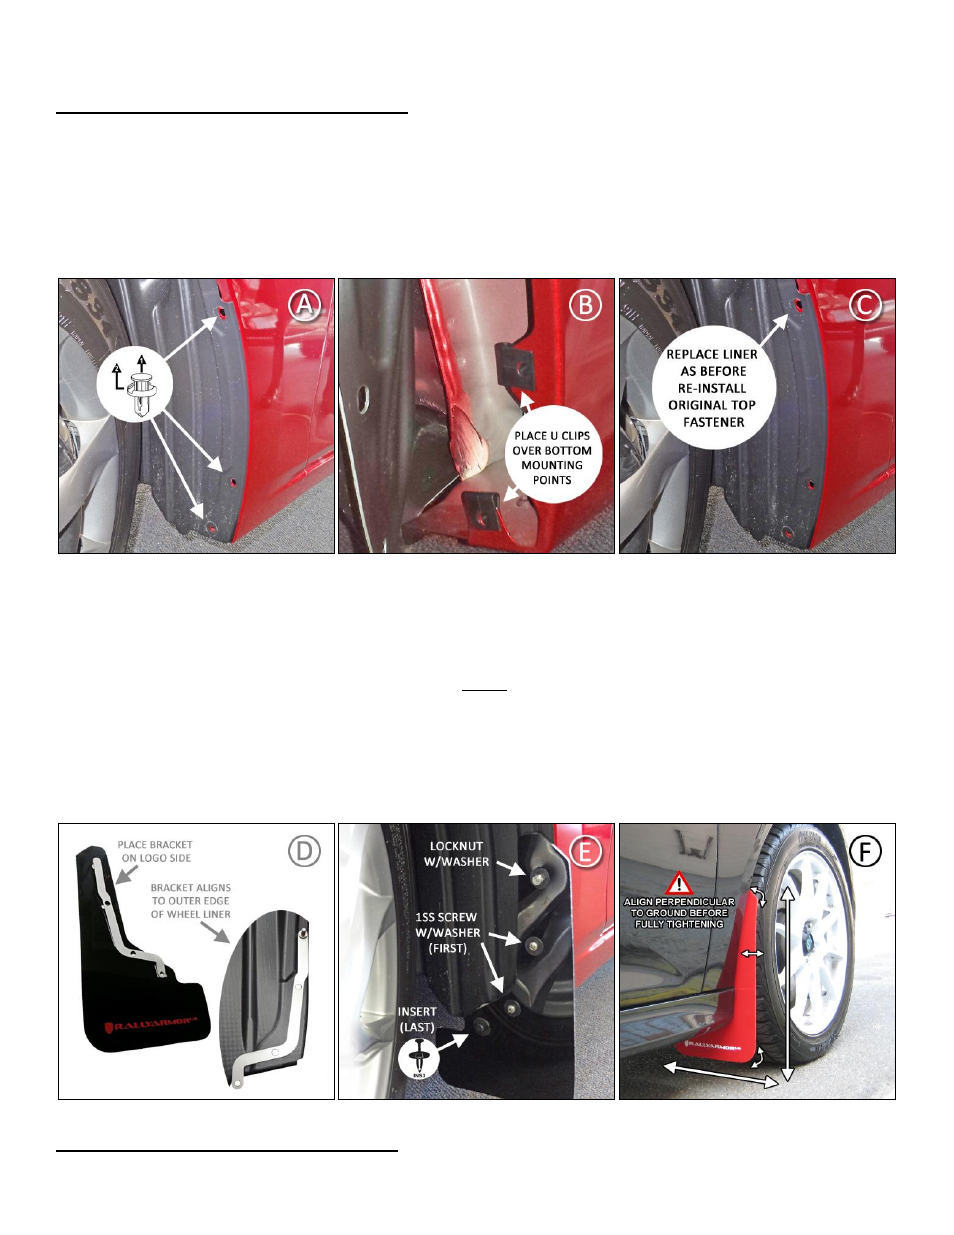
Front Mud Flap Installation
• (Figure A) Park vehicle on an even surface. Turn the steering wheel towards the side you are working on. Remove 3 outer fender
liner fasteners.
• (Figure B) Pull liner away to gain access to inner fender. Place a Flat U clip (UClip) over each of the 2 lower mounting points as
shown.
• (Figure C) Replace liner as before, and re-install upper mounting fastener.
• (Figure D) Place the front bracket against the logo side of the flap, with upper stud through the top mounting hole. Bracket and
flap assembly will align with the outer edge of the wheel well liner.
• (Figure E) Position the front mud flap with logo facing the rear of the vehicle with the bracket between flap and the outer edge of
the liner. Using a standard screw (1SS) and a washer (SmWash), loosely bolt through the mud flap and into each of the two
mounting points where the UClips have been installed. Carefully place a Locknut (SSLnut) with washer (SmWash), over the top
mounting point, and secure the lower inside mounting point with the supplied insert (Ins3).
• (Figure F) Align outer edge of the flap by incrementally adjusting the assembly side to side, as well as the lower & upper portions
of the flap. Check your adjustment, and confirming the flap is perpendicular to even ground. Tighten all mounting screws and nuts
only until snug against washer. Do not over tighten the mounting screws or cross-thread the locknut.
Rear Mud Flap Installation