Rally Armor 2012-14 Impreza (4d/5d) User Manual
Page 4
IMF 22
Version 1.1 Release Date 08.05.2012
4
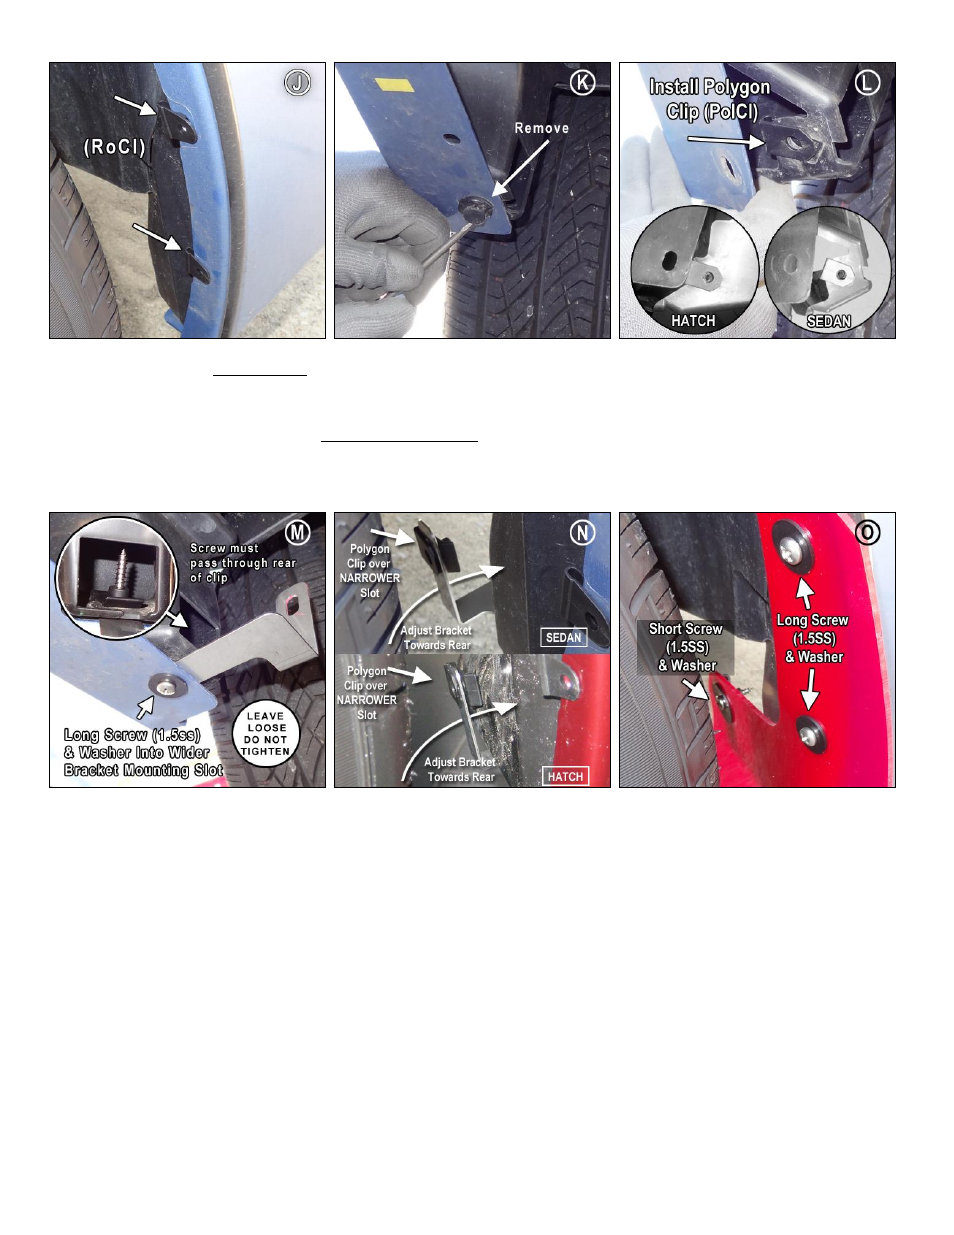
• (Figure M) Position the wider slot side of the bracket between bumper skin and inner bumper piece. Thread a long screw (1.5SS)
with washer (SmWash) through the bumper skin, bracket and polygon clip (PolCl).
DO NOT TIGHTEN. You will need to adjust the
bracket.
• (Figure N) Place polygon clip (PolCl) over narrower slot of bracket. Push bracket back towards the rear of the vehicle.
• (Figure O) Mount the rear mud flap with the logo facing the rear of the vehicle. Place the mud flap against the corresponding
mounting points on the vehicle and bracket. Thread a long screw (1.5SS) with washer (SmWash) through the flap into each of the 2
outer mounted clips. Thread a short screw (1SS) with washer into the inner mounting point. Do not fully tighten.
• (Figure P) Position the bracket back slightly, allowing for clearance between the flap and tire. Sedans have an open area while the
innermost portion of the bracket on the hatch is mounted close to the bumper piece.
• (Figure Q) Align outer edge of the flap by incrementally adjusting the lower and upper portions and walking away from the vehicle
until the flap is perpendicular to even ground. Tighten all mounting screws including bracket mountings points until snug. Do not over
tighten.
• (Figure R) Note Expanded Reference Diagram (page 5)