Rally Armor 08-11 Subaru Impreza & 08-10 WRX User Manual
Page 4
4
TIP #10:
Rally armor recommends adjusting the mud flap, walking away from the vehicle to confirm desired position and then performing the final bolting.
It is recommended you verify the
alignment is correct multiple times before creating mounting hole as this will be not be adjustable after the hole is created.
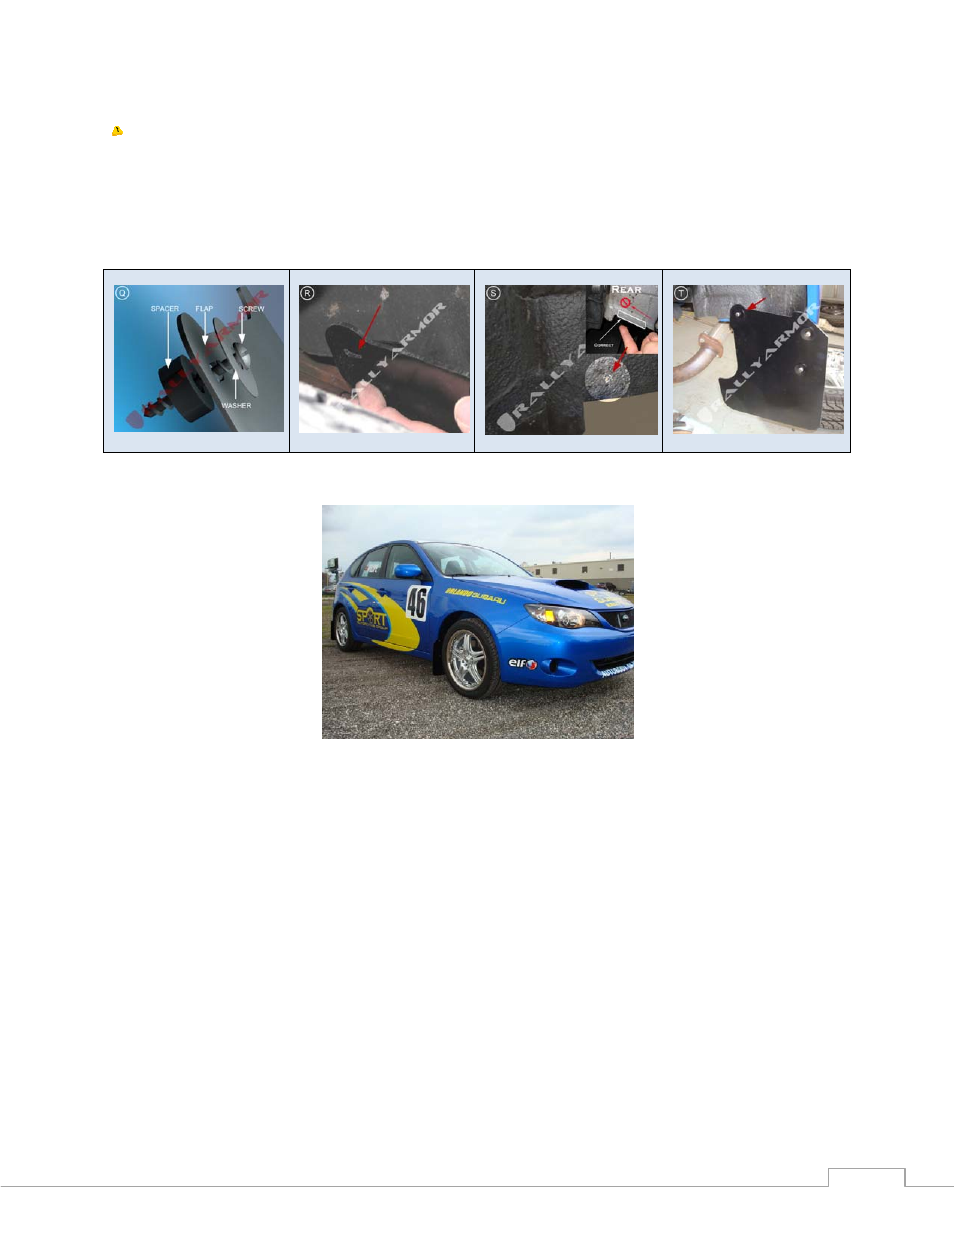
Place screw, washer through flap, and 1 spacer on the other side of flap (see Figure “Q” below). Push inner portion of flap and mounting pieces against flush against
vehicle body (see Figure “R” below‐
note screw/assembly not shown in image
). The tip of the screw will be pushed up against body when flush.
Place a mark where
tip of screw meets the body.
The tip of screw can be utilized by pushing it in as it will leave a mark in the undercoating if needed.
Pull flap back away from drilling area as to not interfere with this part of the process. Create a 1/8
th”
or smaller pilot mounting hole on the mark you have just
created (Figure “S” below). Place the screw/washer and spacer combination again through flap (Figure “Q” below) and fasten the assembly into the hole you have
created. The threads will work their way into the smaller hole and will tighten the entire assembly into the body, and fasten all screws only until snug. (Figure “T”
below)
Rear Installation is now complete.
Repeat the Installation for the other side of the vehicle to complete your installation.