Rally Armor 2013+ BRZ/FRS User Manual
Page 4
IMF 23
Version 1.0 Release Date 07.17.2012
4
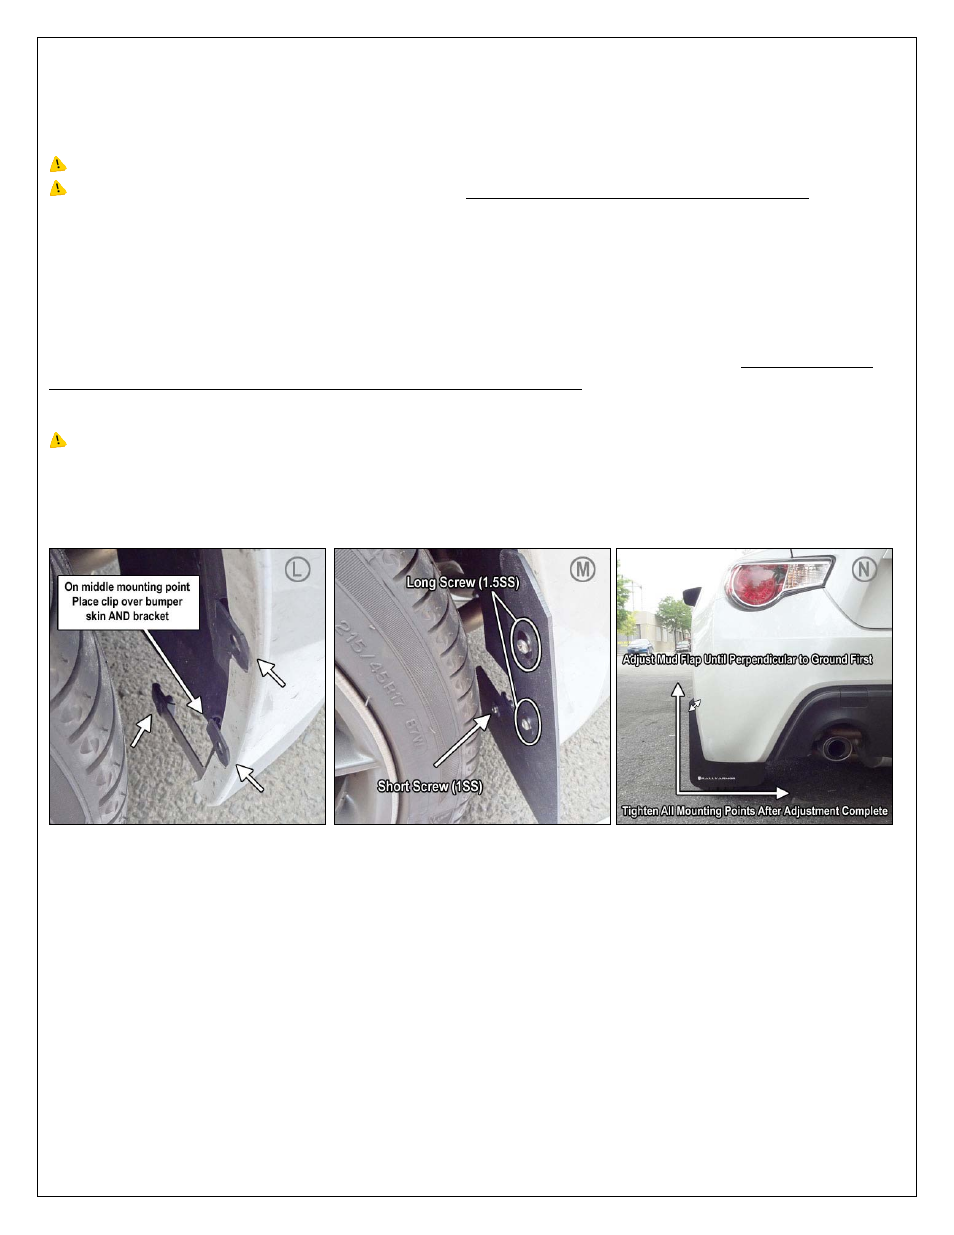
• (Figure L) Place polygon clip (PolCl) over the three mounting points as shown.
-----------------------------------------------------------------------------------------------------------------------------------------------------------------------------------
IMPORTANT: ENSURE ALL MOUNTING CLIPS ARE ALIGNED WITH MOUNTING HOLES ON VEHICLE AND BRACKET.
IMPORTANT: FOR THE MIDDLE MOUNTING POINT PLACE CLIP OVER BUMPER SKIN AND BRACKET MOUNTING POINT.
TO ENSURE ADEQUATE CLIP CLEARANCE, CHECK THAT THE REAR PORTIONS ARE POSITIONED WITHIN THE CUTOUTS FOUND ON THE
INSIDE BUMPER PIECE.
-----------------------------------------------------------------------------------------------------------------------------------------------------------------------------------
• (Figure M) Place the mud flap against the corresponding mounting points on the vehicle and bracket. Thread long screws (1.5SS)
with washers (SmWash) through the flap into the outer edge mounted clips. For the middle mounting point, the screw will thread
through the mounting holes in the bumper, the bracket, and rear portion of the clip. Thread a short screw (1SS) with washer (SmWash)
through the flap on the lower inner mounting point found on the bracket.
IMPORTANT -Do not fully tighten. The mounting points are slotted to allow for movement and final alignment of flap.
• (Figure N) Align outer edge of the flap by incrementally adjusting the angle of the flap and walking away from the vehicle until the
flap is perpendicular to even ground. Tighten all mounting screws including bracket mountings points until snug. Do not over tighten.
All content included on these instructions is the copyright of Rally Armor® LLC