Installing drives, Configuring the boot drive, Removing a hard drive – Dell PowerVault 745N User Manual
Page 66
Back to Contents Page
Installing Drives
Dell™ PowerVault™ 745N Systems Installation and Troubleshooting Guide
Connecting Hard Drives for RAID
The hard-drive bays provide space for up to four SATA hard drives. The hard drives must be connected to a CERC SATA RAID controller card or SATA daughter
card.
Configuring the Boot Drive
The drive or device from which the system boots is determined by the boot order specified in the System Setup program. See "Using the System Setup
Program" in your User's Guide. To boot the system from a hard drive or drive array, the drive(s) must be connected to the appropriate controller.
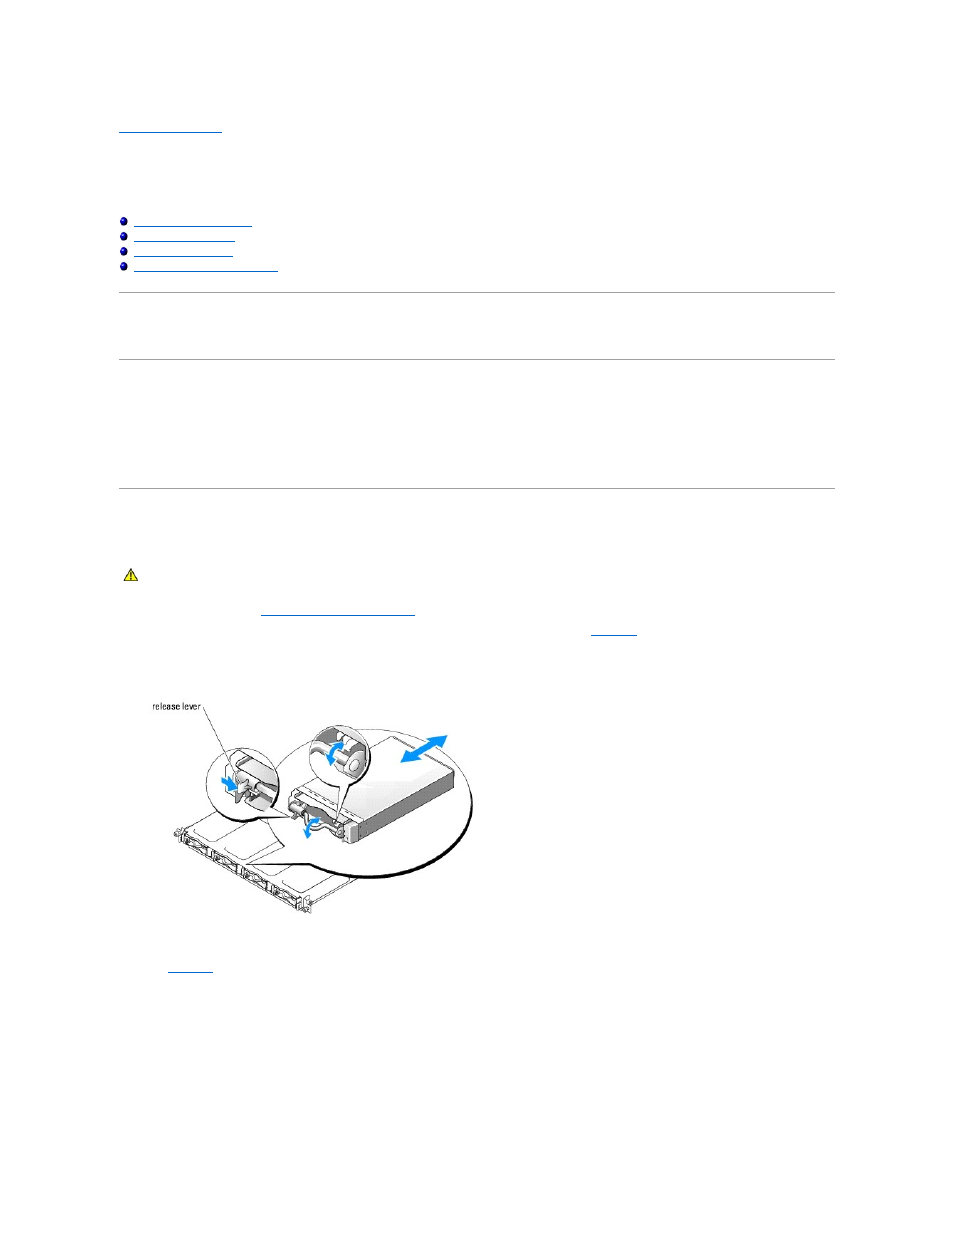
Removing a Hard Drive
1.
Remove the bezel. See "
Removing and Replacing the Bezel
" in "Troubleshooting Your System."
2.
Pull the release lever to the right and pull down the horizontal bar on the front of the carrier. See
Figure 7-1. Removing the Hard-Drive Carrier
3.
Slide the hard-drive carrier out of the chassis.
4.
Using a #2 Phillips screwdriver, remove the four screws on the bottom of the carrier that secure the hard drive and remove the drive from the carrier.
See
.
Figure 7-2. Removing the Hard Drive From the Drive Carrier
CAUTION:
See your System Information Guide for complete information about safety precautions, working inside the computer, and protecting
against electrostatic discharge.