Removing a seed disk, Sprocket indexing (stagger), Removing a seed disk sprocket indexing (stagger) – Great Plains 1625AHL Operator Manual User Manual
Page 86
82
1625AH
Great Plains Manufacturing, Inc.
411-020M
2014-04-21
Removing a Seed Disk
Refer to Figure 85
1.
Remove rain cover. If seed is present, close
shutter
to prevent more seed from entering meter.
Attach funnel (page 104) or place a tarp under the
row to collect seed.
2.
Hold seed disk in meter. Rotate disk clamp
counterclockwise 45
° to release disk.
3.
Tilting top of disk toward meter, slowly remove disk,
allowing seed to collect in funnel or to control flow to
tarp. Open shutter to release remaining seed up to
wing tube.
4.
Clean seed from all brushes. Clean disk seat (
in
Figure 82
page 81), so that new disks can seat fully.
Inspect brushes for excess wear and damage. See
“Meter Brush Maintenance” on page 112.
5.
Inspect removed disks for excess wear and damage.
Set aside any disks requiring replacement. Clean
other removed disks and place in storage. See
“Seed Disk Maintenance” on page 114.
6.
Re-install the rain cover (page 79).
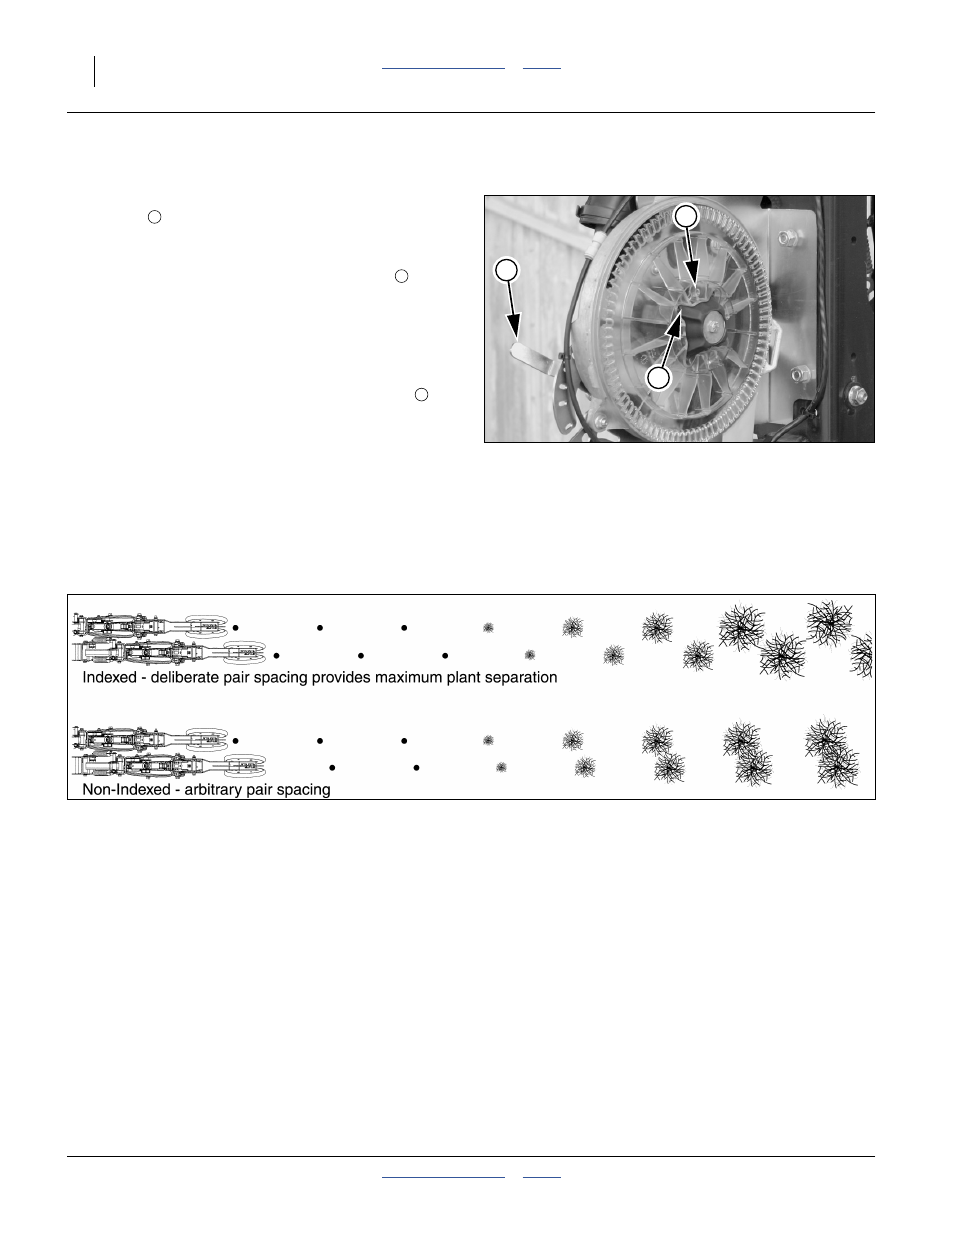
Sprocket Indexing (Stagger)
If you are planting:
• twin-row crops,
• at seed interval spacings above 6
1
⁄
2
inches (16.5 cm),
you can synchronize each pair of adjacent meters in a
twin row so that you achieve the maximum seed-to-seed
spacing between the units of the pair.
Refer to the Seed Rate Manual (411-020B) for
instructions and charts.
Figure 85
Remove Disk
29611
3
1
4
4
1
2
28420