Lights, Front lights – Great Plains V-300F Predelivery Manual User Manual
Page 28
V300, V300F
148-057Q
1/2/2006
26
Lights
Front Lights
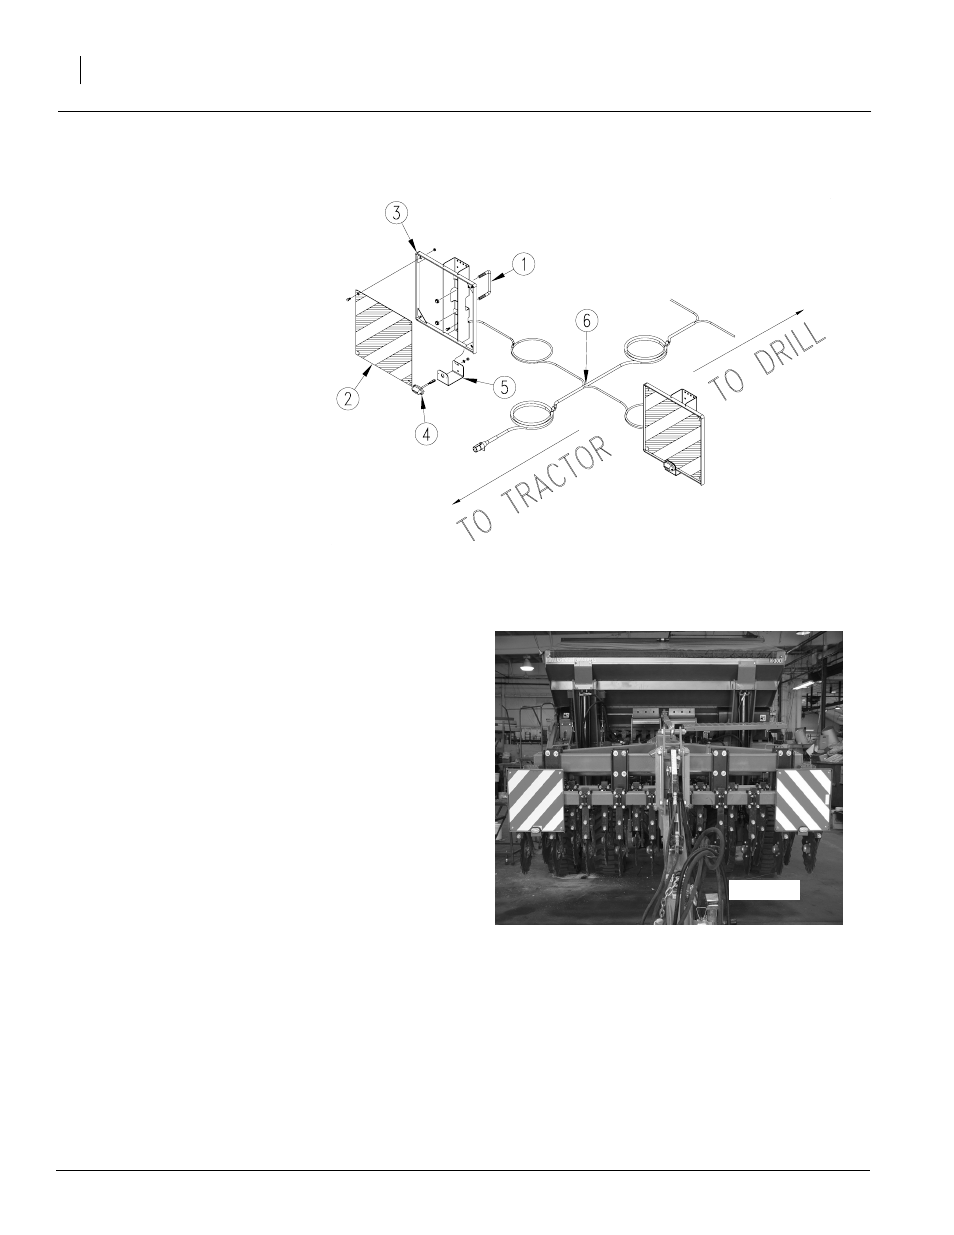
Refer to Figure 43
1.
Attach sign mount weldment (3)
to front side of coulter toolbar on
right-hand side of drill using 5/8-
11 x 6 x 3 1/2 u-bolt (1) and two
5/8-18 hex jam nuts.
2.
Bolt front light bracket (5) to sign
mount weldment (3) using two
3/8-16 x 3/4 bolts, 3/8 lock
washers, and 3/8-16 hex nuts.
3.
Place clear oval light (4) on front
of light bracket (5). Pull light
cord through opening. Screw
light to mounting bracket.
4.
Route right-hand branch of light
harness (6) through back of sign
mount weldment (3).
5.
Attach light harness (6) to light
cord. Pull harness (6) and cord so that light (4) rests
against light bracket (5).
6.
Route light harness (6) towards middle of drill. Se-
cure light harness (6) to coulter toolbar with cable
ties.
7.
Bolt fluorescent safety panel (2) on sign mount weld-
ment (3) using four 3/8-16 x 3/4 bolts and 3/8-16 hex
nuts. NOTE: Light cord should rest between bottom
of safety panel (2) and bottom of sign mount weld-
ment (3).
8.
Repeat steps 1 - 7 on opposite side of drill.
9.
Route light harness through tongue towards back of
drill.
10. Once routed through tongue, light harness will
branch off. Route right-hand branch of light harness
along frame toward right-hand side of drill. Where
necessary, secure with cable ties.
11. Continue routing right-hand branch of harness be-
tween box and frame along right-hand side of drill to-
wards back of box. Fasten with cable ties, if
necessary.
12. Route left-hand branch of light harness along frame
toward left-hand side of drill. Where necessary, se-
cure with cable ties.
13. Continue routing left-hand branch of harness be-
tween box and frame along left-hand side of drill to-
wards back of box. Fasten with cable ties, if
necessary.
23371
23370
Figure 43
Front Safety Lights