Sensor input, Time clock, Setting the schedule – tekmar 162 Setpoint Control Installation User Manual
Page 24
© 2007
D 162 - 08/07
24 of 32
Sensor Input
SECTION J
The Setpoint Control 162 requires a temperature sensor
(Universal Sensor 071 included) to be connected to the
sensor input on the back of the control. All tekmar sensors
are compatible. Choose the sensor type that best meets
the requirements of the application. See application mode
diagrams for the recommended location of the sensor.
The setpoint control has a built-in time clock to allow the
control to operate on a programmable schedule. A battery
less backup allows the control to keep time for at least 4
hours without power.
Time Clock
SECTION K
•
• Use the Time menu to set the correct time.
Schedule Type
Day
24 Hour
5-2
5-11
7 day
Sa
•
•
•
•
Su
•
•
Mo
•
•
•
Tu
•
We
•
Th
•
Fr
•
To provide greater energy savings, the setpoint control
can operate on a programmable schedule. The schedule
is stored in memory and is not affected by loss of power
to the control. A single zone or multiple devices on the
tN4 system can be assigned to follow the schedule of the
setpoint control.
Zone Schedule
A zone schedule only applies to the setpoint control on which
the schedule is programmed. The setpoint control follows
the zone schedule and the events are not communicated
to other devices on the tN4 system.
Master Schedule
If the setpoint control is connected to other devices on
the tN4 system, then the setpoint control can operate on
a master schedule. The master schedule stores the event
times in memory and sends messages to the member
thermostats when to change from one event to the next.
A maximum of four master schedules can be set up on the tN4
system. A master schedule is available to all devices on the
tN4 system. Master schedules simplify installation by allowing
one master schedule to be used by multiple devices.
Schedule Member
If a Master Schedule is available on the tN4 system, the
setpoint control can follow the Master Schedule as a
member.
To follow a master schedule as a member:
1. Assign the setpoint control to follow a master schedule
by setting the Schedule menu item in the Schedule
menu to Member (MBR) 1 to 4. The number must match
that of the Master.
Normally Unoccupied
The setpoint control can be set to normally operate at the
unoccupied temperature. This allows the setpoint control
to temporarily be set to the occupied temperature by either
pressing the Up or Down buttons in the View menu or by
a remote enable.
Schedule Types
The schedule type determines when the schedule repeats
itself.
The setpoint control includes four schedule types:
•
• 24 Hour: Repeats every 24 hours.
•
• 5-2: Repeats on a weekly basis. However, it breaks the
week into the weekend and weekdays. This reduces the
amount of schedule event settings.
•
• 5-11: Repeats on a weekly basis. However, it breaks
the week into Saturday and Sunday followed by the
weekdays. This reduces the amount of schedule event
settings.
•
• 7 Day: Repeats on a weekly basis and allows for
separate event times for each day.
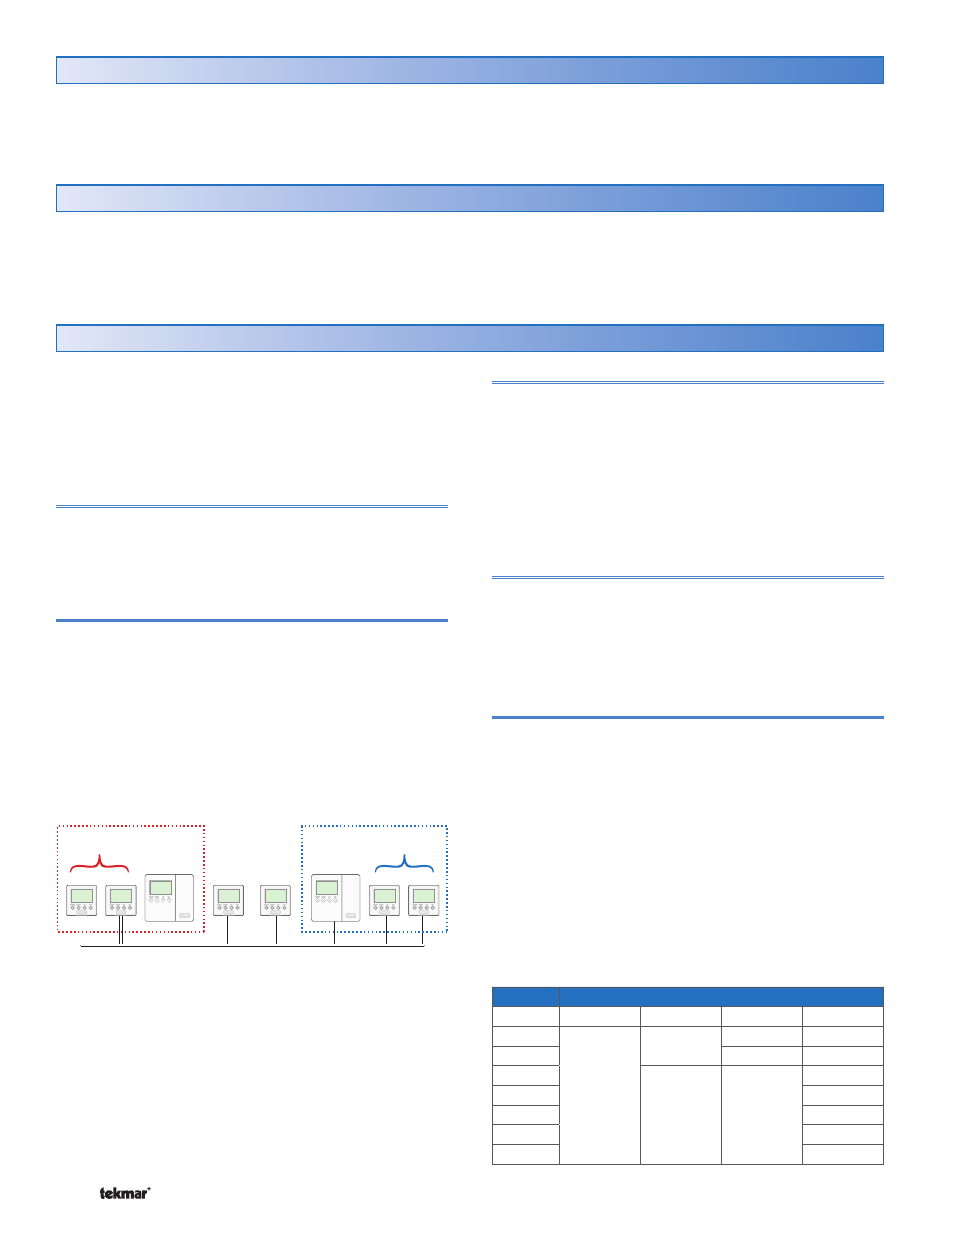
Master
Schedule 1
Members of
Schedule 1
Members of
Schedule 2
Master
Schedule 2
None
Zone
Schedule
Zone 1
2
3 4
5
6 7
8
Setting the Schedule
SECTION L
To create a master schedule:
1. Assign the setpoint control as a master schedule by
setting the Schedule item in the Schedule menu to
Master (MST) 1 to 4.
If the setpoint control is a master schedule, a clock symbol
appears in the display while in the View menu. This helps
locate the master schedule if changes to the schedule
are required.