Powers 595 Series 11 Self-Operating Temperature Regulators - Type WM 3-Way Water Mix User Manual
Page 7
7
7.
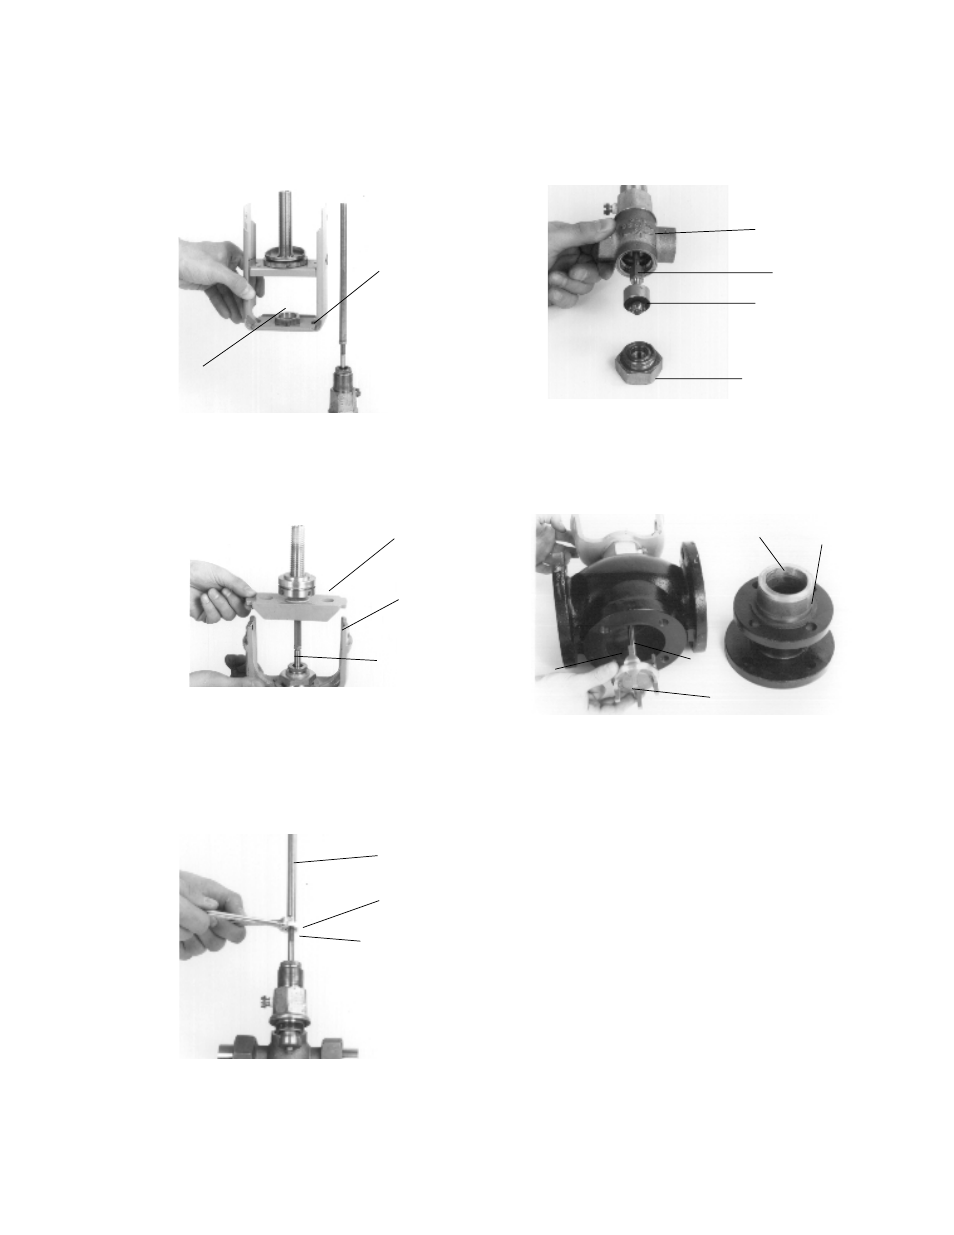
Figure 12A. For 1/2" to 2" valves: Unscrew and remove valve
seat [25]. Pull down valve plug assembly [23 & 24]. Remove
disc lock nut, both disks and other parts [23a-e]. Replace with
new discs and reassemble.
Figure 12B. For 2-1/2 to 4" valves: Remove four flange cap
screws [28]. Remove valve flange and seat assembly [27]. Pull
down plug assembly [24], unscrew stem head retainer [22]
and replace valve plug. Replace gasket [21] Assemble in
reverse order.
6.
Use a 1-3/8" wrench to unscrew lock nut [11].
Figure 10A. For the 1/2" to 2" valves, the bridge and yoke are
a one-piece assembly [9]. Lift them off.
Figure 10B. For the 2-1/2 to 4" valves, the cast iron bridge
and yoke can be separated. Lift both off.
To replace valve plug, disks and gaskets
Follow steps 1-5, To fully disassemble regulator from valve.
6.
Figure 11. For all WM valve sizes, use the 3/8" wrench on the
stem extension [4] and the 7/16" wrench on the hex nut [12]
to loosen and remove them.
Locknut
10A. (1/2" TO 2") LIFT OFF BRIDGE/YOKE ASSEMBLY
Yoke and
Bridge
Bridge
Yoke
Locknut
10B. (2-1/2" TO 4") LIFT OFF BRIDGE AND YOKE
Stem Assembly
7/16"
Hex Nut
5/16" Stem
Extension
11. REMOVE STEM EXTENSION AND HEX NUT
Valve Seat
Disc Assembly
Stem
Body
12A. (1/2" TO 2") PLUG ASSEMBLY
12B. (2-1/2" TO 4") PLUG ASSEMBLY
Flange/Seat
Plug
Assembly
Stem
Stem
Head
Retainer
Gasket