Rockwell Automation 6176M-xxxx Standard Industrial Monitors User Manual User Manual
Page 16
16
Rockwell Automation Publication 6176M-UM001D-EN-P - December 2012
Chapter 2
Installation
Panel Mounting Guidelines
Observe these guidelines when installing the monitor in a panel:
• Included with the monitor is Industrial Monitors Cutout Template,
publicatio
with a cutout template for each monitor
model. Panel cutout dimensions are also listed in
.
• Cut supporting panels to specifications before installation. Take precautions
so metal cuttings do not enter components already installed in the panel.
• Supporting panels must be at least 14 gauge to be sure of proper sealing
against water and dust and to provide proper support. The mounting
hardware supplied accommodates panels up to 6.25 mm (0.25 in.) thick.
Mount the Monitor in a Panel
Follow these steps to mount the monitor in a panel.
1. Cut the panel opening using the appropriate cutout dimensions.
2. Attach cables to the monitor before installing if rear access to the monitor
is limited after installation.
Monitor Connections on page 19
for where to attach cables.
3. Verify that the sealing gasket is properly positioned on the monitor.
This gasket forms a compression-type seal. Do not use sealing compounds.
4. Place the monitor in the panel cutout.
5. Slide the mounting clips into the slots on the top, bottom, and sides of the
monitor.
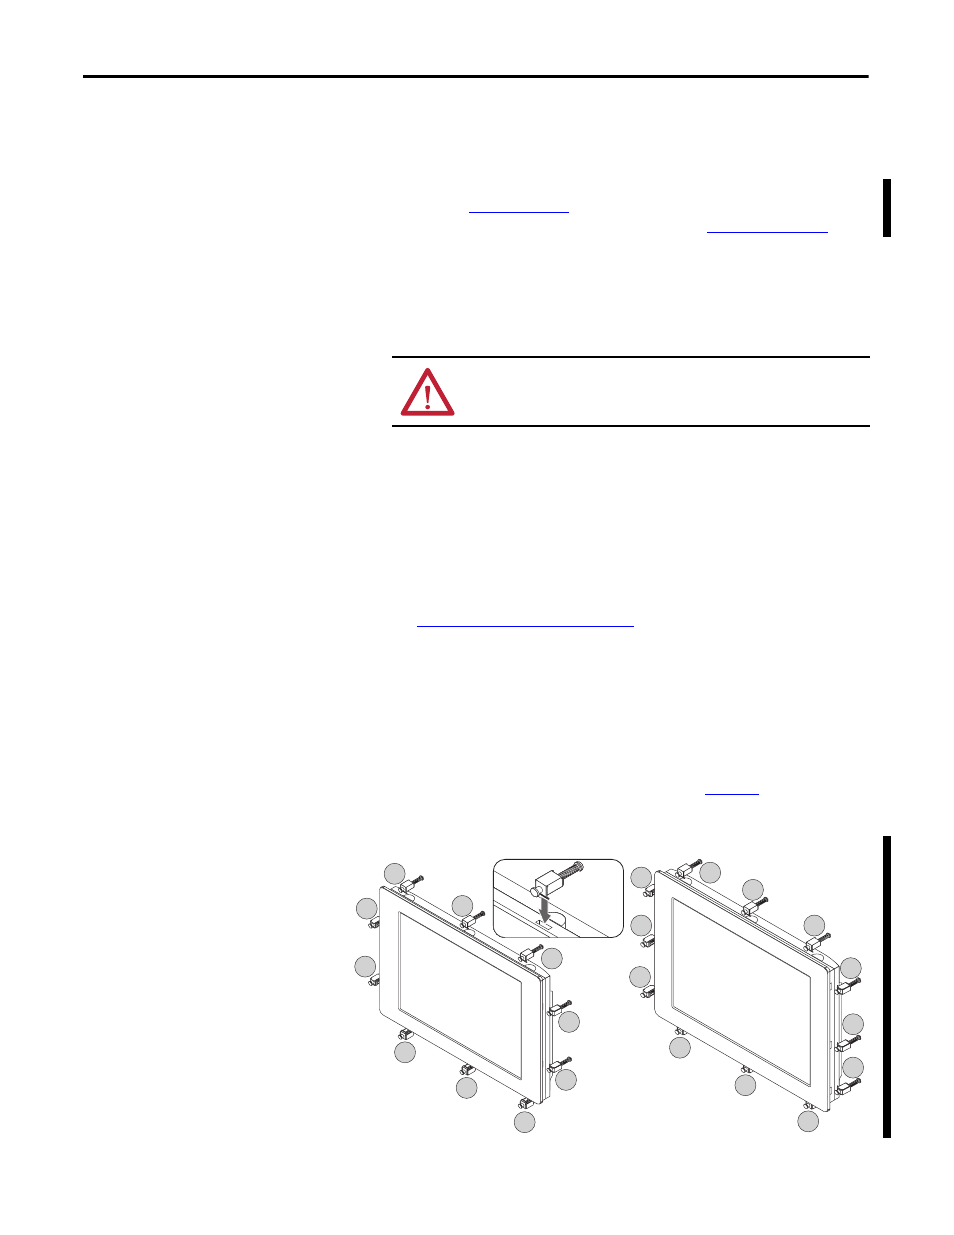
6. Hand-tighten the clips in the sequence shown in
until the gasket
is compressed uniformly against the panel.
Figure 1 - Tightening and Torque Sequence
ATTENTION: Failure to follow these guidelines may result in personal
injury or damage to the panel components.
1550M and 1750M Monitors
9
4
3
10
7
1
5
6
2
8
1950M Monitors
9
11
12
10
7
1
5
6
2
8
4
3