Post-filter view, How to configure a post-filter – Rockwell Automation 9220-WINTA ControlNet Traffic Analyzer Reference Manual User Manual
Page 45
Publication 9220-052C-EN-P - August 2002
Triggers and Filters 4-11
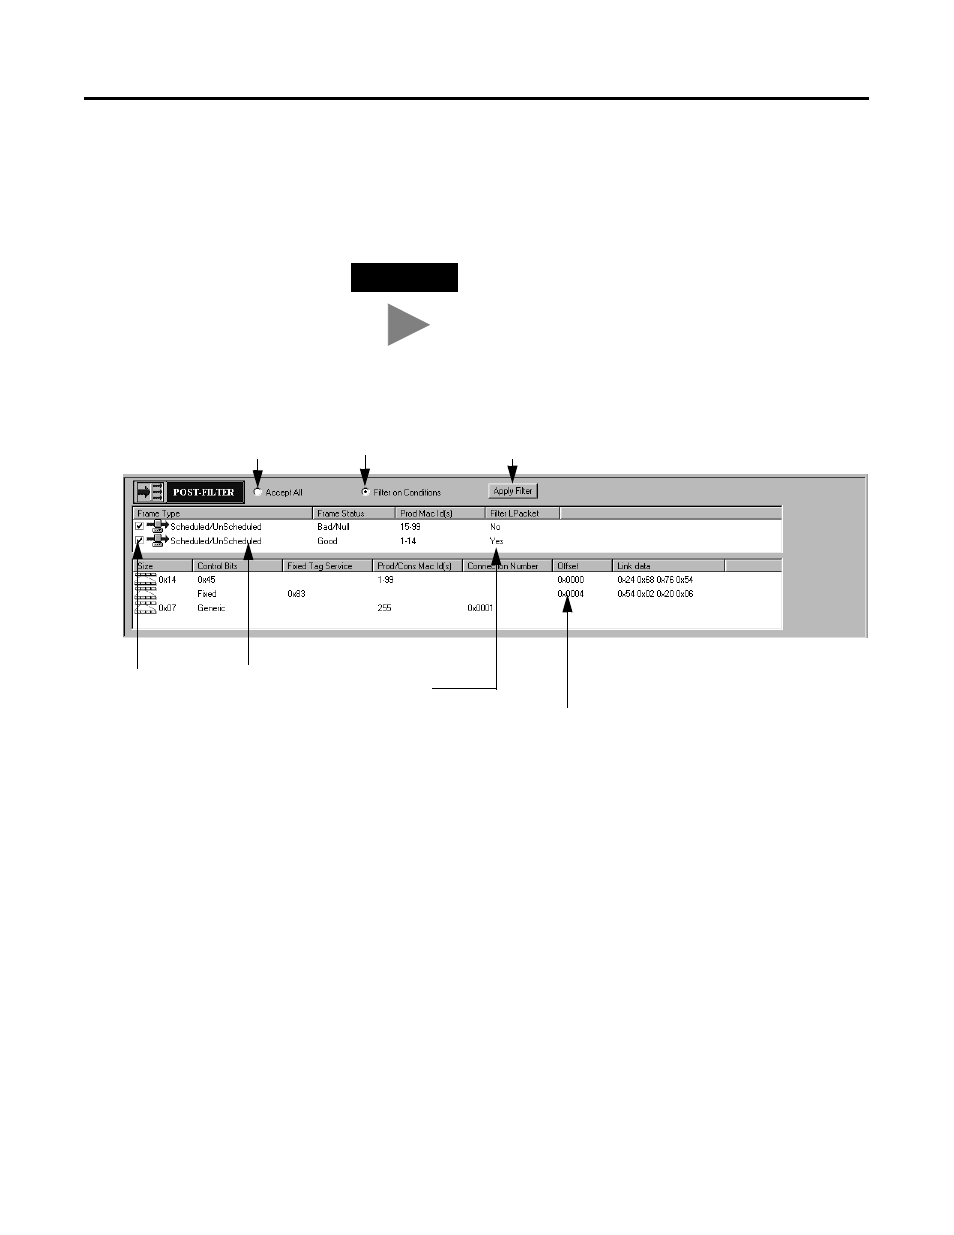
Post-Filter View
You see this view when you have selected the Post-Filter icon in the
Control Panel.
How to Configure a Post-Filter
Defining a post-filter is a little bit more complex than defining a
pre-filter. Post-filtering provides a more precise way of filtering. When
you choose to post-filter on conditions, two filter condition list areas
appear. These two lists have been designed to show all the
information needed by the post-filter.
•
the first list looks like the Pre-Filter list and performs almost the
same function; it will be referred to as the top list.
•
the second list is used to filter on some LPacket data and will be
referred to as the bottom list.
TIP
You can also access the Post-Filter view from the Actions
menu: Control Panel>Define Pre-Filter.
Click on this radio button
to get all stored frames
from the Data Buffer.
Click this button to enable any changes
in post-filtering. This will update the
MAC Frame Data view.
First Post-Filter condition. The
“Yes” means LPacket filter is enabled.
Enable/disable
filter condition.
Second Post-Filter condition.
LPacket filter is enabled.
Click on this radio
button to filter on
conditions.