Setting the data rate switch, Connecting the option module to the drive – Rockwell Automation 20-750-DNET PowerFlex DeviceNet Option Module User Manual
Page 19
Rockwell Automation Publication 750COM-UM002B-EN-P - October 2012
19
Installing the Option Module
Chapter 2
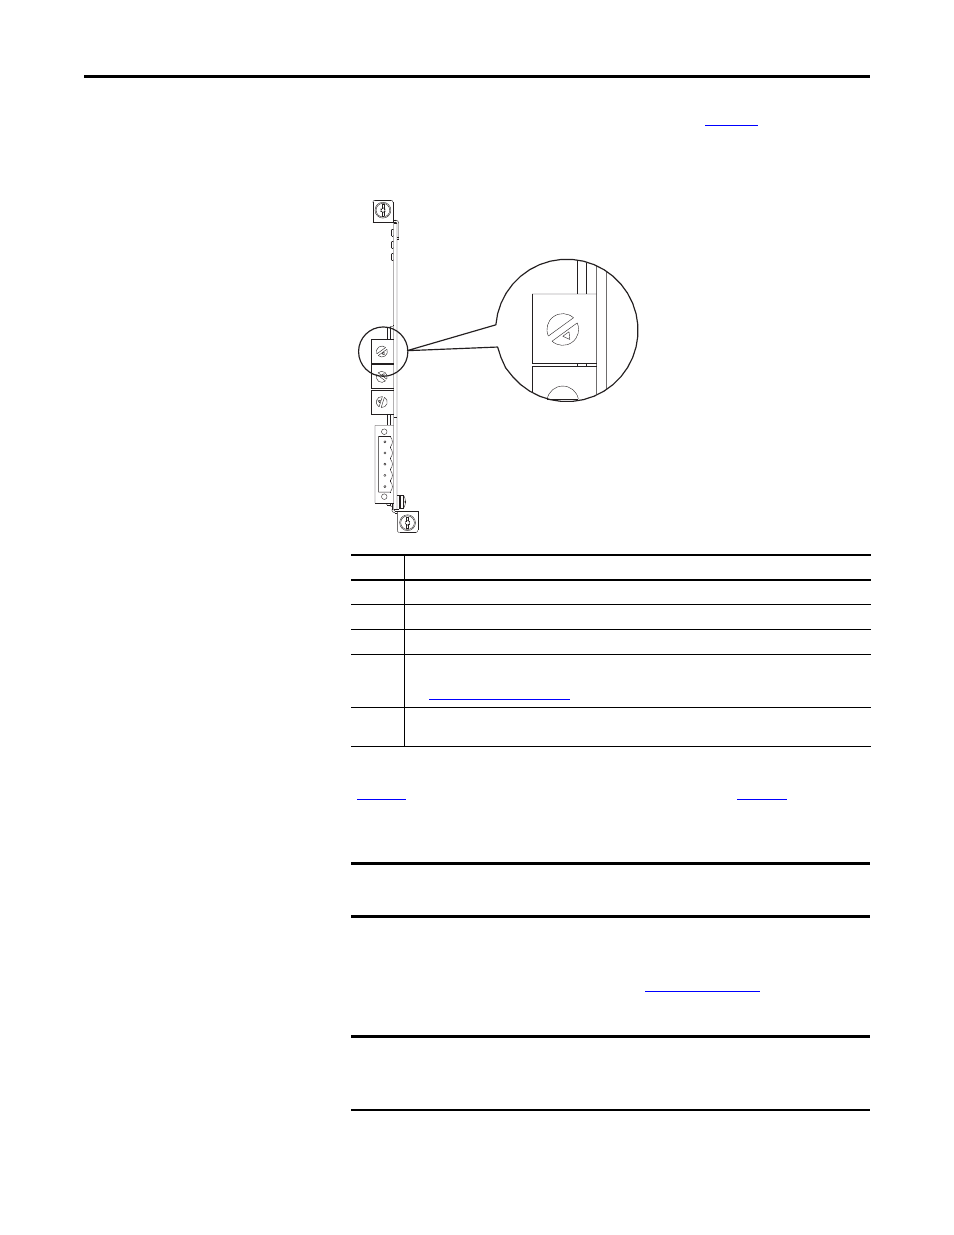
Setting the Data Rate Switch
Set the option module Data Rate switch (top switch in
Figure 2
) by rotating the
switch to the desired setting.
Figure 2 - Setting the Data Rate Switch
The switch settings can be verified by viewing Diagnostic Device Item number 53
(
) with any of the drive configuration tools listed on
Connecting the Option
Module to the Drive
Install the option module in the PowerFlex 750-Series drive control pod in Port
4, 5, or 6. For more installation details, see the Network Communication Option
Module Installation Instructions, publication
ed with
the option module.
Setting
Description
0
Sets the option module to the 125 Kbps data rate.
1
Sets the option module to the 250 Kbps data rate.
2
Sets the option module to the 500 Kbps data rate.
3
Sets the option module to use the data rate value stored in Device Parameter 09 - [Net Rate Cfg], and
sets the option module to use the node address value stored in Device Parameter 07 - [Net Addr Cfg].
See
Setting the Data Rate on page 27
4…9
Sets the option module to the Auto data rate—a data rate used by other network devices. Another device
on the network must be set to a data rate. The default switch setting is 9.
0
5
4
9
3
8
2
7
1
6
0
5
4
9
3
8
2
7
1
6
0
5
4
9
3
8
2
7
1
6
0
5
4
9
3
8
2
7
1
6
IMPORTANT
Remove power from the drive before installing the option module in the drive
control pod.
IMPORTANT
After inserting the option module into drive Port 4, 5, or 6, make sure to
tighten the module screws to the pod mounting bracket to properly ground the
module to the drive. Torque both screws to 0.45…0.67 N•m (4.0…6.0 lb•in).