T-armor, Endwall - floating – Metal Sales T-Armor Series User Manual
Page 73
© Metal Sales Manufacturing Corporation / Subject to change without notice 09/14
73
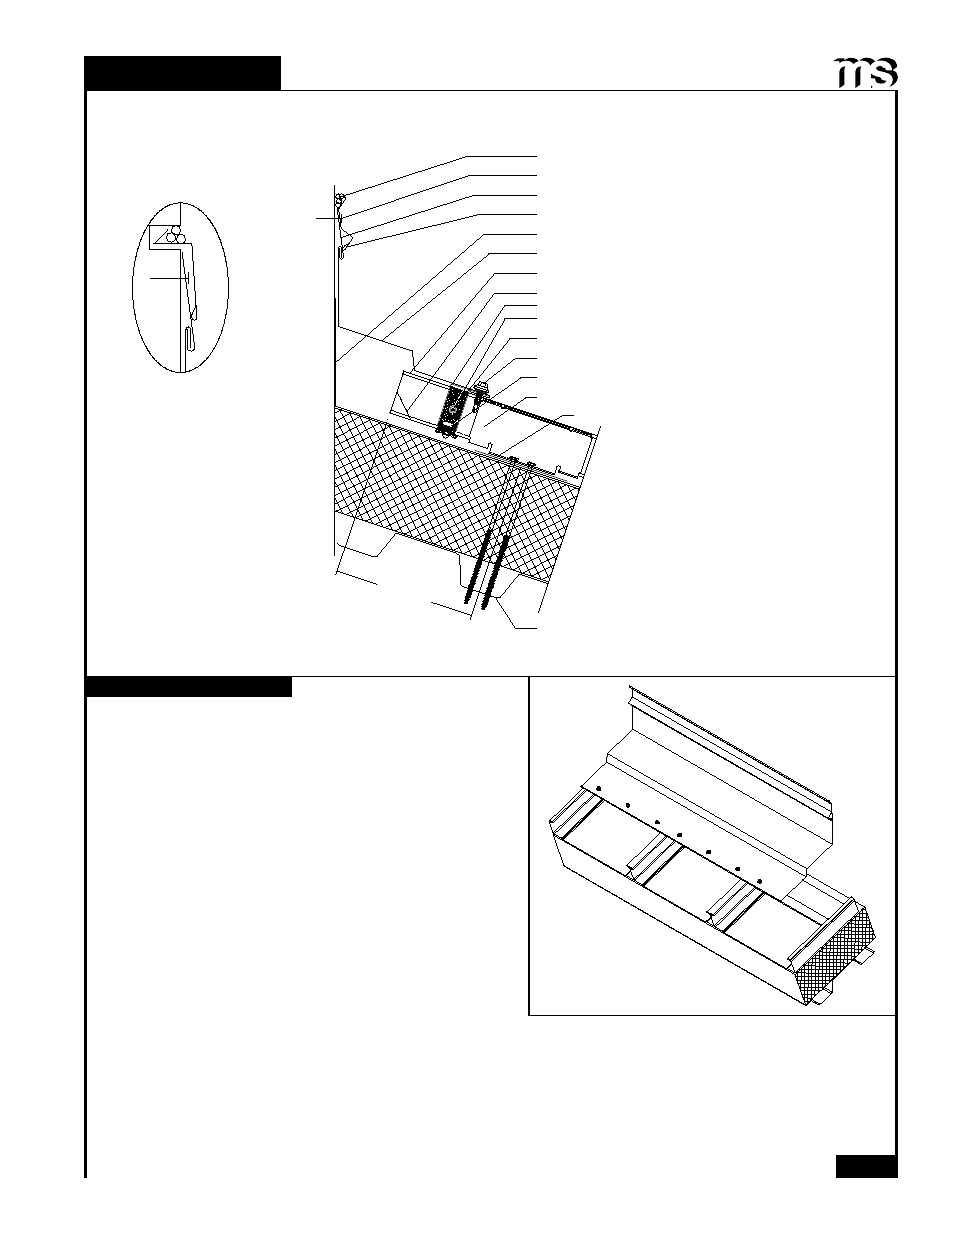
T-ARMOR
ENDWALL - FLOATING
INSTALLATION NOTES
1. Once panels have been installed, apply a row of Double
Bead Tape Sealant across panel, up and over all ribs
approximately 2" to 3" from panel end.
2. Field-cut Z-Closure to fit between the panel ribs, install
Z-Closure over Tape Sealant. Before continuing, make
sure Z-Closure placement will accommodate Pitch Break.
3. Once closure is set in Tape Sealant, fasten through
Z-Closure, Tape Sealant and T-Armor panel with
9/32" Bulb-Tite Rivets and one #12-14x1" Self Driller
N/W screw (see page 52 for number of fasteners required).
4. Apply a row of Double Bead Tape Sealant to the top of
the Z-Closure.
5. Install Pitch Break by hooking the open hem around the
Z-Closure, and fasten into the wall substrate with fasteners
at 1'-0" oc maximum.
6. If two or more flashings are required, lap the flashing over
the previously installed flashing by a minimum of 2" placing a bead of Tube Sealant between the flashings and
secure with Pop Rivets, 2.5" oc.
7. Install Counter Flashing, Reglet or wall panel and fasten to parapet wall with appropriate fastener, 1'-0" oc.
Seal to Counter Flashing, Reglet or parapet wall with Tube Sealant.
Tube Sealant
Fastener (by others)
Counter Flashing
Moisture Barrier (by others)
Starter
Pitch Break
Panel Turn Up
T-Armor Panel
Double Bead Tape Sealant
#12-14x1" SD N/W (1 per rib)
1
/
4
"-14 x
7
/
8
" Stitch XL (3 per panel)
Z-Closure (see Pg 75)
9
/
32
" Bulb-Tite Rivets (see Pg 52)
Clip w/ (2) #14-13 Deck Screws
Bearing Plate
1
/
2
:12 Slope
Minimum
Metal Decking (By others)
With Reglet
With Counter
12" max
*Can only be used with the
low and high clip systems
*Panel cap not shown for clarity