Step 6, T-armor, Caution – Metal Sales T-Armor Series User Manual
Page 53: Installation of panel
© Metal Sales Manufacturing Corporation / Subject to change without notice 09/14
53
T-ARMOR
INSTALLATION OF PANEL (
cont
.)
Steps:
1. Apply two
3
/
8
" beads of Tube Sealant along the vertical side of the rib on the panel and across the horizontal
portion of the top side of the rib directly over the Double Bead Tape Sealant on the eave flashing. Be sure the
Tube Sealant joins with the Double Bead Tape Sealant.
2. Peel back the paper backing covering the Double Bead Tape Sealant at the eave flashing previously
installed.
3. Roll the female leg of the second panel into place over the male leg of the first panel so their ends are flush. Do not let the
flat of the second panel touch the Double Bead Tape Sealant at the eave until the ends are flush.
4. Use C-Clamps to hold the two vertical legs of the panel seams together.
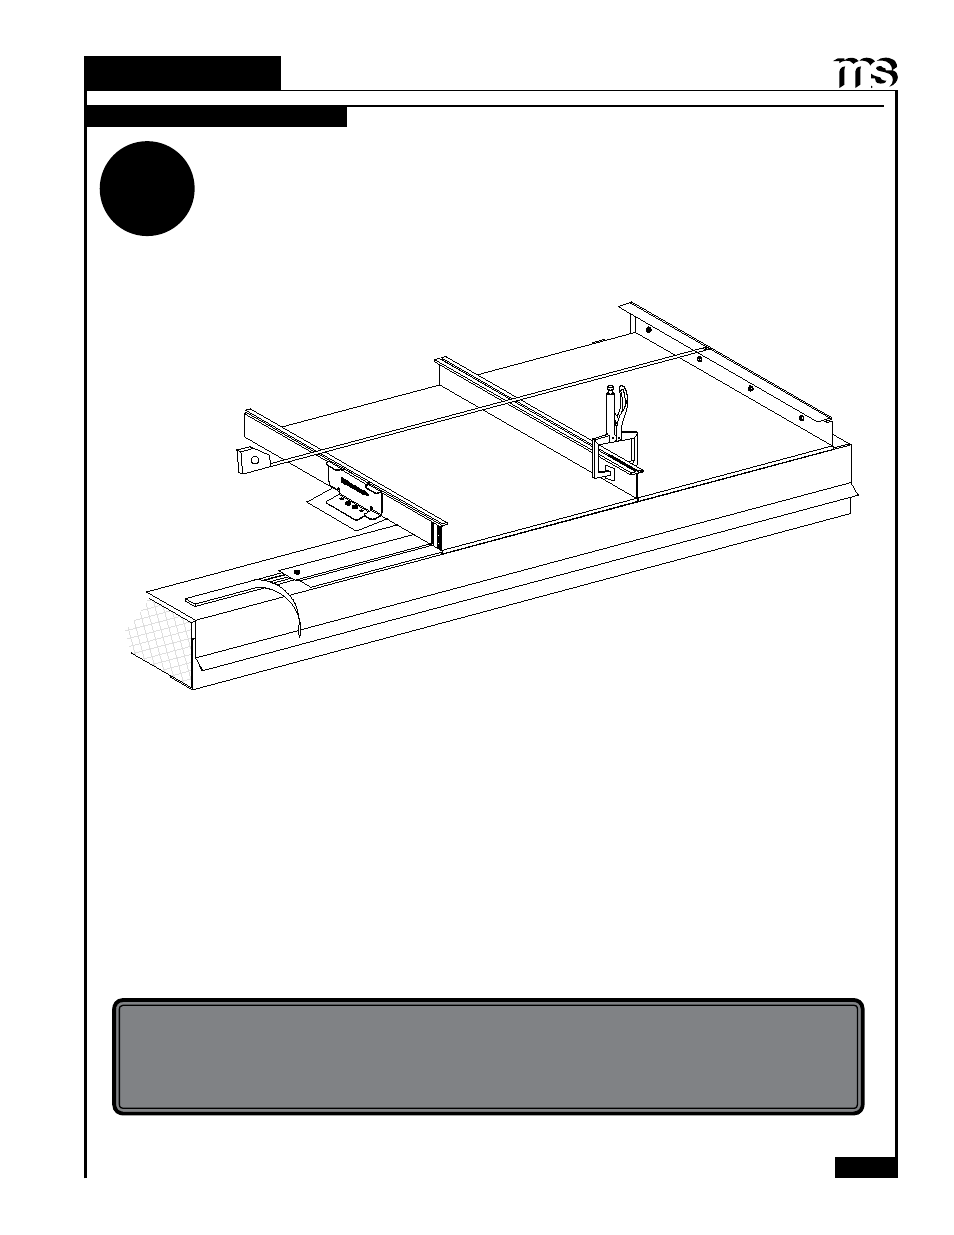
5. Measure the distance from the first rib of the first panel installed. It is very important that the dimension from the start
panel to the last male leg, at the eave and peak, be the same dimension within a ¼" of each other.
6. Make certain that all clips are properly installed and that the panel sidelaps are properly positioned to be seamed. Use the
Hand Crimper to crimp the panel seam at the eave and ridge ends only. This will adequately hold panels in place until
fully seamed.
CAUTION
Hand crimping will not fasten the panels together tightly enough to
withstand normal wind uplift forces. Be sure to seam all panels as soon as possible.
(See seaming panels on pages 55 and 56 for proper seaming instructions.)
Tape Measure For Panel
Modularity
SIDELAPPING OF PANEL
STEP
6