T-armor, Eave - fixed – Metal Sales T-Armor Series User Manual
Page 71
© Metal Sales Manufacturing Corporation / Subject to change without notice 09/14
71
T-ARMOR
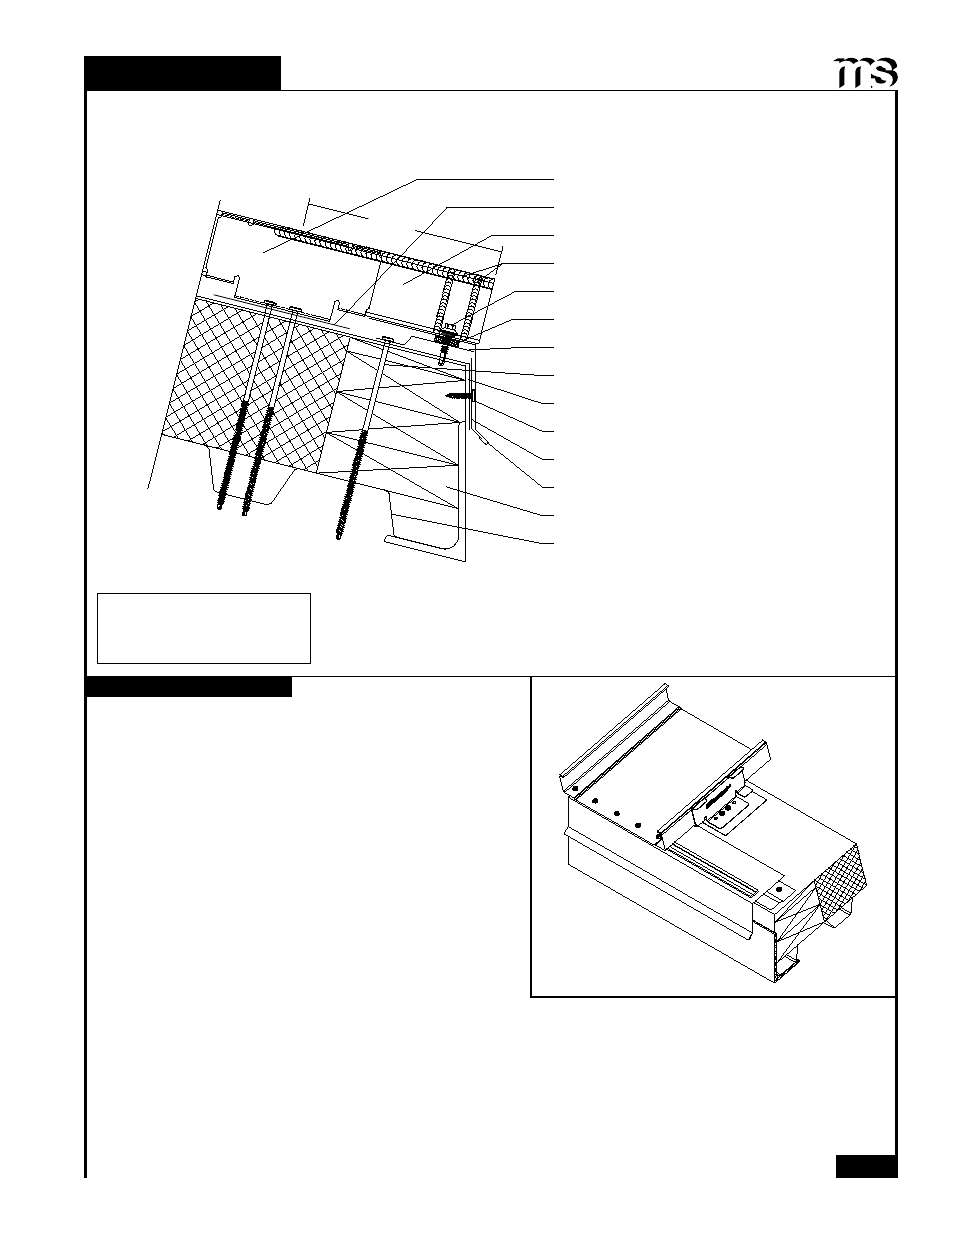
EAVE - FIXED
Eave
T-Armor Panel
Bearing Plate
Double Bead Tape Sealant
Tube Sealant (between panel ribs)
Moisture Barrier (By others)
Roof Cleat
1
/
2
:12 Slope
Minimum
INSTALLATION NOTES
All Eave flashings must be installed prior to panel
installation.
1. Install new Eave Plate over top of rigid board insulation
and fasten through the wood blocking into the metal deck
with #14-13 Deck Screws 1'-0" oc.
2. Install new Eave flashing by engaging to Roof Cleat and
rotating on to the Eave Plate.
3. If two or more flashings are required, lap the flashing
over the previously installed flashing by a minimum of 2"
placing two beads of Tube Sealant between the flashings
and secure with Pop Rivets, 2.5" oc.
4. Apply a continuous row of Double Bead Tape Sealant
across the top of the Eave flashing.
5. Set panel into place and use #12-14
x1
1
/
4
"
Self Driller XL
screws to attach (see page 52).
6. Apply Tube Sealant up the side and across the top of the panel ribs before installing the next panel.
Eave Plate
#14-13 Deck Screws (1'-0" oc)
Clips w/ (2) #14-13 Deck Screws
#12-14x1
1
/
4
" SD XL (See Pg 52)
#10-12x1" PH Wood Screw (1'-0" oc)
Wood Blocking
Metal Decking (By others)
Additional #14-13 Deck
Screws may be required for
areas with large snow loads
*Panel cap not shown for clarity
9" max