AirLive ARM-104 v3 User Manual
Page 54
AirLive ARM-104_v3 ADSL2/2+ Router
48
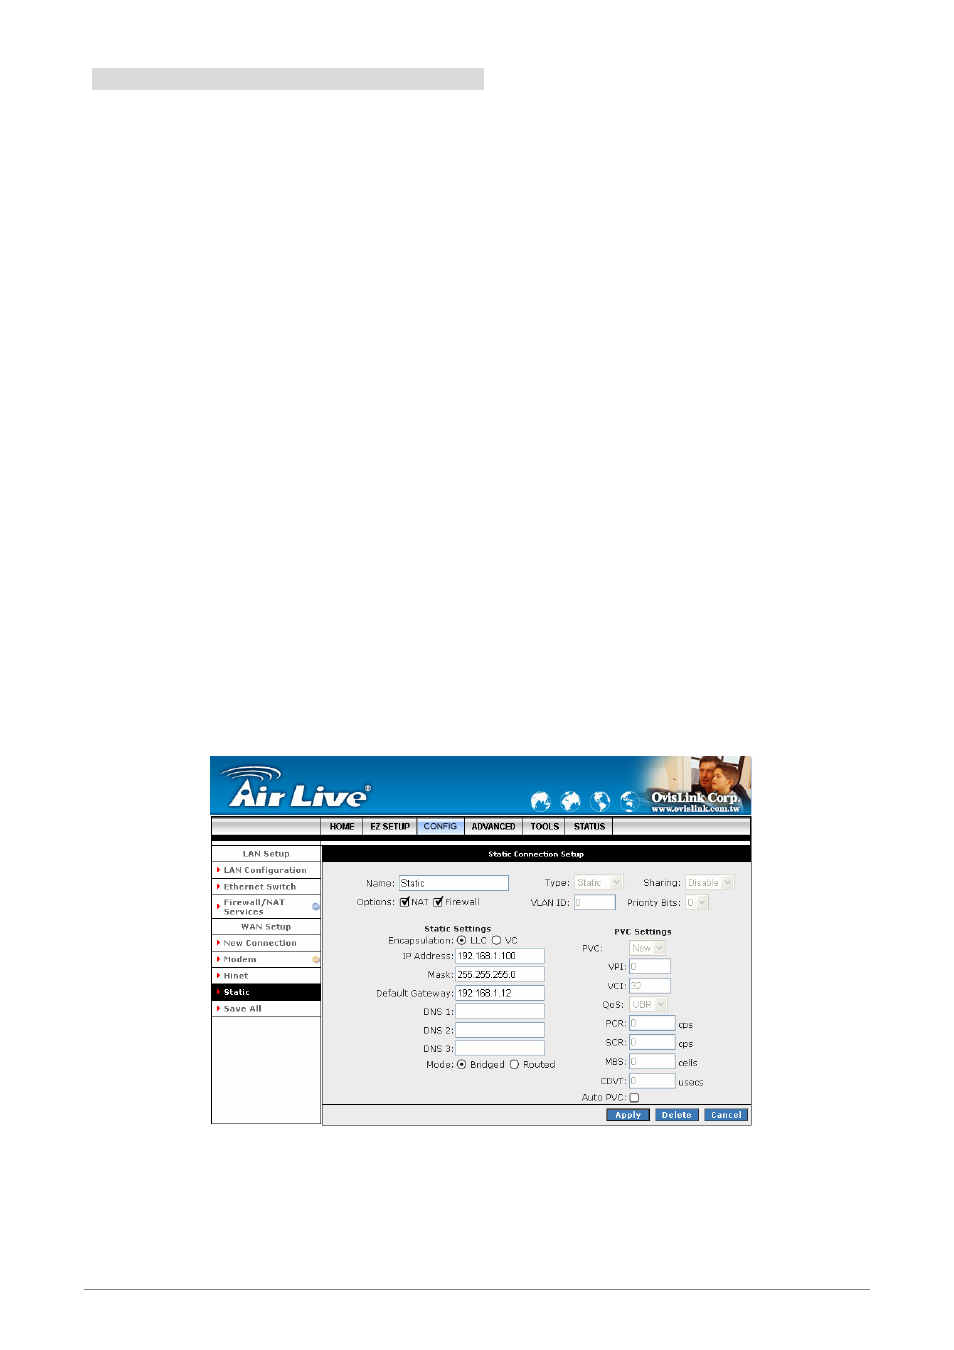
4.3.1.1.3.1 Static Configuration Procedures
1.
From the Setup main page, click on New Connection.
2.
Enter a unique name for the Static connection in the Name field. The name must not have spaces and
cannot begin with numbers.
3. At
the
Type field select Static. The Static connection setup page is displayed as shown below.
4.
The Network Address Translation (NAT) and the Firewall options are enabled by default. Leave these in
the default mode.
5. Under
Static Settings, select the Encapsulation type (LLC or VC).
Note—If you are not sure just use the default mode.
6.
Based upon the information your ADSL/ISP provided, enter your assigned IP address, Subnet Mask,
Default Gateway (if provided), and Domain Name Services (DNS) values (if provided).
7.
For the static configuration, you can also select a Bridged connection or a Routed connection. Since
static IP address is typically used to host WEB servers, you may want to use a bridge connection.
8. Under
PVC Settings, enter the values of VPI and VCI settings.
Note—Your DSL service provider or your ISP will supply these.
9. Select
the
Quality of Service (QOS); leave the default value if you are unsure or the ISP did not
provide this information.
10. Click
the
Apply button to complete the connection setup. This will temporarily save this connection as
illustrated in figure below. A new link has been created for this connection in the left-hand column. You
can Apply/Delete/Cancel this connection using this screen.
11. To make the change permanent , click on click on Save All.
12. To check on the status, click on Status (at the top of the page) and select Connection Status.