JLG 1230ES Service Manual User Manual
Page 111
SECTION 6 - MAST COMPONENTS
3121222
– JLG Lift –
6-11
11. Before tightening the mast mounting bolts/nuts,
check mast for vertical front/rear and left/right
plumb. Per following table:
Tighten the mast mounting bolts/nuts to 62 ft. lbs.
(88Nm), in the following sequence:
1. Left Front
3. Left Rear
2. Right Rear
4. Right Front
12. At the top of the mast, if reinstalling the power-trak,
reach down into the power-trak compartment and
pull the power-trak assembly up, attach the hanger
bracket to the top of the mast assembly. (See Figure
6-13.)
13. Re-install the platform assembly (See Platform Instal-
Plumb, maximum - Front/Rear
3 in. (76mm)
Plumb, maximum - Left/Right
2 in. (50mm)
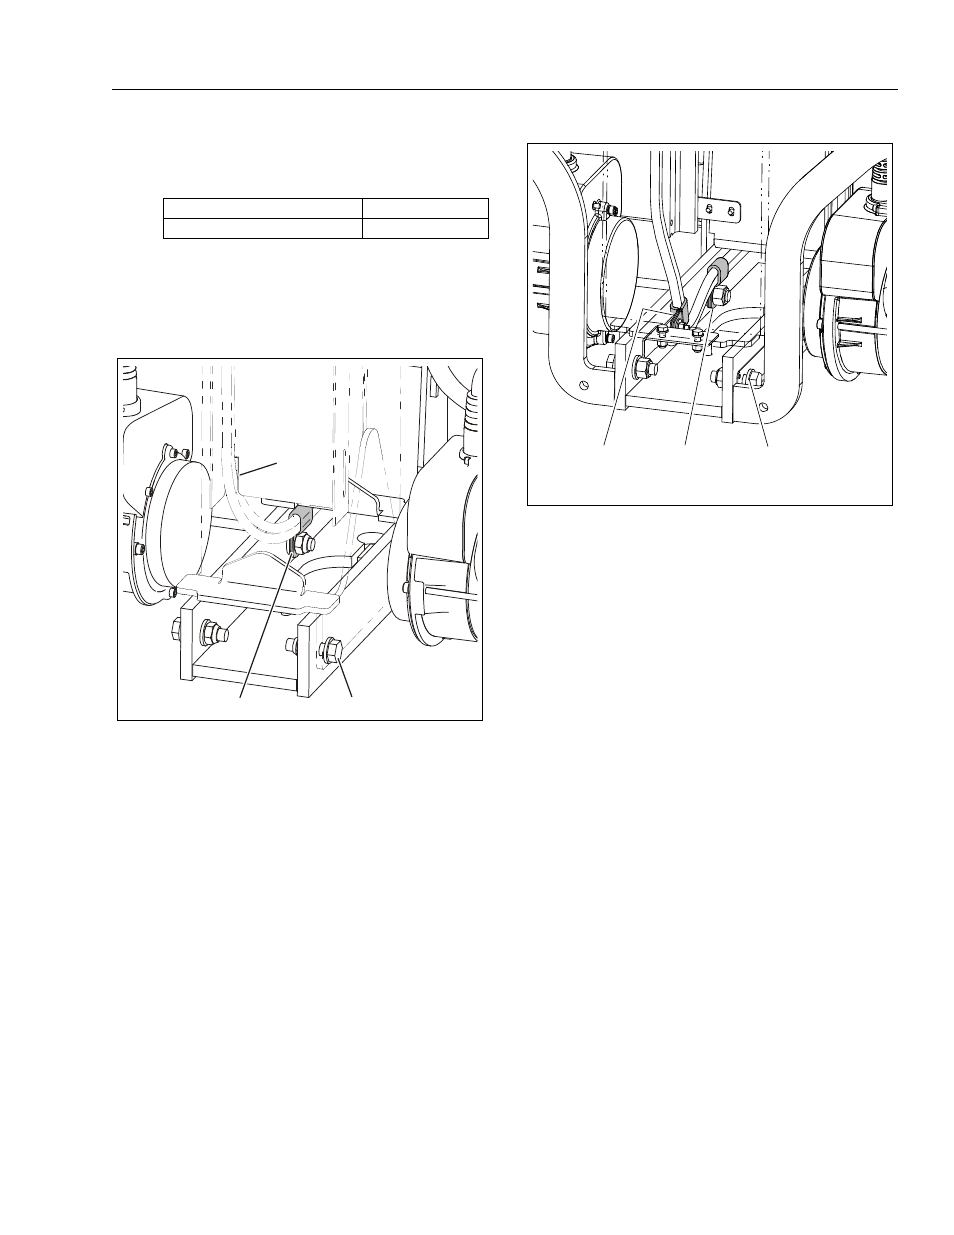
Mast Lower End - Installation - Original Design
1. Control Cable P-Clamp (a)
2. Route Cable Through Notch
in Mast Baffle Plate
3. Left-Front Mast Mounting
Bolt (b)
Note: (a) Install clamp between washer and nut of the right-rear
mast mounting bolt.
(b) An extra washer may be required to space the screw
away from the RED manual descent button on the lift cylin-
der. Torque mast mounting bolts to 62 ft. lbs. (88 Nm),
tighten in an X (cross) tightening pattern.
1
2
3
Mast Lower End - Installation - Later Design
1. Control Cable Frame P-
Clamp (a)
2. Control Cable Mast P-Clamp
- Attach to Bracket
3. Left-Front Mast Mounting
Bolt (b)
Note: (a) Install clamp between washer and nut of the right-rear
mast mounting bolt.
(b) An extra washer may be required to space the screw
away from the RED manual descent button on the lift cylin-
der. Torque mast mounting bolts to 62 ft. lbs. (88 Nm),
tighten in an X (cross) tightening pattern.
1
2
3