7 mast assembly, 7 mast assembly -6, Mast - installation -6 – JLG 1230ES Service Manual User Manual
Page 106
SECTION 6 - MAST COMPONENTS
6-6
– JLG Lift –
3121222
NOTE: It may be necessary to pull down or push up on the
rear of the platform to keep the platform level while
lifting it off of the mast assembly.
3. Lower the platform assembly approximately half way
down the mast, then reinstall the slide pads at the
bottom corners of the platform mast section. (See
Figure 6-5.) - Item 1.
4. Continue to lower the platform assembly, at the top
of the mast guide the cylinder rod of hydraulic cylin-
der #3 into the cross support located at the top of
the platform assembly mast section. Install the
detent bolt and nut, tighten securely. (See Figure 6-
5.) - Item 2.
5. Pull the electrical harness cables out through the top
of the platform mast section and lay over the right
side of the mast.
6. Reattach the power-trak cable guide using the two
(2) bolts and nuts to the lug at the top of the platform
mast section. (See Figure 6-5.) - Item 2.
7. Route the electrical cables down the right side of the
mast section and reinstall the metal cable cover
using the two (2) screws previously removed.
8. Reattach the AC receptacle box to the side of the
mast and install the platform control box to the plat-
form control box mounting plate. Attach the platform
control box - cable harness to the bottom of the con-
trol box.
9. Reconnect machine power at the right side batteries
quick-disconnect connector.
10. Power machine up and cycle the mast up and down
a few times, look inside the top of the mast to be cer-
tain the power-trak and harness cables are free of
interference and not being pinched in any way.
11. If operation is OK, reinstall the mast section top
cover.
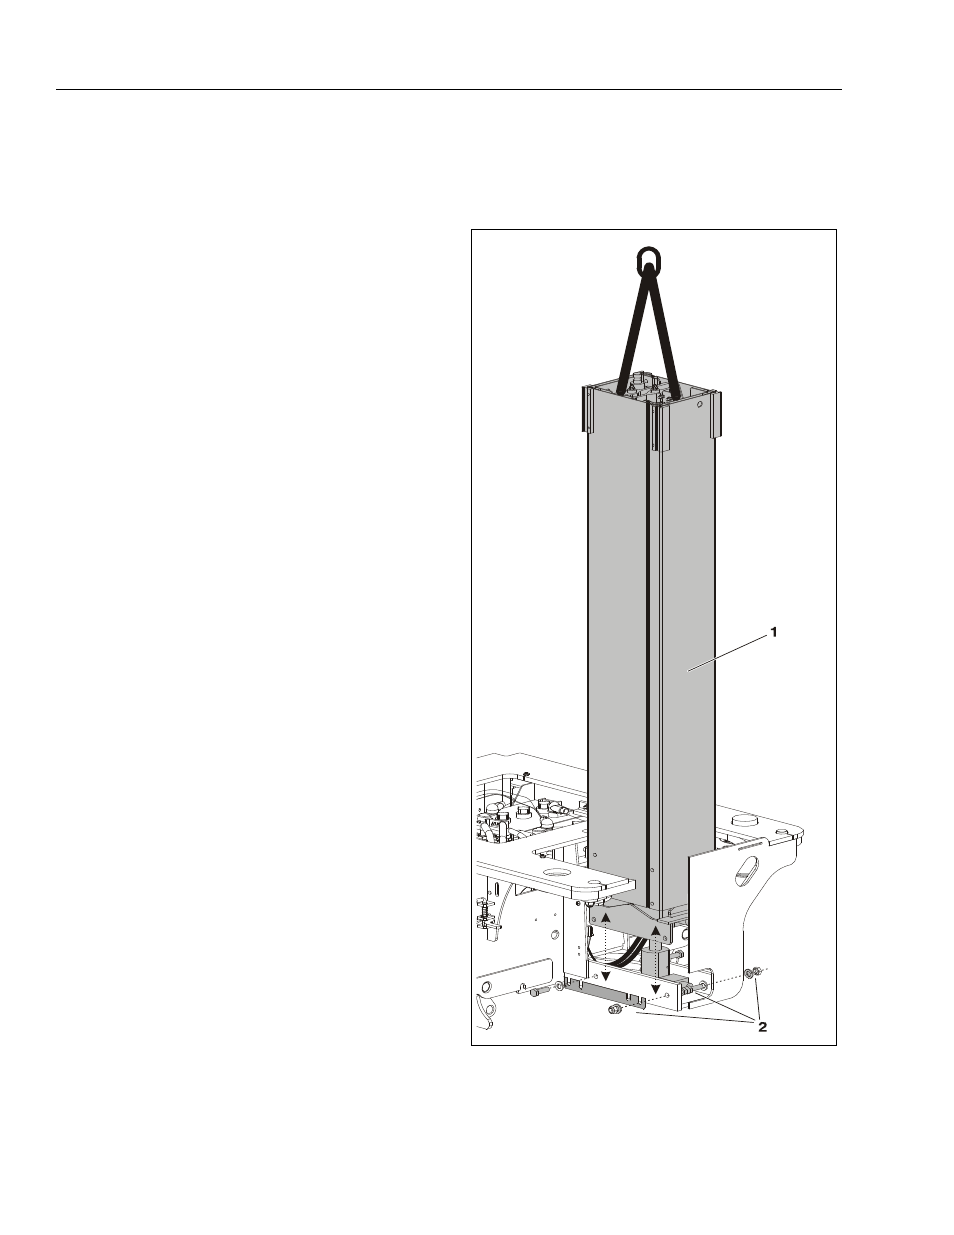
6.7 MAST ASSEMBLY
It is recommended that the platform assembly be
removed (See Section 6.6) before removing the mast
assembly separately.
Figure 6-6. Mast - Installation
(Front of frame shown cutaway for illustrative purposes only)
1. Mast Assembly
2. Fastening Hardware