Poison Spyder WHEEL SPACERS User Manual
Installation instruc tio ns, Wheel spacers installation instructions
INSTALLATION INSTRUC
TIO
NS
©2012 POISON SPYDER CUSTOMS, INC. • 951-849-5911 • WWW.POISONSPYDER.COM
WHEEL SPACERS INSTALLATION INSTRUCTIONS
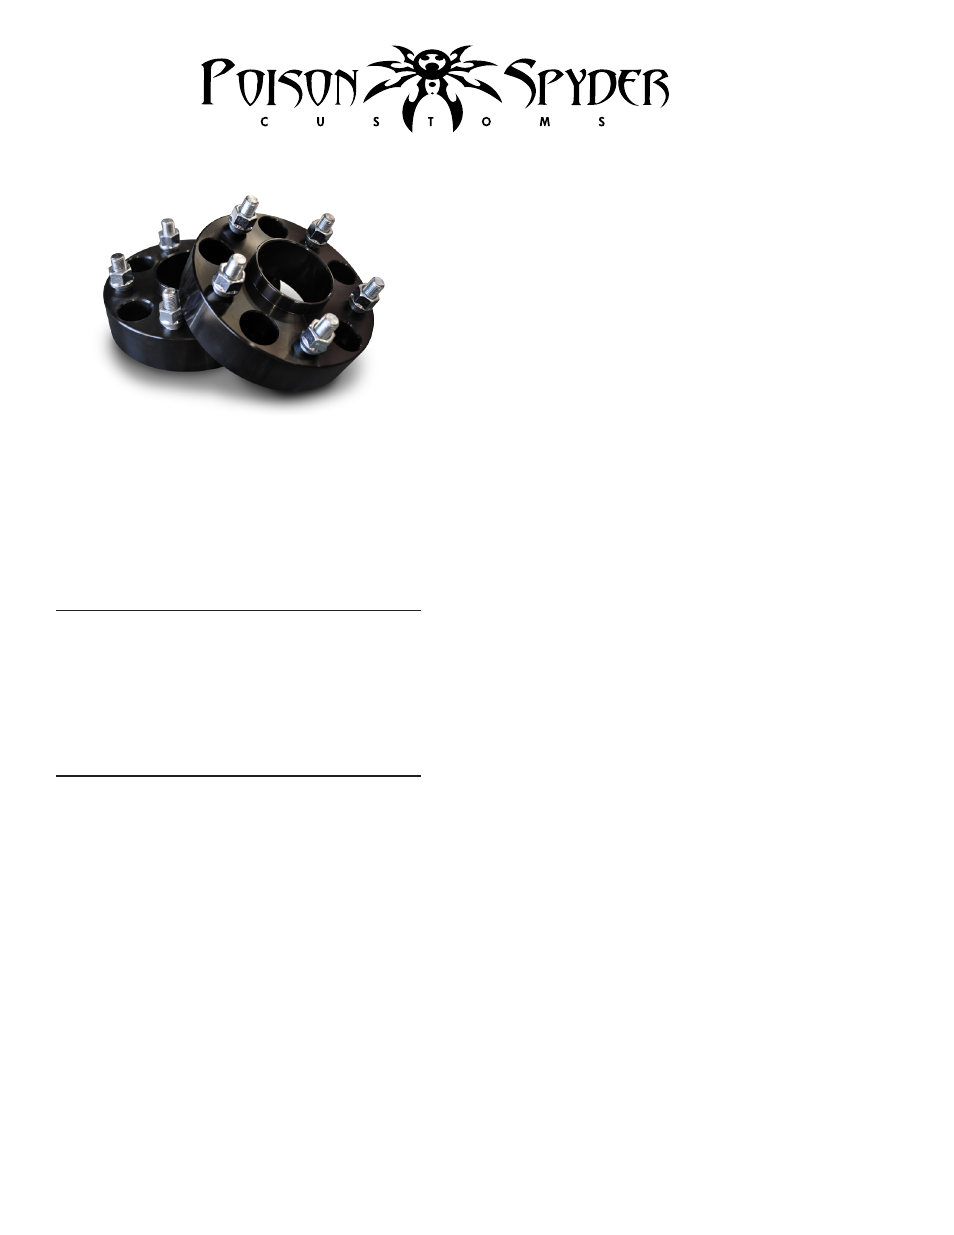
Thank you for purchasing a pair of Poison Spyder
Wheel Spacers. Installation is fairly simple with
the right tools and good mechanical abilities. If
you are not confident in your mechanical skills,
please seek the help of a professional to perform
the installation. Please read through these entire
instructions before proceeding with installation.
TOOLS NEEDED
• Floor Jack & Jack Stand
• Lug Nut Wrench or Socket, Ratchet &
Extension
• Wire Brush
• Torque Wrench
INSTALLATION PROCEDURE
1. Park vehicle on a level surface and set the
parking brake. Place wheel block or chock at
front wheel (opposite the one you’re working
on, if installing spacers on the front wheels).
You will want to wear eye protection beyond
this point in time.
2. Use the floor jack to lift the wheel of the
ground, place axle on jack stand and remove
floor jack. DO NOT work on the vehicle with
only the jack holding it up!
3. Use a wire brush to clean surface of hub/
rotor or drum where the spacer is going
to be mounted. Surface must be clean so
that the spacer sits perfectly flat against the
mounting surface. In some vehicle models,
rotor retainer clips must be removed to allow
the spacer to sit flat.
4. Install the spacer using the supplied lug
nuts, finger-tight. These “bulge” style lug
nuts are designed for the tapered end to seat
into the machined tapered hole in the spacer.
5. Using a calibrated torque wrench, dry
torque the lug nuts in a star pattern to
your vehicle manufacturer’s specifications
(check your owner’s manual for dry torque
specifications). DO NOT USE AN IMPACT
GUN, as it may damage the lug nuts and/or
studs.
6. Once the spacer is installed, check the
surface of the spacer. Studs or lug nuts
should not protrude beyond the wheel
mounting surface of the spacer. Using a
straight-edge along the wheel mounting
surface may be helpful if it looks “close”.
7. Install wheel using the same lug nuts that
were originally removed. The threads on
the lug nuts MUST match the threads on
the wheel spacer! If yours do not match,
stop this installation and contact Poison
Spyder. Do not cross-thread or force mis-
matched threads! Use a torque wrench, in
a star pattern, to tighten the lug nuts to the
manufacturer’s specification.
8. Use floor jack to lift wheel, remove jack
stand, and set wheel on the ground. Repeat
the install procedure for the opposite wheel.
9. After both wheel spacers are installed,
drive the vehicle for 10 miles. Then, using
the procedure outlined above, remove each
wheel and check the torque of the lug nuts
holding the spacer to the hub. If re-torquing
is needed, do so then repeat the 10-mile test
drive and re-check. Repeat the re-torque/
test drive/re-check procedure until no further
re-torquing is needed.
10. After 100 miles, remove the wheel and
check the torque once again, and re-torque/
re-check as needed.
Congratulations, you have completed installation
of your Poison Spyder Wheel Spacers.