1 fourth boom section removal, Fourth boom section removal – JLG 534D-10 User Manual
Page 57
3.29
534D-9, 534D-10 & 544D
Boom
3.11.1
Fourth Boom Section Removal
1. Park the machine on a firm, level surface, fully
retract the boom, lower the boom to a level position,
place the transmission control lever in (N)
NEUTRAL, engage the park brake and shut the
engine OFF.
2. Place a Do Not Operate Tag on both the ignition key
switch and the steering wheel, stating that the
machine should not be operated.
3. Open the engine cover. Allow the system fluids to
cool.
4. Remove the battery negative (-) cable from the
battery negative (-) terminal.
Note: When removing a boom section(s), use a lifting
device with a sufficient lift capacity. (A complete four
section boom assembly weighs approximately 8250 lbs.)
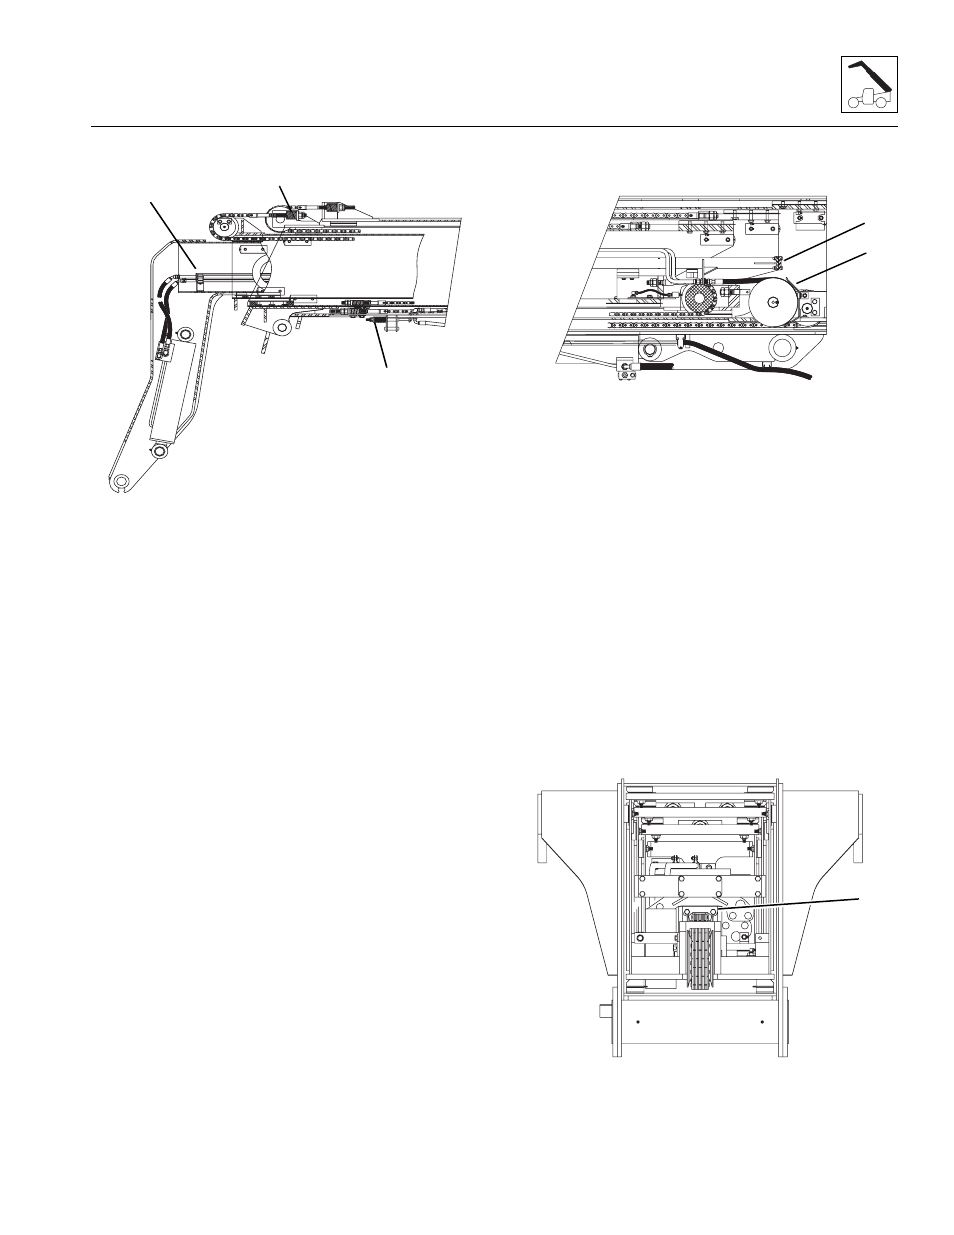
5. Release tension from the hoses on the hose take-up
bracket (1).
6. Label, disconnect and cap all hydraulic hoses
attached at each end of the hose carrier assembly.
Cap all fittings and openings to keep dirt and debris
from entering the hydraulic system.
7. Remove the hose guide (2) at the rear of the second
boom section.
8. If equipped, label, loosen and separate all electrical
cables on each end of the hose carrier assembly.
9. Loosen and remove the guide bracket from the front
of the hose carrier assembly.
10. Loosen and remove the two bolts (3) holding the
hose carrier at the front of the fourth boom section.
11. Loosen and remove the four bolts (4) holding the
hose carrier to the rear of the third boom section.
12. Slowly pull the hose carrier assembly out of the front
of the fourth boom section.
13. When the hose carrier assembly is approximately
25% free of the boom, fasten the two hose carriers
together (using nylon tie-wraps or suitable straps) to
keep the hose carriers from separating.
14. Continue to withdraw the assembly, fastening the
hydraulic carriers together.
15. When the hose carrier is 75% tied together, pull the
assembly free of the boom and set on suitable
supports.
16. Loosen the jam nuts on the extend chain at the top
front of the second boom section. Disconnect the
extend chain (5) from the chain clevis.
17. Pull the fourth boom section out far enough to create
slack in the retract chain. Loosen and remove the
retract chain bracket (1) which will allow the chain
clevis to be lifted out of the mounting location.
18. Loosen and remove the wear pads from the front of
the third boom section. Note the location of the wear
pads, mounting bolts and number of shims from
each location.
MX0470
1
3
5
MX0460
2
4
MX1400
1