6 second & third boom section installation, Second & third boom section installation – JLG 534D-10 User Manual
Page 35
3.7
534D-9, 534D-10 & 544D
Boom
7. Connect the auxiliary hoses to the quick disconnects
on the side of the boom head. Connect the electrical
cable to the plug mounted below the auxiliary quick
disconnects if equipped.
8. Install the tilt cylinder in the boom head, install the
mounting pin and keeper bolt, locking the mounting
pin and tilt cylinder into position.
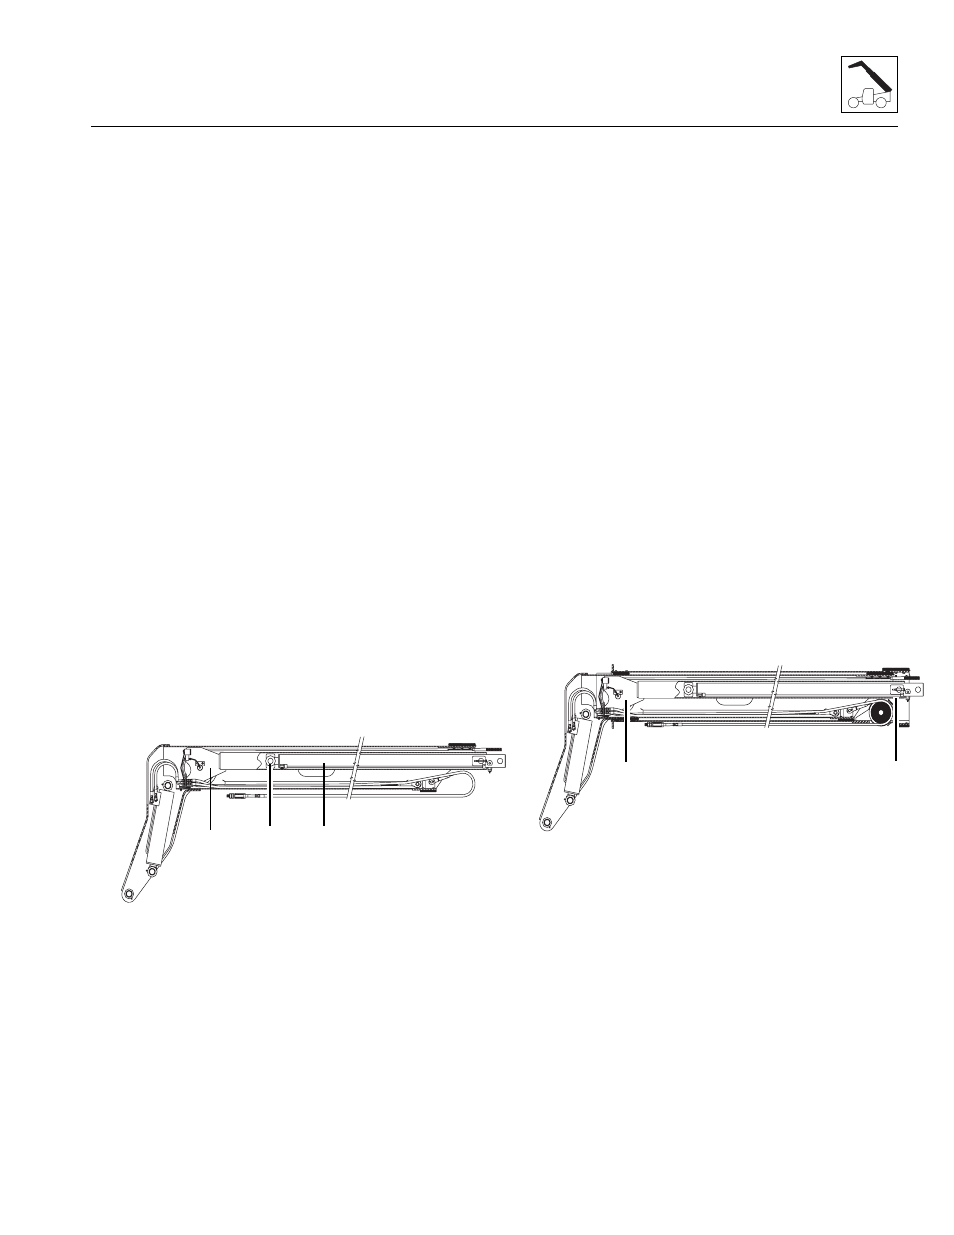
3.3.5
Extend/Retract Cylinder and Push
Beam Assembly and Installation
1. Install the extend/retract cylinder (1) into the push
beam.
2. Install the mounting pin and hardware (2) at the
extend/retract cylinder rod eye.
3. Install the push beam assembly (3) through the front
of the third boom section leaving the sheave bracket
exposed for accessibility.
4. Guide the threaded end of the extend cables through
the sheave bracket.
Note: The extend cable will not feed through sheave
bracket with the sheave installed.
5. Lay the cables over the boom head and complete
the sheave assembly installation; i.e. sheaves, pins,
lube system and wear pad.
6. Guide the cable around the sheave and install the
cable guide and guide bar.
7. With the push beam installed in the third boom
section, the third boom section and push beam are
ready to be installed into the second boom section.
8. Place the second boom section upside down on
suitable supports.
9. Lubricate the inside second boom section on area’s
where the third boom section wear pads will slide.
10. Using a suitable sling, balance the third boom
section and carefully slide 3 ft - 4 ft (0,9 m - 1,22 m)
into the front of the second boom section.
11. Set the third boom section onto a suitable support
and reset the sling under the boom head of the third
boom section. Carefully slide the third boom section
into the second boom section.
12. Install the push beam (3) fully into the second boom
section, lining up the mounting pin bores at the rear
of the second boom section.
13. Install the push beam mounting pins and locking
hardware (4).
14. Leave 6 in - 8 in (152 mm - 203 mm) of the third
boom section out to be able to install the wear pads
in the front of the second boom section.
15. With the sling still under boom head, install the wear
pads and spacers in the front of the second boom
section.
16. Install the top wear pads and spacers on the top rear
of the third boom section.
17. Install the wear pads and spacers on the bottom and
both sides at the rear of the second boom section.
For ease of installation DO NOT install the top wear
pads at this time.
18. Lubricate wear pads, inside sheaves, bores and pins
during assembly.
3.3.6
Second & Third Boom Section
Installation
1. Place the first boom section upside down on suitable
supports.
2. Lubricate the inside first boom section on area’s
where the second boom section wear pads will slide.
3. Using a suitable sling, balance the second and third
boom sections and carefully slide
3 ft - 4 ft (0,9 m - 1,22 m)into the front of the first
boom section.
MX0170
1
2
3
MX0160
3
4