1 pca 2 dsassembly -2, 1 pca 2 disassembly – Bacharach PCA 2 24-9448 User Manual
Page 82
Instruction 24-9448
6-2
Maintenance
6.1 PCA 2 Disassembly
The followng procedure descrbes how to dsassemble the analyzer, whle
Fgures 6-1 thru 6-4 llustrate how the analyzer s put together.
Tools Requred:
Medum Phllps Screwdrver
Procedure:
1. Unplug all thermocouples from
bottom of analyzer.
2. Remove battery cover and then
remove batteres.
TIP: In Step 3, if the sensors are
not being replaced, leave the tubing
connected to each sensor’s gas cap,
being careful not to put unneces-
sary strain on the tubing during the
disassembly process.
3. Pull off sensor retaner; and
then unplug all sensors.
4. Lay analyzer face down on a padded work surface; and then usng a
medum Phllps screwdrver, remove the unt’s four rear-case screws.
5. Lft rear case from analyzer and set asde.
6. Unplug electrcal connectors J8, J9, and J14 from prnted crcut
board.
CAUTION: In Step 7, note that there is tubing connected
between the bottom hose-connector plate and the pressure sensor
on the printed circuit board. Do not put unnecessary strain on
this tubing during the disassembly process.
7. Carefully lft battery-and-pump chasss, along wth the bottom hose-
connector plate, from analyzer.
8. Lft prnted crcut board from analyzer.
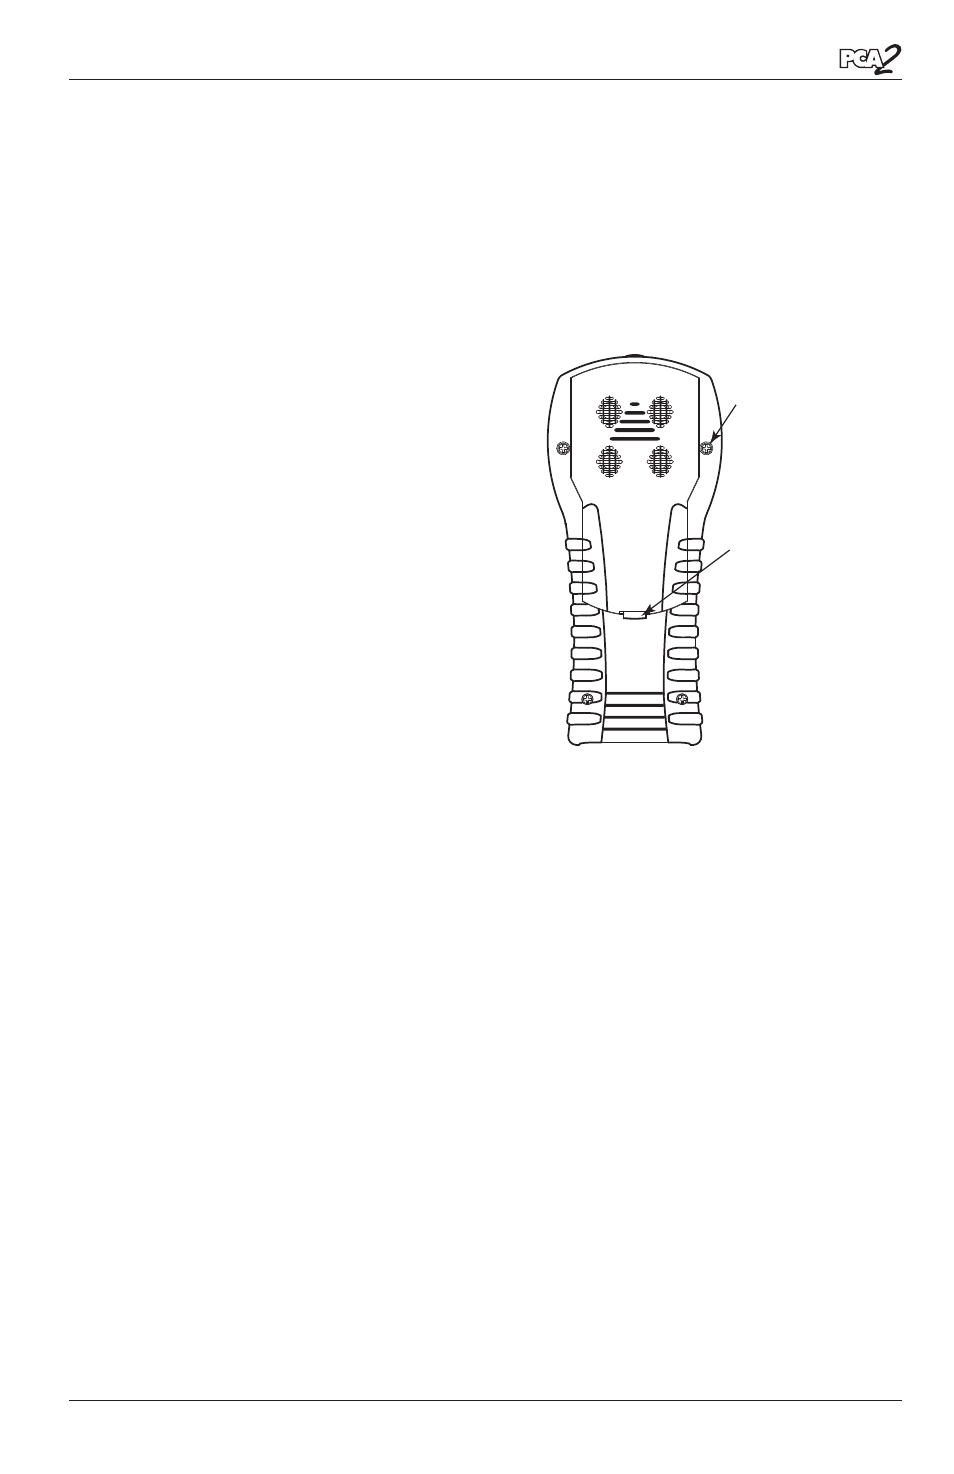
•
Rear Case Screws
(typical 4 places)
Release and then
remove battery
cover by pushing
latch up
Figure 6-1. Removing Rear Case