Connecting a vcr using the scart output function, Using with other equipment 12, Connecting a vcr – Pioneer KRP-600A User Manual
Page 66: Using the scart output function, Vcr playback, Scart cable vcr media receiver (rear), Scart cable, Scart cable dvr-940hx-s media receiver (rear), Av link advanced system
Using with other equipment
12
66
En
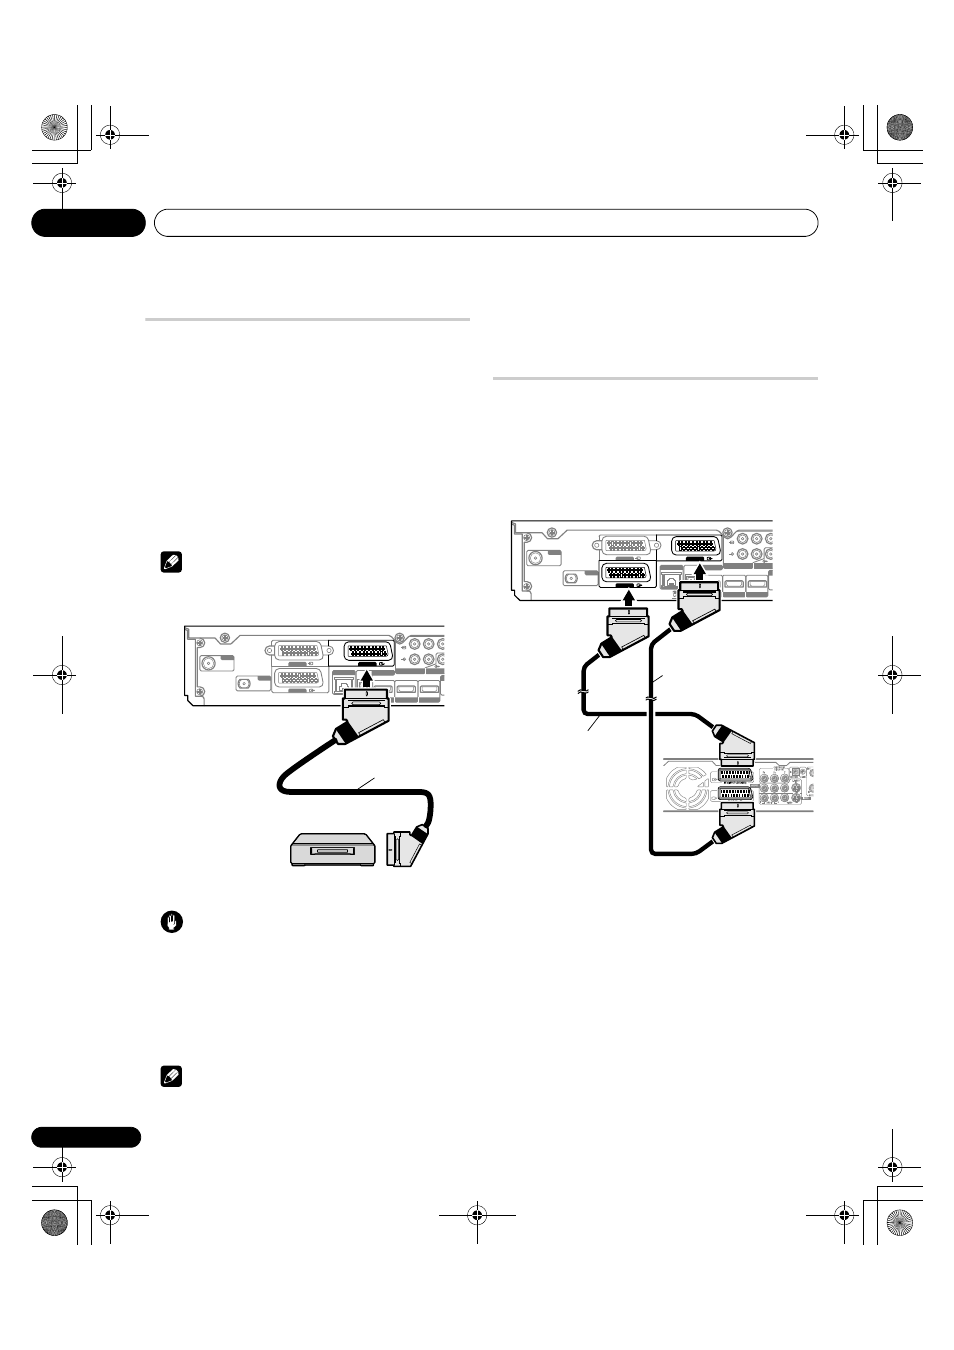
Connecting a VCR
Use the INPUT 2 terminals when connecting a VCR and other
audiovisual equipment.
If your VCR supports TV-VCR advanced “AV link” systems, you can
connect the VCR to the INPUT 2 or INPUT 3 terminal on the flat
screen TV using the fully-wired 21-pin SCART cable.
AV link advanced system
• Download tuning information directly from TV to VCR (Preset
download).
• While watching TV, you can record a programme with a one-
touch press of the VCR recording button. (WYSIWYR*)
* Refer to your VCR operation manual as some VCRs have an
exclusive key for WYSIWYR.
• When you press the play button on the VCR, the system
automatically turns on from standby and displays a VCR image.
Note
• TV-VCR advanced “AV link” systems may not be compatible with
some external sources.
Caution
• If you connect a device such as a VCR between the aerial and
Media Receiver, signal reception quality may deteriorate. In this
case, we recommend using a distributor and making sure to
switch the “Aerial Power” setting off in order to prevent the
device from being damaged.
VCR playback
To watch a VCR image, press INPUT 2 on the remote control unit or
press INPUT on the Media Receiver to select “INPUT 2”.
Note
• If VCR images do not come in clearly, you may need to change
the input signal type setting using the menu. See page 59.
• Connect external equipment to only terminals that are to be
actually used.
• Refer to your VCR operation manual for the signal type.
Using the SCART output function
This function allows you to record DTV programmes with a
connected VCR or other recording equipment while enjoying
watching the flat screen TV as usual. With this function, you can
also easily enjoy timeshift playback when a DVD/HDD recorder
(DVR) is connected.
The following diagram assumes that you connect a Pioneer DVR-
940HX-S to the Media Receiver so that you can enjoy timeshift
playback with the recorder.
In addition to the above connections, you need to perform the
following:
• See Switching the SCART output (page 67) and select “Fixed on
DTV/SAT” for “SCART Output” in the Setup menu.
• On the DVD/HDD recorder (DVR), select the video/audio input
source matching the external input terminal to which the Media
Receiver has been connected. For this method, see the
operation manual that came with the recorder.
• Select the input source on the Media Receiver depending on the
terminal to which the output of the DVD/HDD recorder (DVR)
has been connected; for the above connection example, select
“INPUT 2”.
• When you complete the connections and setups, you can then
enjoy timeshift playback with the DVD/HDD recorder (DVR). You
can also select the 2-screen or picture-in-picture mode to watch
images coming from the DTV input source and an external input
source (“INPUT 2” for the above connection example) to which
the output of the recorder has been connected.
SAT
ANT
SUB WOOFER O
INPUT 2
L
R
AUDIO
P
R
COMPONENT VIDE
P
B
Y
C
LAN (10 / 100)
INPUT 3
INPUT 1
INPUT 4
HDMI
INPUT 3
HDMI
INPUT 1
DIGITAL OUT
OPTICAL
HDMI
OU
INPUT 2
SCART cable
VCR
Media Receiver (rear)
SAT
ANT
SUB WOOFER O
INPUT 2
L
R
AUDIO
P
R
COMPONENT VIDE
P
B
Y
C
LAN (10 / 100)
INPUT 3
INPUT 1
INPUT 4
HDMI
INPUT 3
HDMI
INPUT 1
DIGITAL OUT
OPTICAL
HDMI
OU
INPUT 2
SCART cable
SCART cable
DVR-940HX-S
Media Receiver (rear)
KRP-600A_500A.book Page 66 Monday, September 8, 2008 10:31 AM