A335, Assembly & installation instructions – Hubbardton Forge 138815 User Manual
Page 3
Assembly & Installation Instructions
A335
Apparatus Pendant 138815
Page 3 of 5
Hand-Forged, Vermont-Made Lighting and Accessories
154 Route 30 South, Castleton, Vermont 05735
28309
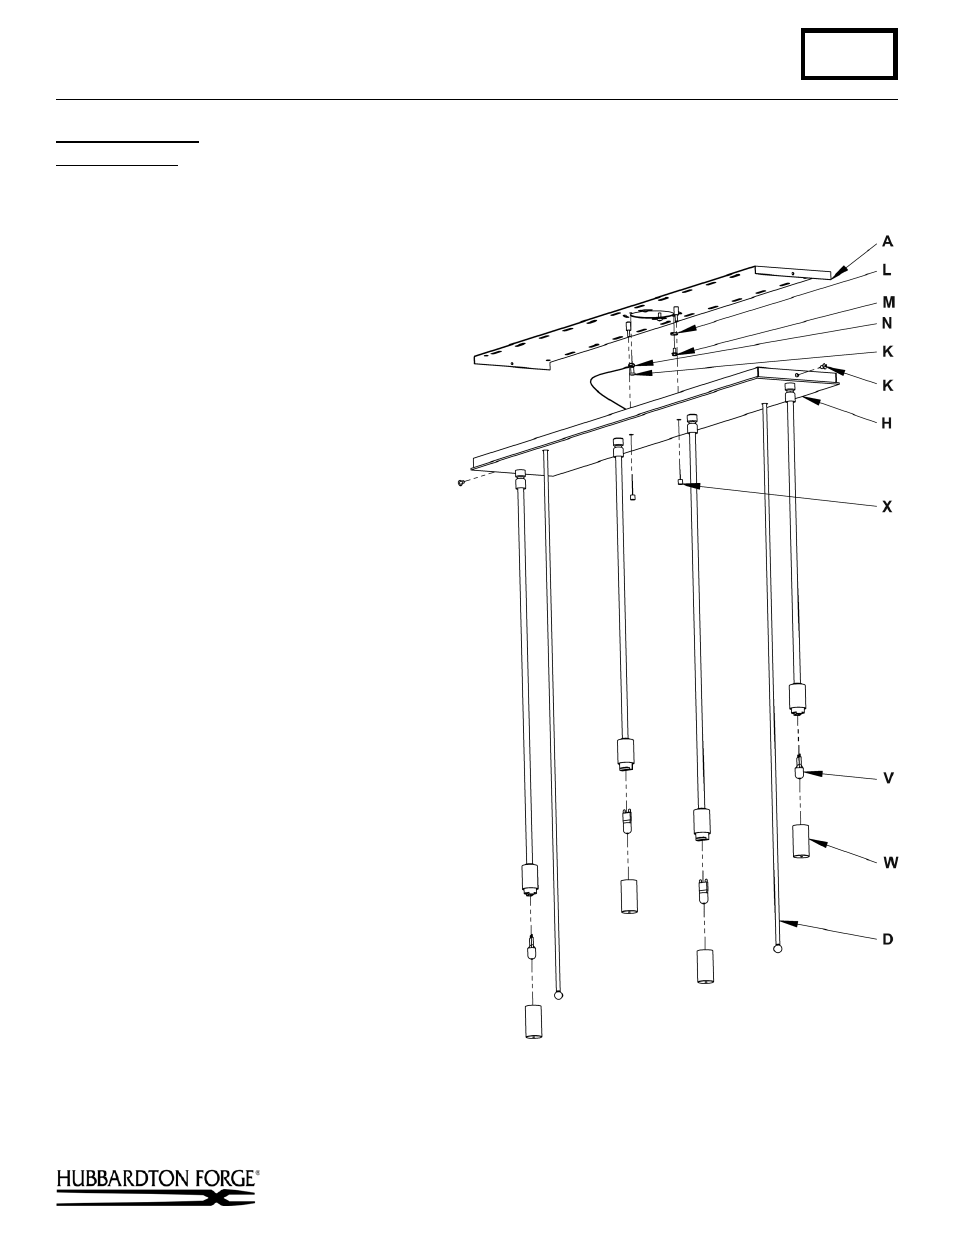
To Install Canopy
(Figure 3)
Component Parts
A Mounting Bracket
D ¼” Dia Rod
H Canopy
K #8 Screw
L
Cupped Washer
M Green Ground Screw
N Support Cable
V Bulb
W Shield
X Barrel Knobs (2)
1. Raise canopy (H) close to ceiling. Attach canopy
support cable (N) to mounting bracket(A) using a
#8 screw (K). Temporarily suspend canopy using
cable (Figure 3).
Caution:
The cable is intended to temporarily
suspend the canopy to help with fixture
installation. Never depend on them to support
fixtures with glass installed.
2. Using suitable wire connectors (not provided)
connect fixture wires to supply (white to white
and black to black). Using cupped washer (L)
and green ground screw (M) run pigtail from
mounting bracket (A) to junction box. Connect
all ground wires (bare copper or green to bare
copper or green). Push wires back into outlet box.
Caution:
Make sure wire connectors are twisted
on securely, and no bare wire is exposed.
3. Raise canopy (H) to ceiling, push firmly to ceiling
making sure no wires are pinched between fixture
canopy (H) and ceiling. Secure canopy (H) to
mounting bracket (A) using #8 screws (K) and
barrel knobs (X).
4. Install bulbs (V). Be careful not to touch bulb
with bare hands; oil from the hands will
dramatically reduce bulb life.
5.
Screw shields (W) on to sockets. Do not over
tighten.
(continued)
(Figure 3)