A335, Assembly & installation instructions – Hubbardton Forge 138815 User Manual
Page 2
Assembly & Installation Instructions
A335
Apparatus Pendant 138815
Page 2 of 5
Hand-Forged, Vermont-Made Lighting and Accessories
154 Route 30 South, Castleton, Vermont 05735
28309
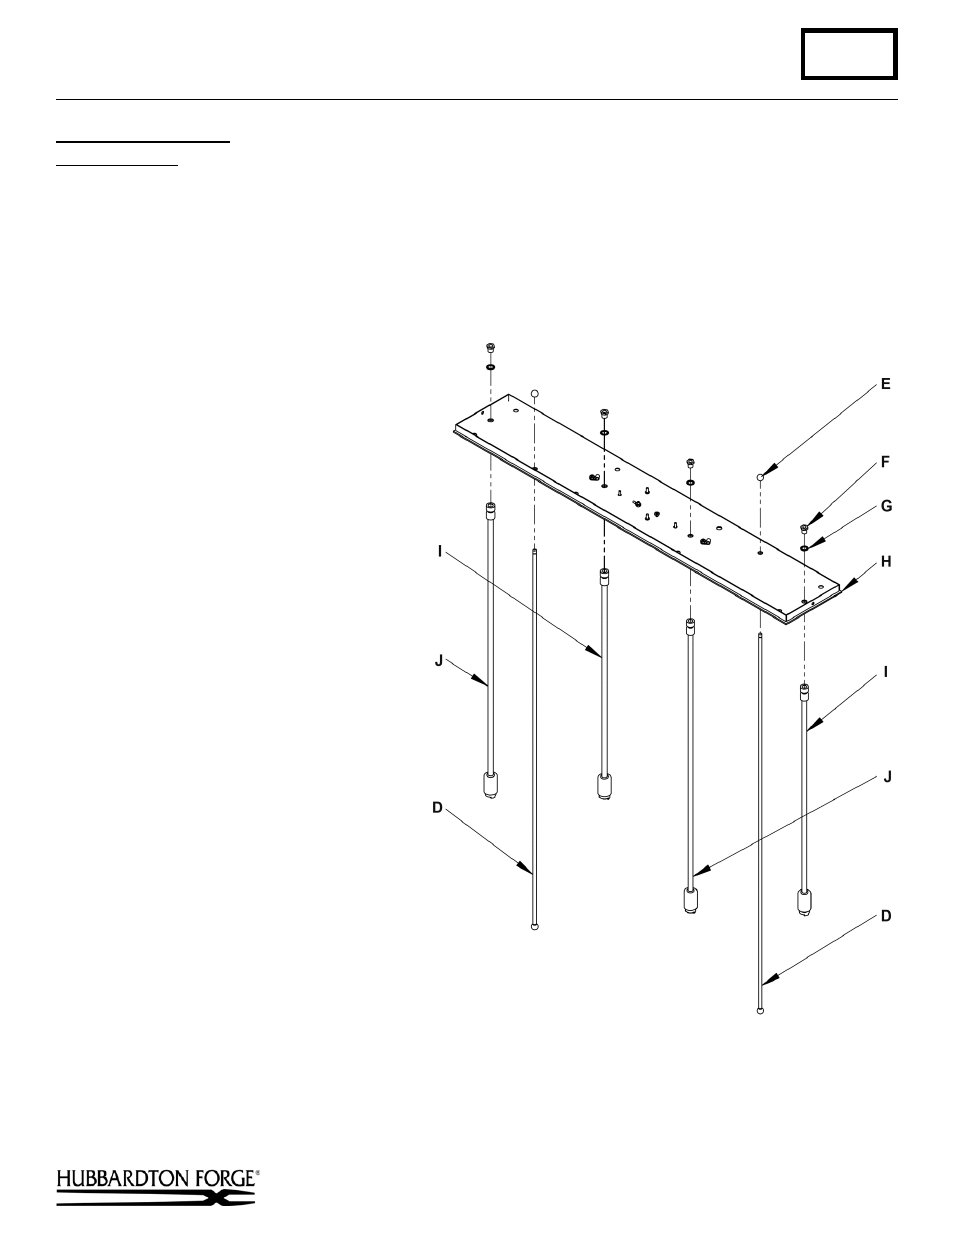
To Assemble Canopy
(Figure 2)
Component Parts
D ¼” diameter Rod (2)
E ½” diameter Ball (2)
F Hex Nipple (3)
G Lock Washer (3)
H Canopy
I
Short Canopy Pipe (2)
J
Long Canopy Pipe (2)
1. Remove ball (E) from one end of ¼”
diameter rod (D). Slip rod (D) up
through hole in canopy (H) and
reattach ball (E).
2. Repeat step one for second rod (D) and
ball (E).
Note: Reference Figure 2 for mounting
locations of Short Canopy Pipe (I) and
Long Canopy Pipe (J)
3.
Thread socket wires through canopy.
4.
Line up end of canopy pipe (I/J) with
hole in canopy (H).
5.
Slip lock washer (G) and hex nipple
(F) onto wires.
6. Place hex nipple (F) through lock
washer (G), down through holes in
canopy and thread into canopy pipe.
Tighten securely.
7. Repeat steps 2 and 3 for the remaining
pipes.
(continued)
(Figure 2)