Removing or replacing the at-cv5001dc power supply – Allied Telesis AT-CV5001 User Manual
Page 73
AT-CV5001 Media Converter Chassis Installation Guide
73
Removing or Replacing the AT-CV5001DC Power Supply
The AT-CV5001DC Power Supply is hot-swappable. You do not have to
power off the chassis to install a second power supply or to replace a
failed power supply in a chassis that has two power supplies.
Note
The predecessor to the AT-CV5001 Chassis, the AT-CV5000
Chassis, had different power supply modules for the left and right
slots. This is not the case for this chassis and the AT-CV5001DC
Power Supply, which can be installed in either slot.
There are two power supply slots. This procedure illustrates slot A. The
procedure is the same for slot B.
To remove or replace the AT-CV5001DC Power Supply, perform the
following procedure.
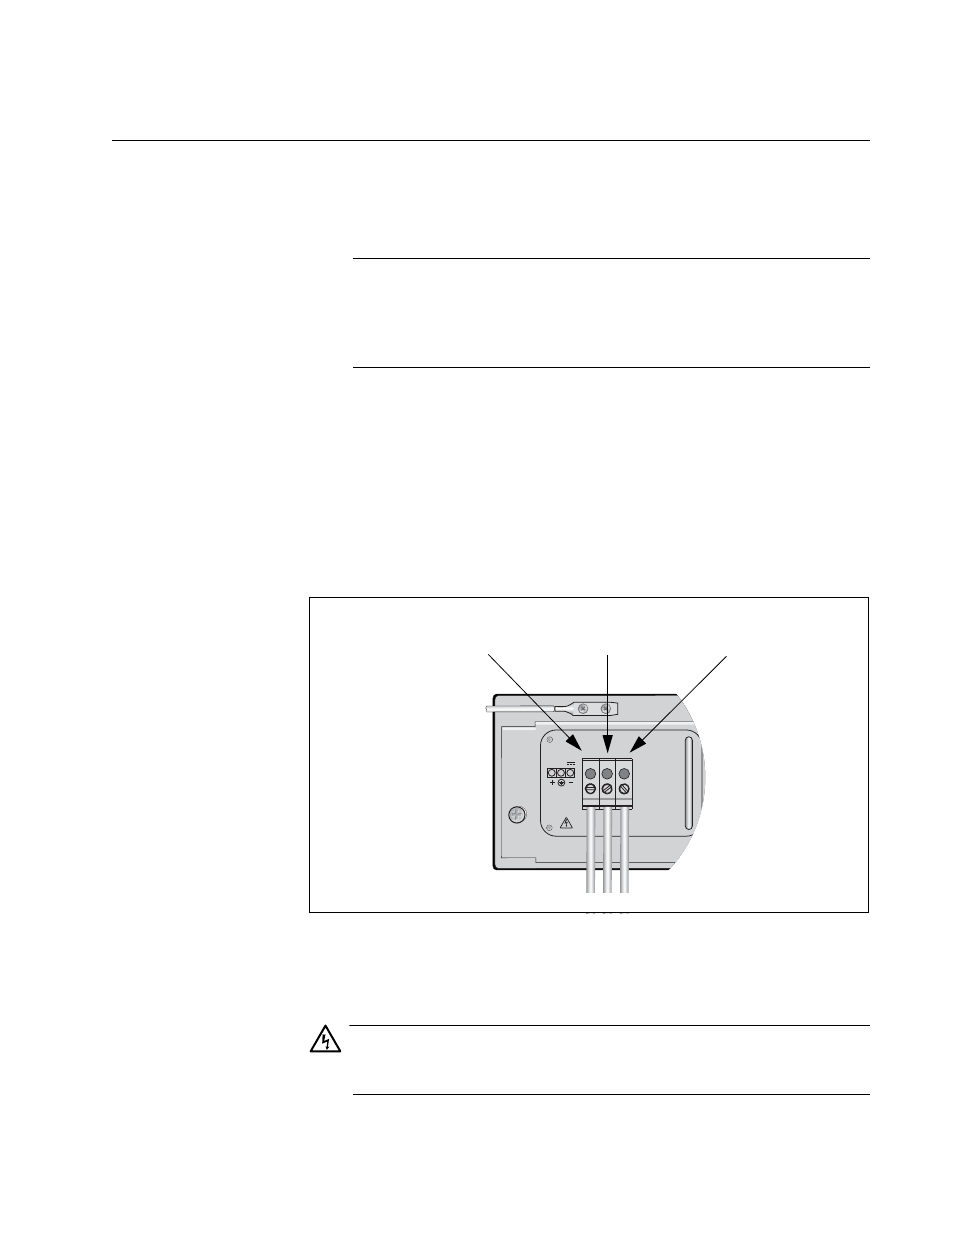
1. Power off the DC circuit to the AT-CV5001DC Power Supply
2. Disconnect the -48 VDC feed wire from the terminal block marked
- (minus).
3. Disconnect the +48 VDC (RTN) feed wire from the terminal block
marked + (plus).
4. Disconnect the power supply ground wire.
Warning
When installing this equipment, always ensure that the power supply
ground connection is installed first and disconnected last.
E11
A
FOR CENTRALIZED
RESTRICTED AREA.
INSTALL ONLY IN A
CONNECTION,
DC POWER
AT-CV5001DC
DISCONNECT ALL POWER SOURCES &
REFER TO MANUAL BEFORE SERVICING
40-60VDC
1676
+48 VDC Positive
Ground
-48 VDC Negative
Terminal
Terminal
Terminal