Warning, Electrical connection – Alliance Laundry Systems D677I User Manual
Page 29
Installation
27
510969
© Copyright, Alliance Laundry Systems LLC – DO NOT COPY or TRANSMIT
Electrical Connection
Three-Wire Power Cord
1. Remove the screw and terminal block access
cover from the rear of the dryer cabinet.
2. Insert ends of direct wire through power supply
hole (containing proper strain relief) in rear of
dryer cabinet. Refer to Figure 19. Connect the
power cord, or direct wiring, to the appropriate
terminal block terminals using the three wire-
binding (10-32 x 3/8") screws from the
accessories pack in the envelope shipped inside
the dryer cylinder. If the dryer had previously
been connected with a four-wire power cord,
remove the four-wire power cord by reversing
procedures under Four-Wire Power Cord
instructions.
IMPORTANT: Use only a U.L. listed No. 10 A.W.G.
(copper wire only) three conductor power supply
cord kit rated 240 Volts (minimum)
30 Amperes and labeled as suitable for use in a
clothes dryer.
3. Tighten these wire-binding screws firmly.
IMPORTANT: Failure to tighten these screws
firmly may result in wire failure at the terminal
block.
4. Secure the strain relief to the power cord, or
wires, where they enter the dryer cabinet.
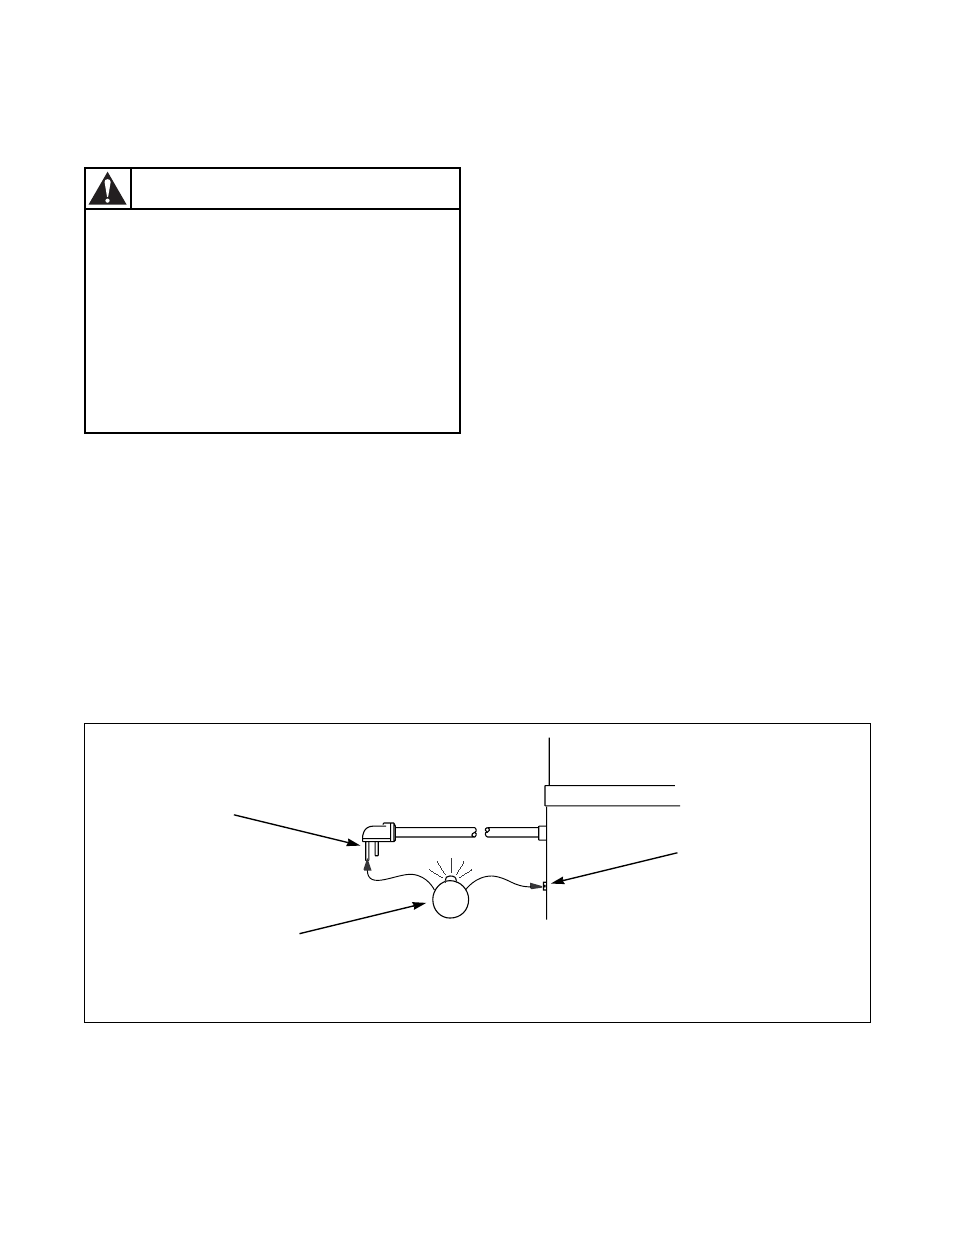
5. Check the continuity of the ground connection
before plugging the cord into an outlet. Use an
acceptable indicating device connected to the
center grounding pin of the plug and the green
screw on the back of the cabinet.
6. Reinstall access cover and screw.
Figure 18
The dryer is grounded to neutral conductor
at the terminal block. If the dryer is installed
in a mobile home, or if local codes do not
permit grounding through the neutral,
proceed as shown on Four-Wire Power
Cord instructions.
W134
To reduce the risk of electric shock,
disconnect the electrical service to the
dryer before proceeding.
W135
WARNING
D607I
1
Grounding Pin
3
Indicating Device (Must show continuity)
2
Ground Screw on Back of Cabinet
D607I
2
1
3