0 dismantlement of thrust actuator – ARI Armaturen ARI-PREMIO Plus EN User Manual
Page 46
Page 46
0040501004 5010
Operating and installation instructions
Thrust actuator ARI-PREMIO-Plus
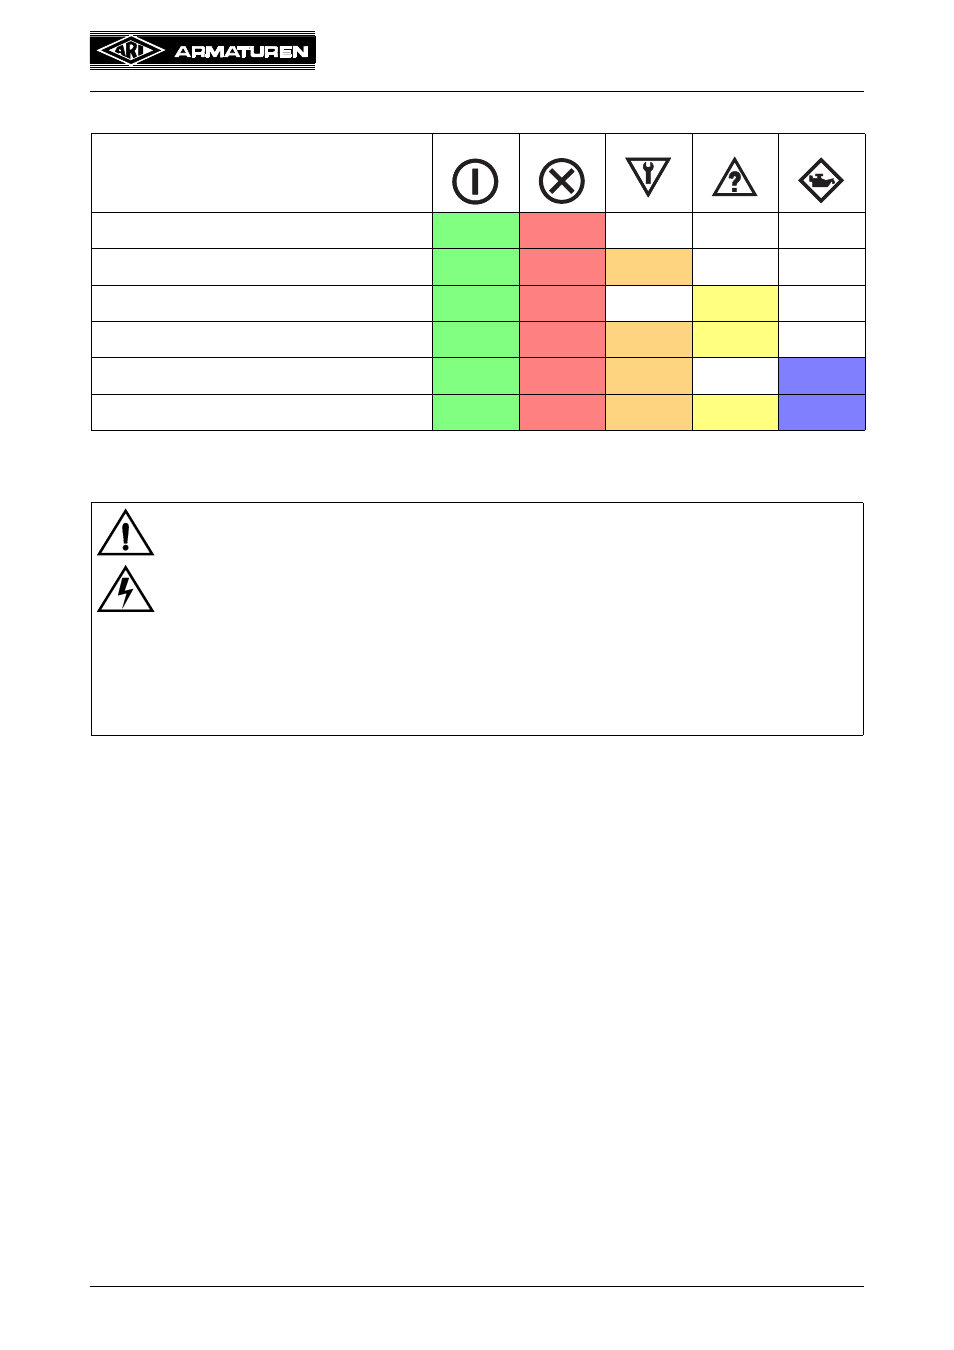
9.2 LED encoding (from software version 2.1.7 and higher)
10.0 Dismantlement of thrust actuator
To dismantle the thrust actuator proceed as follows:
- Loosen hexagon nut on the hood, carefully remove hood.
- Disconnect all cables led into thrust actuator from outside and remove from thrust
actuator.
- Place hood on carefully from above and fix in place with hexagon nut.
- Loosen grub screw inside torsion safety feature; screw coupling out of torsion safety
feature.
- Loosen clamping bolts connecting the thrust actuator to the fitting.
- Remove thrust actuator from valve.
-
No initialisation run
Green
Red
Blockage
Green
Red
Orange
Y
in
control signal failure
Green
Red
Yellow
ADV - outside the travel path
Green
Red
Orange
Yellow
Position can not be achieved
Green
Red
Orange
Blue
Full travel too low
Green
Red
Orange
Yellow
Blue
ATTENTION !
- The supply line for connecting up the thrust actuator must be in the dead state
i.e. disconnected while dismantlement work is being carried out. After being
disconnected, the mains power must be prevented from being switched back
on again accidentally.
- The system must be run down (depressurised state) as the valve cone is not
held without the thrust actuator and would thus be conducted by the system
pressure.
- Valve plug approximately in mid lift position - on no account supported inside a
seat!