Running myfaces-components on nonstop – HP Integrity NonStop H-Series User Manual
Page 235
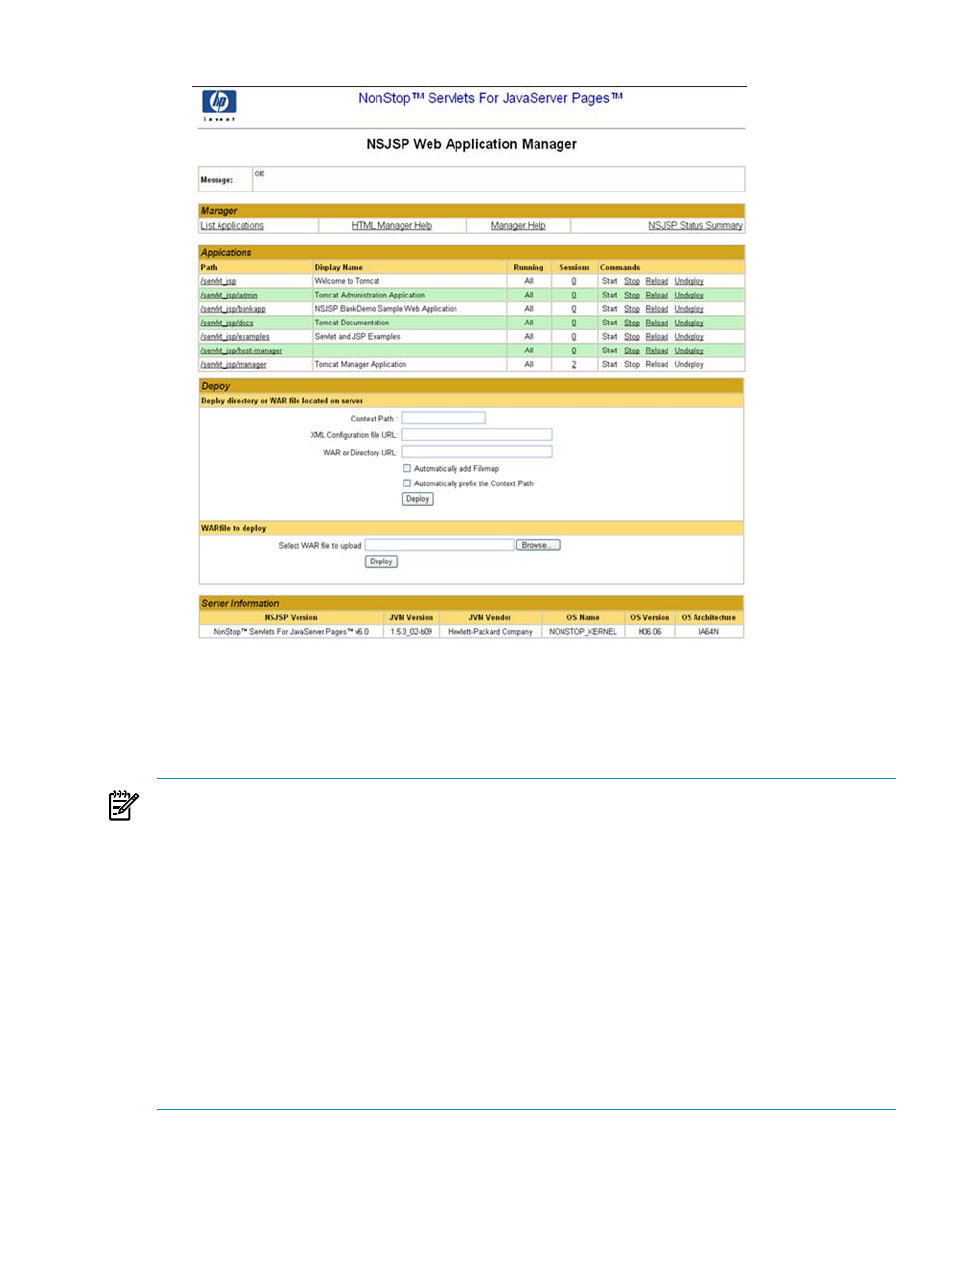
Figure 11-2 NSJSP Web Application Manager Screen
3.
In the WAR file to deploy section, click Browse and locate the
myfaces-components.war
file on your Windows system.
4.
Click Deploy.
myfaces-components is listed under Applications.
NOTE:
If you do not have access to the NSJSP Web Application Manager screen, you can deploy
myfaces-components on your NonStop system by completing the following steps:
1.
Ensure that you have WRITE permissions to the
webapps
directory in your
<NSJSP
deployment directory>
. You can confirm this by using the OSS command:
OSS> ls –l
For example:
ls –l at /home/sash_usr/webserver/servlet_jsp
must display
WRITE permissions to the
webapps
directories.
If this directory does not have WRITE permissions set, run the following command:
OSS> chmod +w
2.
Copy the myfaces-components application WAR file (
myfaces-components.war
) from
the
Windows
directory to the
<NSJSP deployment directory>/webapps
OSS directory on your
NonStop system.
Running myfaces-components on NonStop
To run myfaces-components on your NonStop system, click the /servlet_jsp/myfaces-components
path under Applications in the NSJSP Web Application Manager screen.
Deploying and Running Sample MyFaces Application on NonStop
235