Caution – HT instruments SOLAR300N User Manual
Page 51
SOLAR300 - SOLAR300N
EN - 49
5.3.3. Advanced setting screen – PV systems
Press the F2 key or touch the “ADVANCED” item on the display. The instrument displays
the following screen:
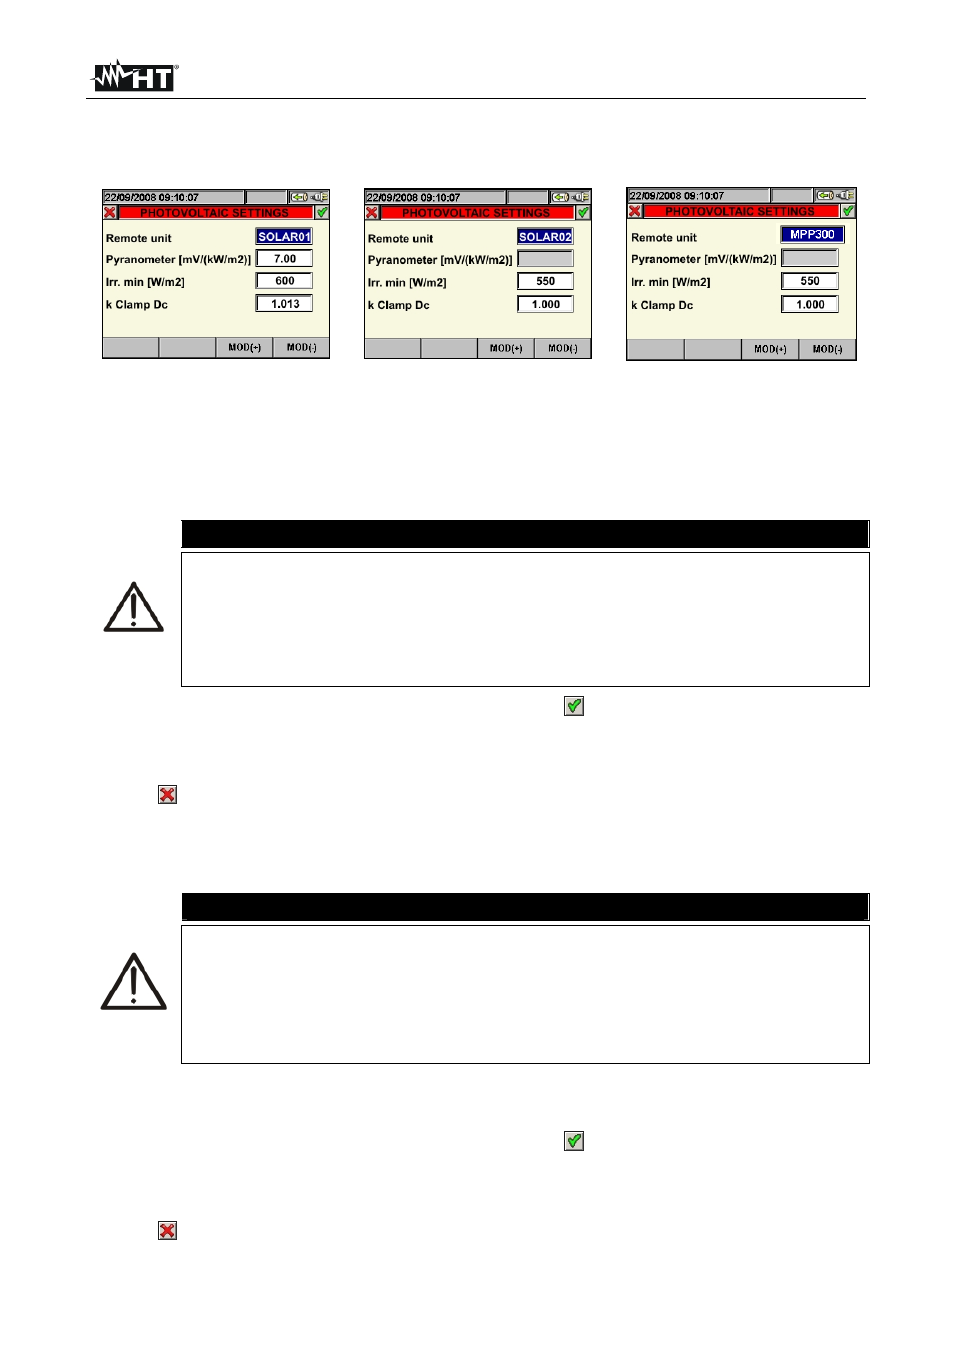
Selection of rem. U. SOLAR-01 Selection of rem. U. SOLAR-02
Selection of rem. U. MPP300
Fig. 101: Advanced setting screen for PV systems
5.3.3.1. Setting of remote unit
This option allows to set the type of remote unit which can be used with the instrument.
1. By means of the F3 or F4 key (or items MOD(+) or MOD(-) on the display), select the
desired unit SOLAR01 or SOLAR02, MPP300.
CAUTION
The selection of remote unit SOLAR-02 or MPP300 automatically disables the
“Pyranometer” field as the sensitivity of the used irradiance probe (pyranometer
or reference cell) should be set inside the internal menu of SOLAR-02 (see
user manual of SOLAR-02).
The selection of the type of system MPP-1 or MPP-3 (see §5.3.1) shall
automatically force MPP300 as remote unit type.
2. Press the SAVE or ENTER key (or the smart icon
) to save the selected setting by
confirming with “Ok”. In this way, the settings made will remain valid also after turning
off the instrument.
3. To quit the settings made or to exit without saving, press the ESC key (or the smart
icon ).
5.3.3.2. Setting the corrective factor of the pyranometer (only for SOLAR-01 unit)
This option allows setting the characteristic corrective factor (sensitivity) of the supplied
pyranometer
CAUTION
The sensitivity parameter is normally indicated on the label of pyranometer
or on the relevant certificate is normally expressed in
V/Wm
-2
so,
considered the measurement unit on meter [mV/kWm
-2
] simply set the
value read on label without any unit conversion
A wrong setting of sensitivity parameter on meter means a significative error
on the irradiance measurement and, then, a wrong DC efficiency calculation
1. By means of the F3 or F4 key (or items MOD(+) or MOD(-) on the display), select the
desired value within the range 1.00
100.00
2. Press the SAVE or ENTER key (or the smart icon
) to save the selected setting by
confirming with “Ok”. In this way, the settings made will remain valid also after turning
off the instrument.
3. To quit the settings made or to exit without saving, press the ESC key (or the smart
icon ).