4 replacing the backlight, Replacing the backlight -8 – Yokogawa Data Acquisition with PID Control CX2000 User Manual
Page 60
8-8
IM 04L31A01-01E
8.4
Replacing the Backlight
1.
Remove the bezel (see section 8.1).
2.
Remove the two screws attaching the aluminum sheet on the back of the bezel,
and the rivet that fastens the flat cable (see section 8.3).
Rivet
Display Bracket
Aluminum Sheet
Earth Bracket
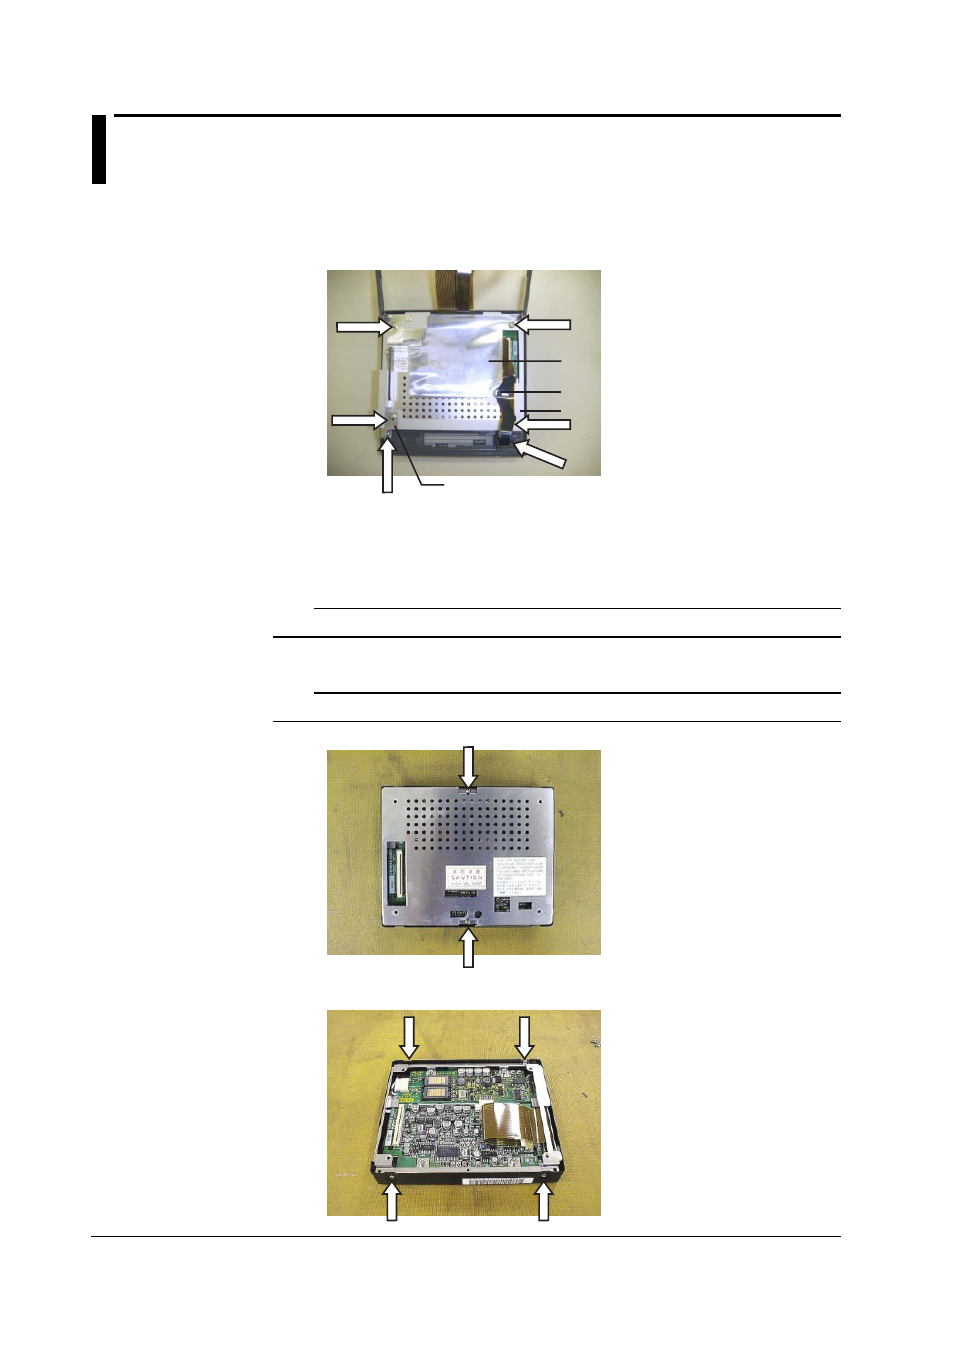
3.
Remove screw numbers 1?3 as shown, then remove the Earth bracket.
4.
Remove screw number 4, then remove the Display bracket.
5.
Remove the LCD screen from the plastic screen cover, and set the LCD screen
down on a static-proof surface.
Note
Be careful not to scratch the LCD screen when handling it.
6.
Remove the two screws as shown, then remove the rear cover.
Note
Only use a screw driver that precisely fits the screws.
7.
Remove the four screws from the sides of the LCD screen as shown.
See also other documents in the category Yokogawa Sensors:
- EJA438 (5 pages)
- EJA120A (6 pages)
- EJA115 (85 pages)
- EJA120A (47 pages)
- EJA120A (79 pages)
- EJA130A (2 pages)
- EJA130A (4 pages)
- EJA120A (31 pages)
- EJA130A (47 pages)
- EJA120A (40 pages)
- EJA210A (70 pages)
- EJA130A (4 pages)
- EJA430A (78 pages)
- EJA210E (96 pages)
- EJA210E (52 pages)
- EJA210E (89 pages)
- EJA210E (170 pages)
- EJX120A (4 pages)
- EJA210E (9 pages)
- EJX115A (55 pages)
- EJA210E (41 pages)
- EJX910A (175 pages)
- EJX910A (83 pages)
- EJX910A (9 pages)
- EJX910A (103 pages)
- FlowNavigator Software (163 pages)
- EJX910A (55 pages)
- EJA530A (67 pages)
- EJA120A (83 pages)
- EJX530A (52 pages)
- EJA110E (85 pages)
- EJA110E (4 pages)
- EJX120A (85 pages)
- EJA118 (76 pages)
- EJX118A (64 pages)
- EJA438 (72 pages)
- EJA430E (85 pages)
- EJX430A (40 pages)
- EJX430A (76 pages)
- EJA430E (7 pages)
- EJX430A (6 pages)
- EJA430E (41 pages)
- EJA430E (96 pages)
- EJX438A (10 pages)
- ADMAG AXR (194 pages)