Caution – Yokogawa Data Acquisition with PID Control CX2000 User Manual
Page 24
3-4
SM 04L31A01-01E
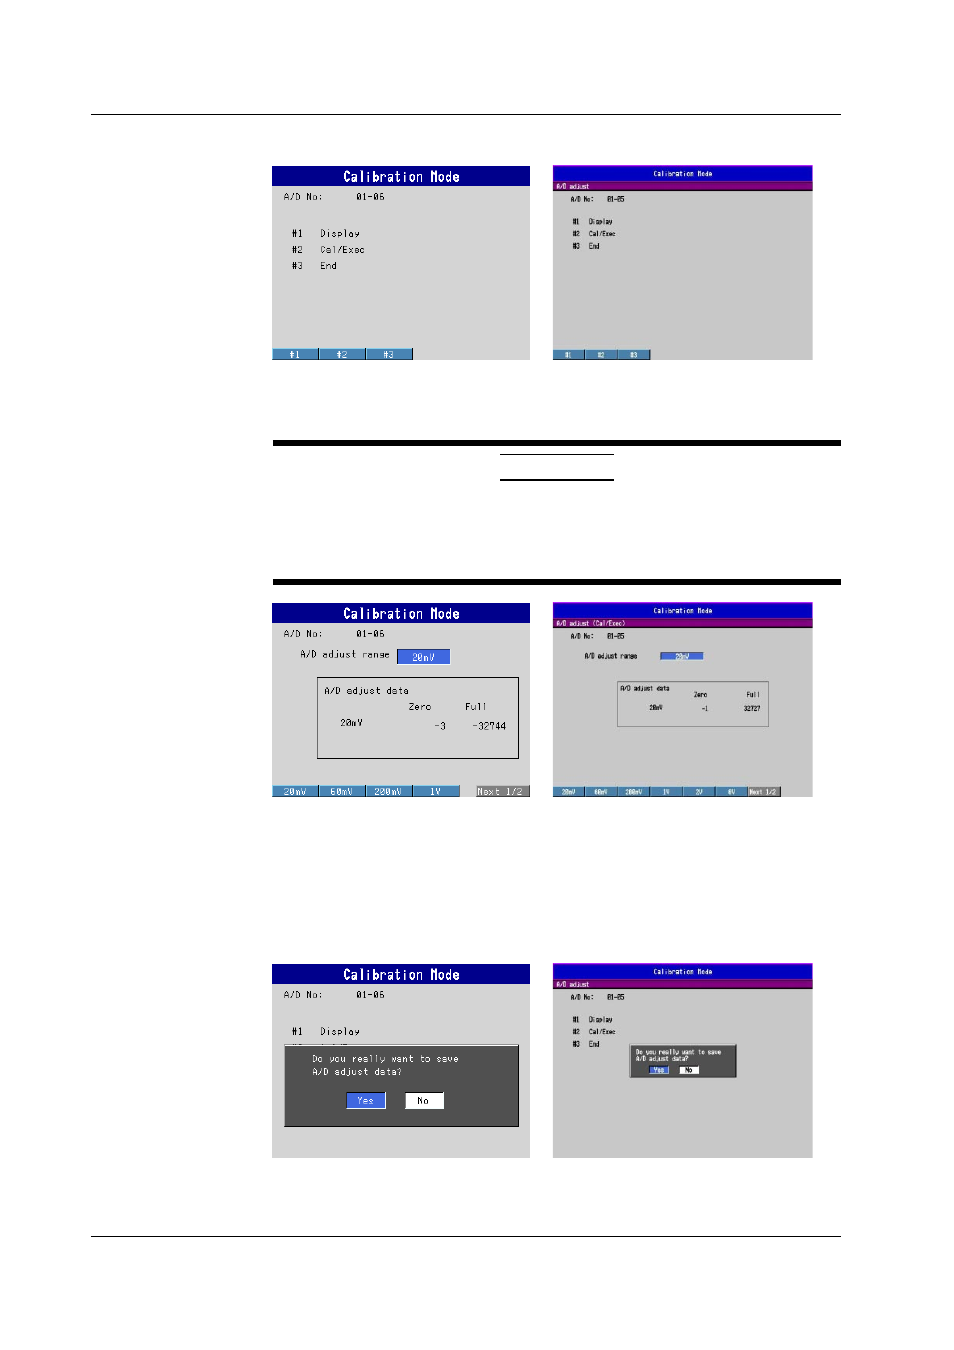
4.
Press the ENTER key. The A/D adjust screen is displayed.
5.
Input the zero and full scale value to the calibration channels shown in
"Calibrating the Input Range" (page 3-2).
6.
Press the Cal/Exec soft key. The A/D adjust (Cal/Exe) screen is displayed.
CAUTION
If you select Display in the A/D adjust screen, you can confirm the calibrated
value and manually input values using keys. Key-based manual calibration has
a large effect on measurement accuracy, so only perform the procedure if you
think it is absolutely necessary.
7.
Press the soft key corresponding to the range to be calibrated (20 mV, 60 mV,
200 mV etc.).
8.
Press the ENTER key. The calibration begins.
9.
Repeat steps 5—8 and calibrate all ranges.
10.
Press ESC. You are returned to the A/D adjust screen.
11.
Press the End soft key. A dialog box appears asking you whether or not to save
and exit.
12.
Select Yes. You are returned to the A/D adjust (Cal/Exe) screen.
13.
Repeat steps 3—12 to calibrate and save calibrated values for each group.
14.
When you are finished with all procedures, turn the power OFF.
3.1 Calibration of the Measuring Instrument's Input