Yokogawa Data Acquisition with PID Control CX2000 User Manual
Page 30
4-3
SM 04L31A01-01E
Replacing Parts
4
Terminal cover screws
Terminal block attachment
screws
Connector
Terminal cover screws
Terminal block
attachment screws
Connector
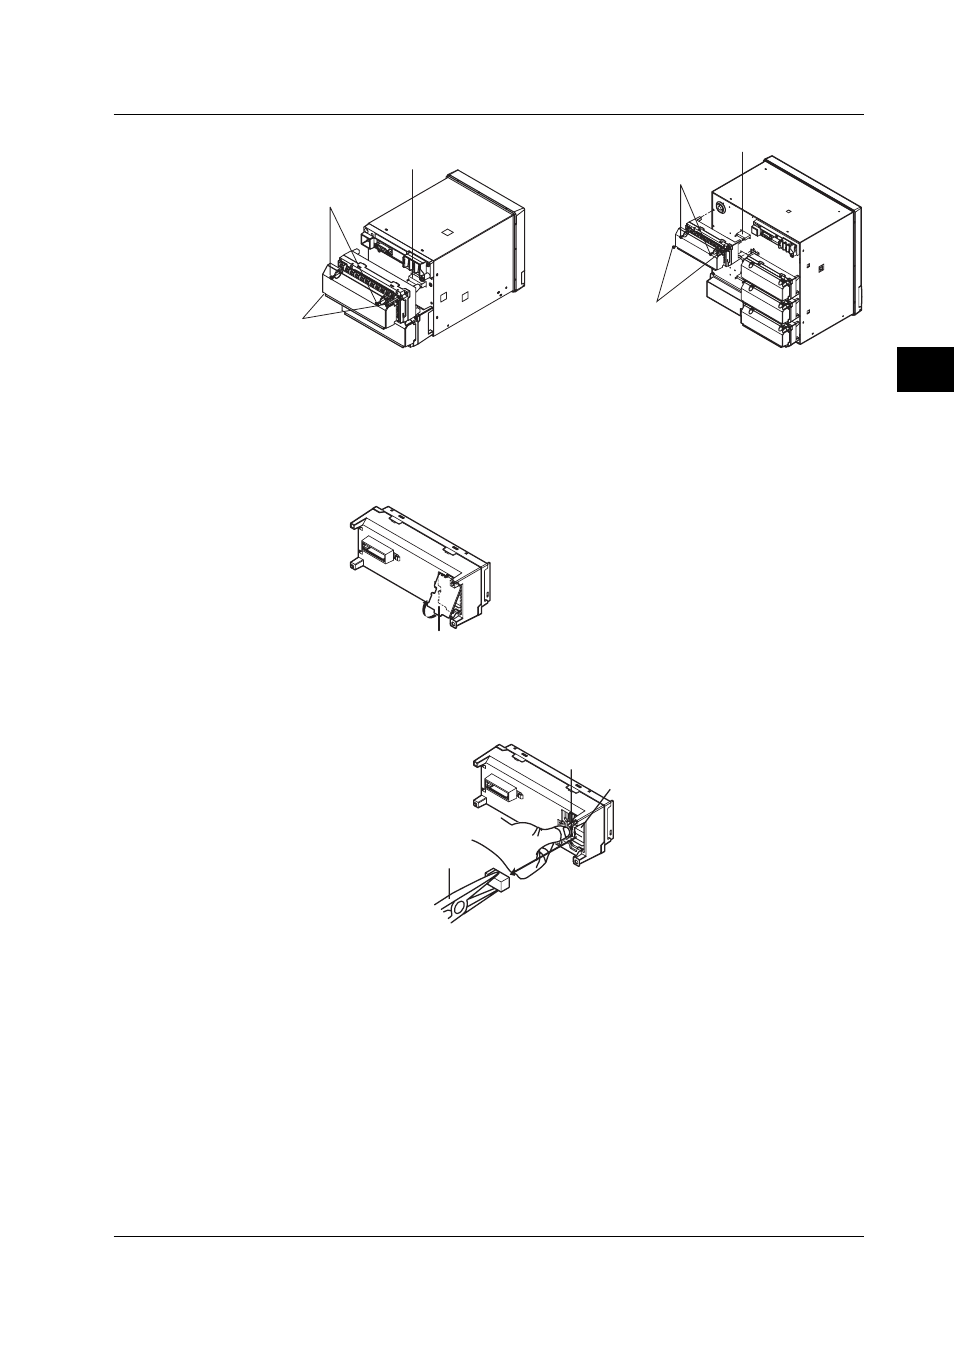
2 .
Loosen the 2 terminal block attachment screws.
3 .
Pull the terminal block straight out and away from the unit. Be careful not
to bend the connector pins while removing the terminal block.
4 .
Open the back lid of the terminal block. The letters printed on the relays
indicate the loops they correspond to: RL1 is for loops 1, 3, and 5, and
RL2 is for loops 2, 4, and 6.
Back lid
5 .
Using a tool such as a pair of needle-nosed pliers, grasp the relay and pull
it directly outward. If you are not replacing the other relay, be careful not
to damage it when removing the relay to be replaced.
Control relay
Push the Relay Lock Latch to the Left
Needle-nosed pliers
or a similar tool
Replace the relay with the following:
Matsushita Electronic Works, Ltd. Control Relay
Part No.: DSP1-DC12V
Web Site: http://www.nais-e.com/
4.1 Replacement of the Control Output Terminal Block (Module)