2 removing the board assemblies and the drive, Removing the board assemblies and the drive -4 – Yokogawa Data Acquisition with PID Control CX2000 User Manual
Page 56
8-4
IM 04L31A01-01E
8.2
Removing the Board Assemblies and the Drive
1.
Remove the bezel (see section 8.1).
Removing the Board Assemblies
2.
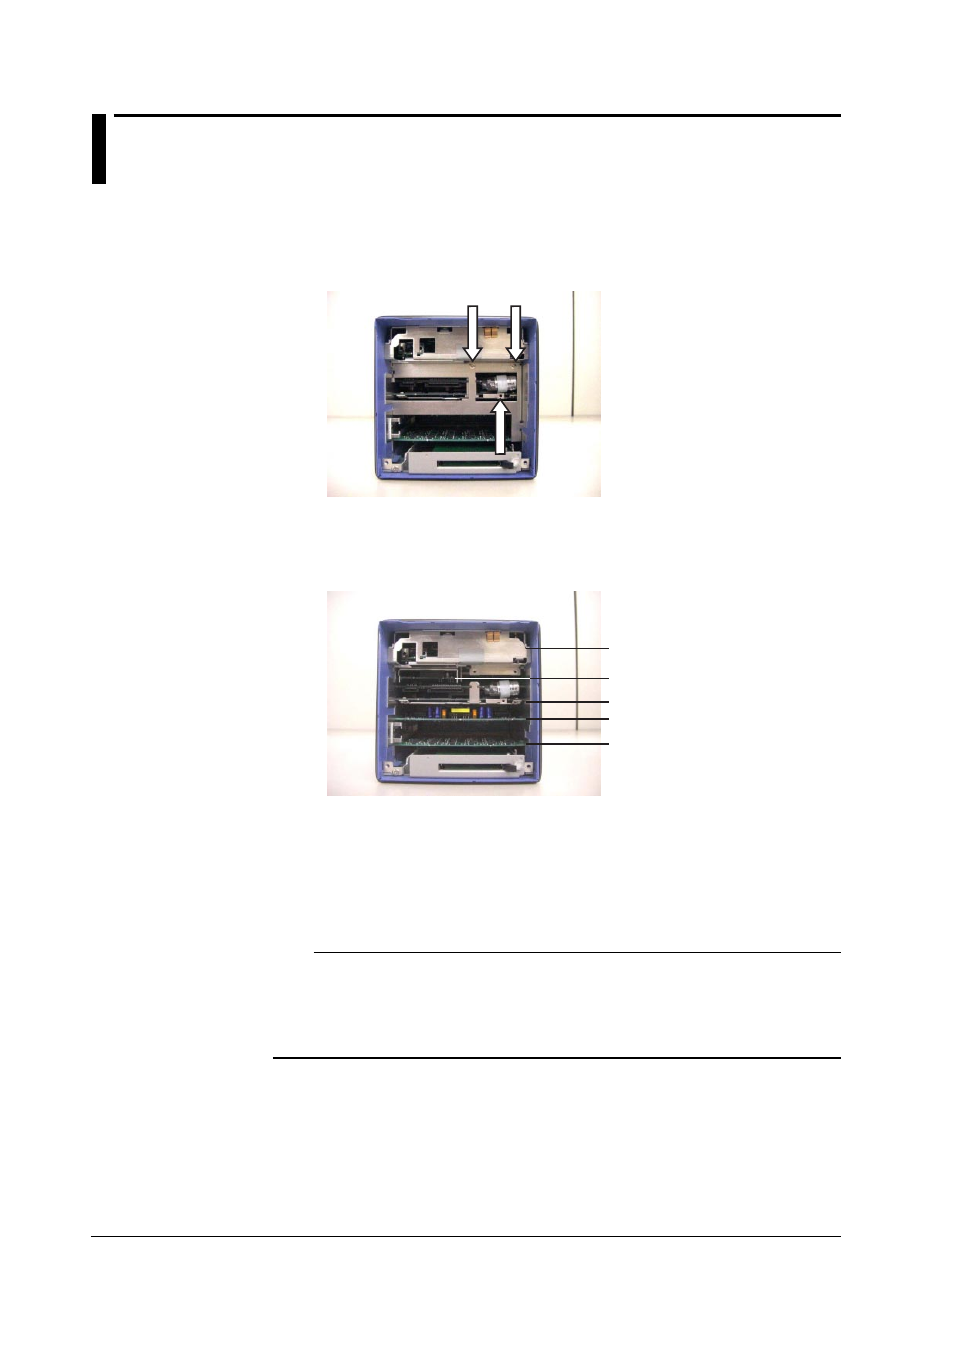
Remove the three bracket screws.
3.
Slide the bracket down to pop it out of position, then remove it. Removing the
bracket allows removal of all board assemblies.
CX with the bracket removed.
MON Scanner Assembly
AD Assembly
CPU Board Assembly
S-Power Assembly
Comm Board Assembly
4.
Pull out and remove the S-Power assembly, Comm Board assembly, and CPU
Board assembly.
5.
You may have to pull forcefully to remove the MON Scanner assembly and the
AD assembly. You can pry them out gradually by inserting tools into the holes
on either side of the board, then rocking the board side to side while pulling.
Note
•
The connection where the AD assembly is inserted into the mother board may be tight.
When reinserting the boards, make sure that they are completely inserted into the
connectors.
•
If it is difficult to grasp the MON Scanner assembly, first remove the drive to provide extra
space (see next page).