Ransburg – Ransburg RMA Indirect A11600 User Manual
Page 59
Replacement
Align the cut out notch of the shroud with the high
voltage cable access hole of the atomizer exten-
sion. Snap into place and tighten all flat head
screws to 3-5 lbs•in (.34-.56 Nm) torque.
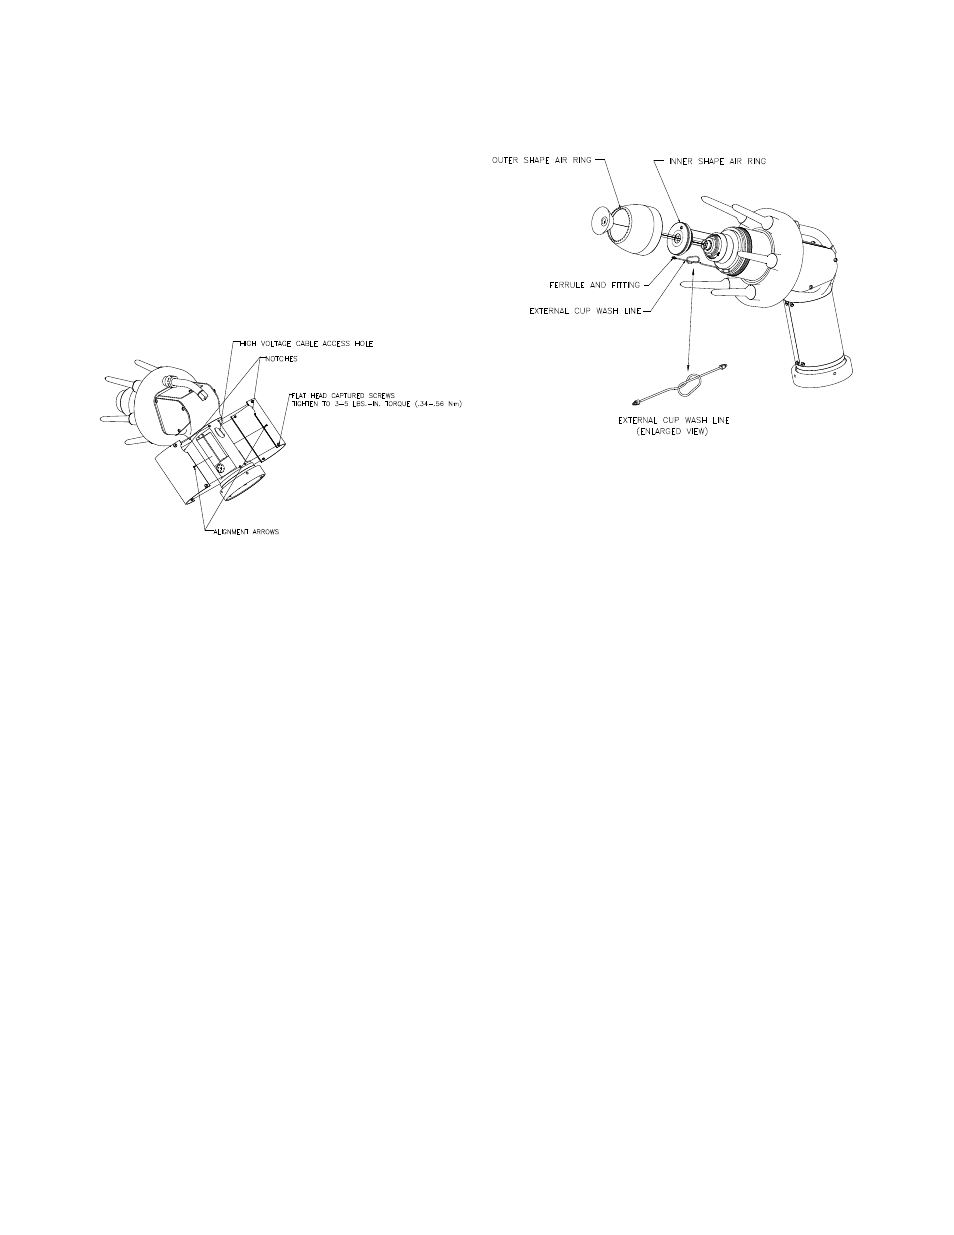
Shaping Air Manifold, Solvent Tube
Removal/Replacement
Removal
Remove the outer shaping air ring by turning if off
by hand in a counter-clockwise direction. Remove
the fitting, ferrule, and exterior cup wash line from
the inner shaping air manifold by turning the fitting
in a counter-clockwise direction using a 3/16"
end wrench. Loosen set screw on inner shaping
air manifold with a 5/64" hex wrench enough to
allow manifold to be removed from the turbine
body. Remove the inner shaping air manifold by
turning it off in a counter-clockwise direction. A
1/4-20 threaded screw may be screwed into the
cup wash port to provide additional leverage to
remove the inner shaping air ring.
Reassembly
(Lightly lubricate all o-rings prior to assembling.)
Carefully install the inner shaping air ring onto the
turbine threads. Tighten in a clockwise direction
until it seats against the turbine. Tighten set screw
to 5 lbs•in (0.564 Nm) torque to prevent shaping
air ring/manifold from rotating. Do not overtighten!
(Use a 5/64" hex key wrench.) If replacing the
solvent tube, install into the atomizer body first and
tighten with a 3/16" end-wrench. Before installing
the other end into the inner shaping air ring, check
the position of the 1/4-20 threaded hole. If it is less
than 180° from the fitting installed in the atomizer
body, you must install a loop (as shown in Figure
26) to prevent tube from becoming pinched when
outer shroud is installed. Do not kink the tube
when installing loop (granny knot).
Turbine Removal / Replacement
Remove the turbine retaining ring by using the
wrench (A12088-00), turning the turbine retaining
ring in a counter-clockwise direction. Pull the
turbine out while rocking it from side to side.
Figure 26: Interior/Exterior Shaping Air
Manifold Removal
Rear Shroud Removal/
Replacement
Removal
Loosen flat head screws until they are loose.
Screws are captured in the shroud and will come
off with it as an assembly. Pry the edge of the
shroud away from the atomizer extension while
pulling it away from it. Repeat for other side.
Figure 25: Shroud Removal
RMA-303 Indirect Charge - Maintenance
Ransburg
55
LN-9252-06.4