Ransburg, Aerobell - maintenance – Ransburg Aerobell (Std.) Rotary Atomizer A12381 User Manual
Page 51
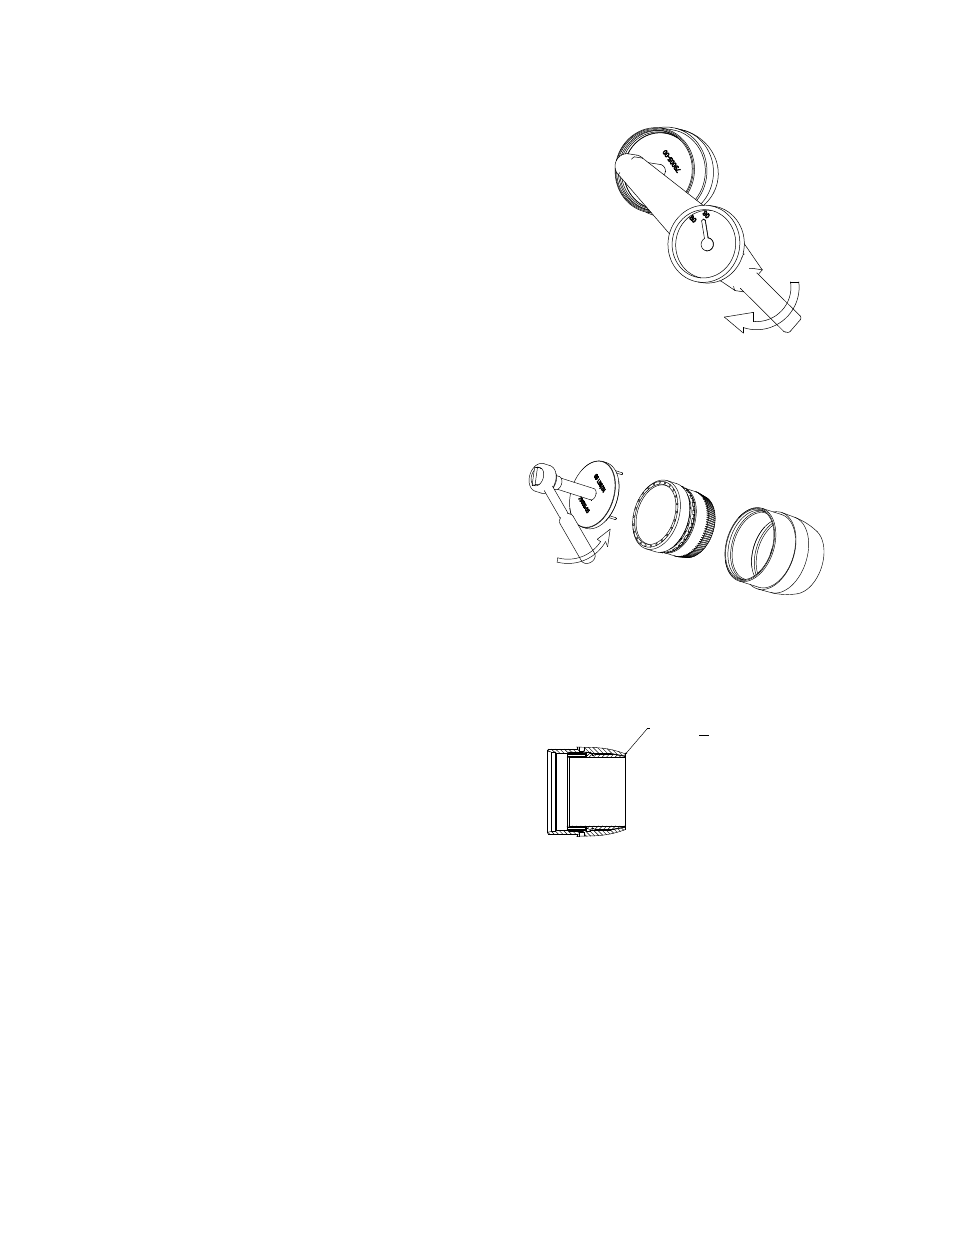
Shaping Air Cap and Shaping Air
Ring Removal, Cleaning, and
Reassembly
(78297-00 and 78298-00 (70mm))
Remove the shaping air cap and shaping air ring
assembly from the atomizer with the RPM-419
wrench. Insert the pin of the wrench into the hole
of the shaping air cap. Turn counter-clockwise
to remove. Remove the inner shaping air ring
by placing the 79005-00 tool into the back of the
assembly. Align the pins of the tool with the holes
of the shaping air ring. Use a 3/8" socket driver in
the tool, turn counterclockwise to remove.
Clean all parts to remove any debris or build-up.
Use a soft bristle brush to clean the shaping air
slots of the shaping air ring. Dry all parts before
reassembling.
To reassemble, insert shaping air ring into the
shaping air cap and tighten clockwise. Tighten to
89 lbs•in (40 Nm) torque. When tight, the shaping
air cap and shaping air ring should be flush with
each other at the face (± .007-inches, ± .18mm). If
not, remove and check for debris and reassemble.
Reinstall the assembly on to the atomizer shaping
air manifold until it stops on the RPM-3 shroud.
Tighten 1/8-1/4 turns more.
Figure 11: Installation of
78297-00 and 78298-00 (70mm)
Figure 12: Disassembly of
78297-00 and 78298-00 (70mm)
Figure 13: Assembly of
78297-00 and 78298-00 (57mm)
INSTALLATION OF 78297-00 AND 78298-00
(70MM)
DIS-ASSEMBLY OF 79297-00 AND 78298-00
(70MM)
78297-00 AND 78298-00 ASSEMBLY
(70MM)
FLUSH ( + .007 INCHES, .18MM)
Aerobell - Maintenance
47
LN-9264-08.2
Ransburg