Ransburg – Ransburg Vector R Series Classic 79520 R90 Waterborne User Manual
Page 46
Vector R Series Classic Applicators - Maintenance
42
Ransburg
AH-06-02.12
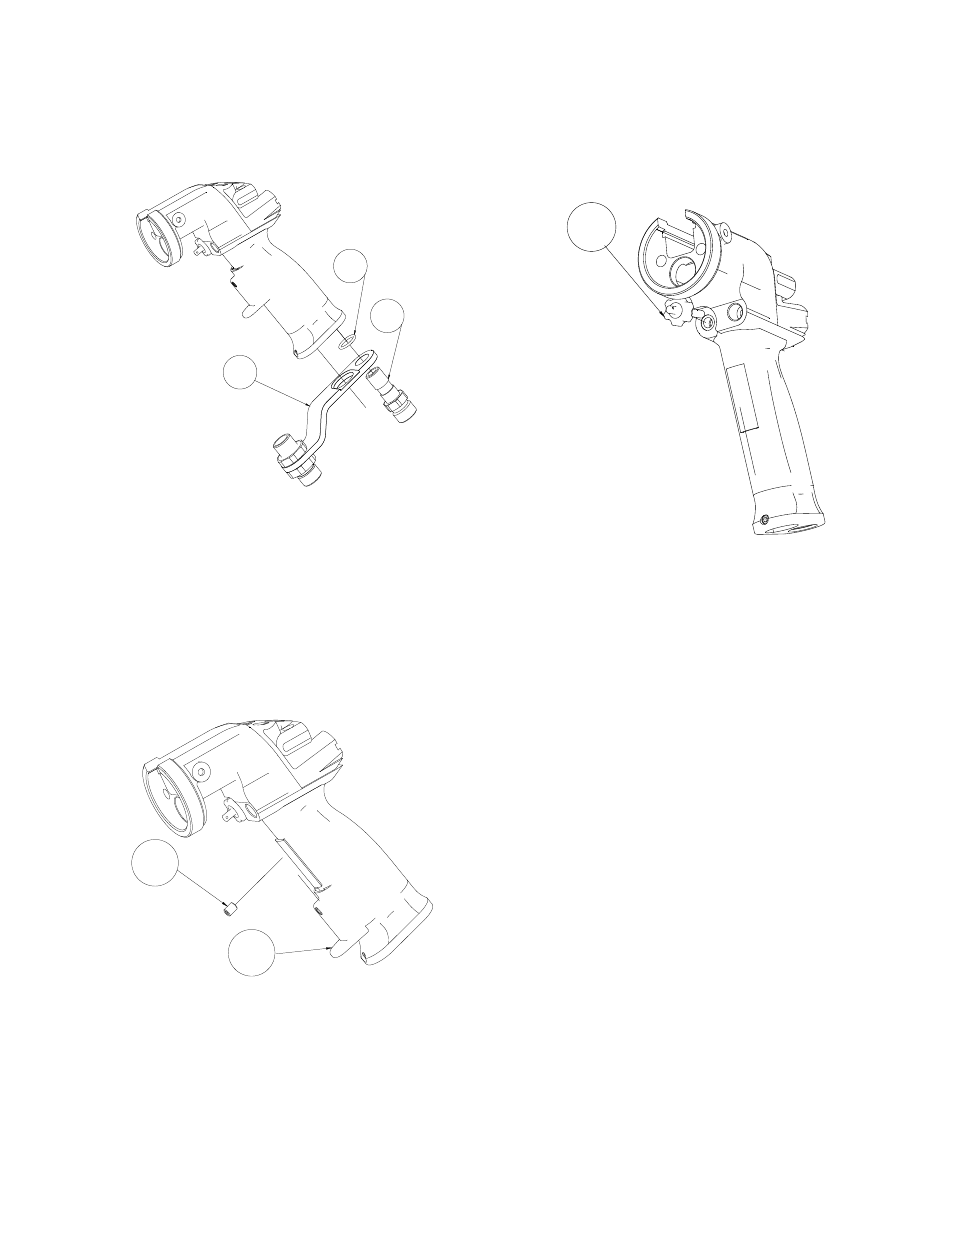
Figure 24: Air Inlet Fitting and Fluid
Bracket Removal
Figure 25: Trigger Shelf Removal
Figure 26: Trigger Stop Removal
6. Remove the air inlet fitting and the fluid bracket
from the base of the applicator.
7. Remove the trigger shelf by removing the set
screw with a 3/32" Allen wrench. Push down on
the shelf to remove.
8. Remove the trigger stop by turning the knob
of the stop counter-clockwise until the thread of
the stop is completely disengaged.
Reassembly
(Refer to Figures 21, 22, 23, 24, 25, 26,
and 27)
1. Screw the trigger stop into the handle in a
clockwise direction.
2. Push the finger shelf up on the dovetail pad
on the handle to the desired height, insert the
set screw, and tighten with a 3/32" Allen wrench.
3. Insert the fluid bracket over the air fitting, then
install the o-ring over the air fitting. Tighten the
air fitting in a clockwise direction.
1 - Fluid Bracket
2 - Air Inlet Solvent Proof O-Ring
3 - Air Inlet Fitting
1 - Finger Shelf Set Screw
2 - Finger Shelf (pushed down)
1 - Trigger Stop Assembly
1
2
3
1
2
1