Ransburg, Vector r series classic applicators - maintenance – Ransburg Vector R Series Classic 79520 R90 Waterborne User Manual
Page 43
Vector R Series Classic Applicators - Maintenance
39
Ransburg
AH-06-02.12
All six (6) spring washers
MUST be re-
placed alternately as shown in Figure 17,
or the applicator will malfunction.
W A R N I N G
!
Figure 17: Spring Washer Assembly Sequence
12. Place the packing nut (large bore first) on the
rear needle shaft section.
13. Screw the trigger adjustment nut onto the rear
needle shaft section with the hexagon rearward
and the spring retainer with the hexagon forward.
Do not lock the hexagon nuts in place.
14. Install the needle shaft sub-assembly into the
packing chamber from the rear of the barrel with
the needle/electrode forward.
15. Push the needle shaft sub-assembly forward
until the packing nut will engage its mating thread
in the barrel and screw it into place by hand, ap-
proximately 3 turns.
Figure 18: Needle Shaft Assembly Into Barrel
16. Pull the needle shaft rearward as far as it
will go.
17. Install the fluid nozzle, air cap, and retaining
nut (refer to "Air Cap" and "Fluid Nozzle" in the
"Maintenance" section).
18. Tighten the packing nut using the spanner
tool on the special multi-purpose wrench until it
bottoms.
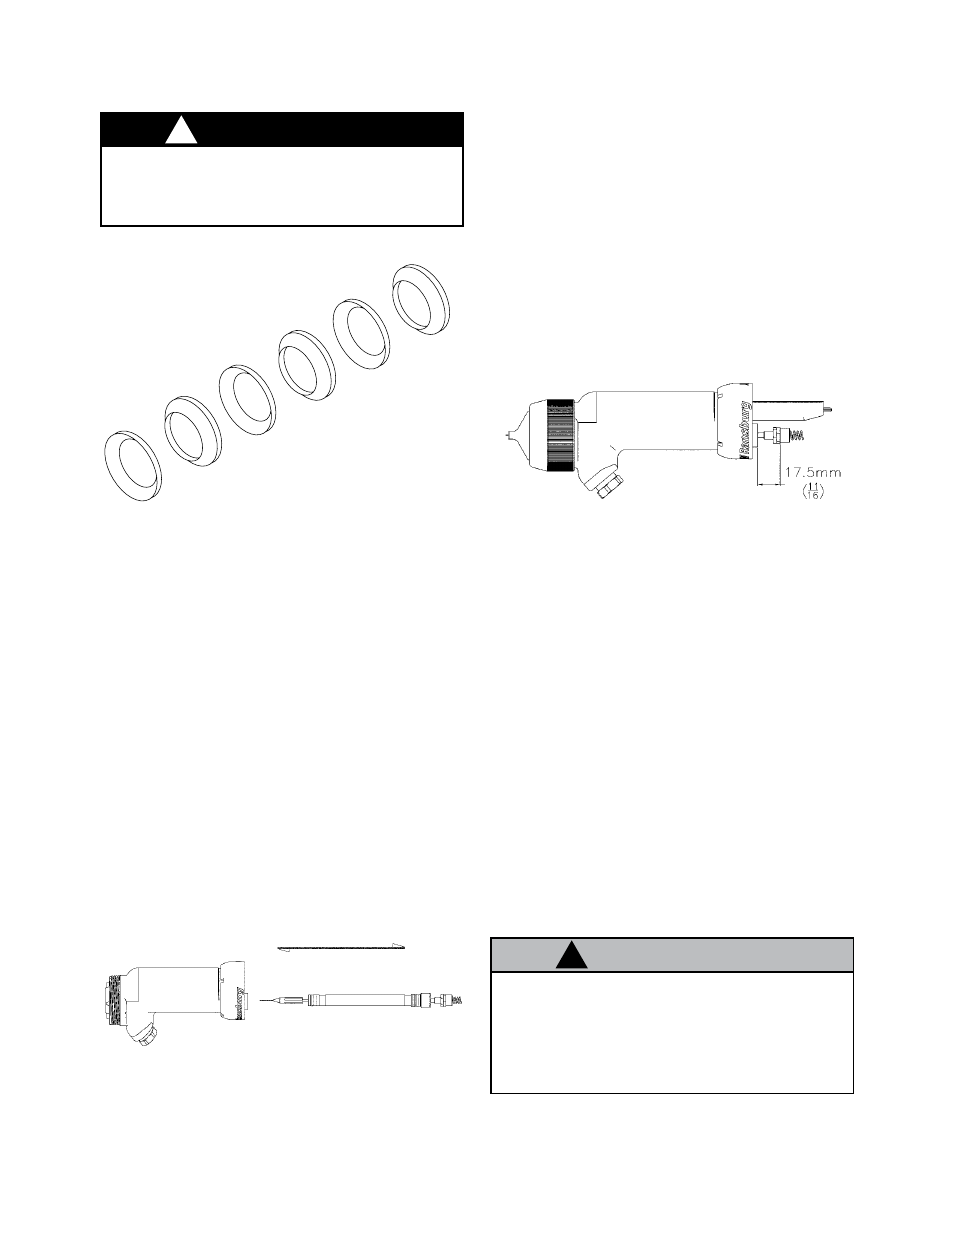
Figure 19: Trigger Adjustment Nut Dimensions
19. Push the needle shaft forward until the needle/
electrode seats into the fluid nozzle.
20. Adjust the trigger adjustment nut as far forward
on the needle shaft as possible.
21. Adjust the needle shaft spring retainer until
the rear of the hexagon is 11/16 inch from the
rear surface of the barrel packing chamber (refer
to Figure 19).
22. Hold the spring retainer in place and screw the
front trigger adjustment nut rearward until contact
is made. Use two 3/8" open-end wrenches to
tighten and lock the adjustment nuts in place on
the needle shaft.
DO NOT overtighten the hexagon adjust-
ment nuts or damage may occur to the plas-
tic threads or the needle shaft may break.
Finger tight is typically sufficient. (Maximum
torque of 18-24 in•oz).
C A U T I O N
!