Fluid nozzle, Ransburg, Vector r series classic applicators - maintenance – Ransburg Vector R Series Classic 79520 R90 Waterborne User Manual
Page 37: Cleaning and inspection, Removal
Vector R Series Classic Applicators - Maintenance
33
Ransburg
AH-06-02.12
Cleaning and Inspection
1. Use a suitable solvent to clean the fluid nozzle.
2. Examine the fluid nozzle for damage to the air
passages and the fluid nozzle tip. Also, exam-
ine the needle seat for damage or wear. If any
damaged or any worn areas are found, the fluid
nozzle must be replaced.
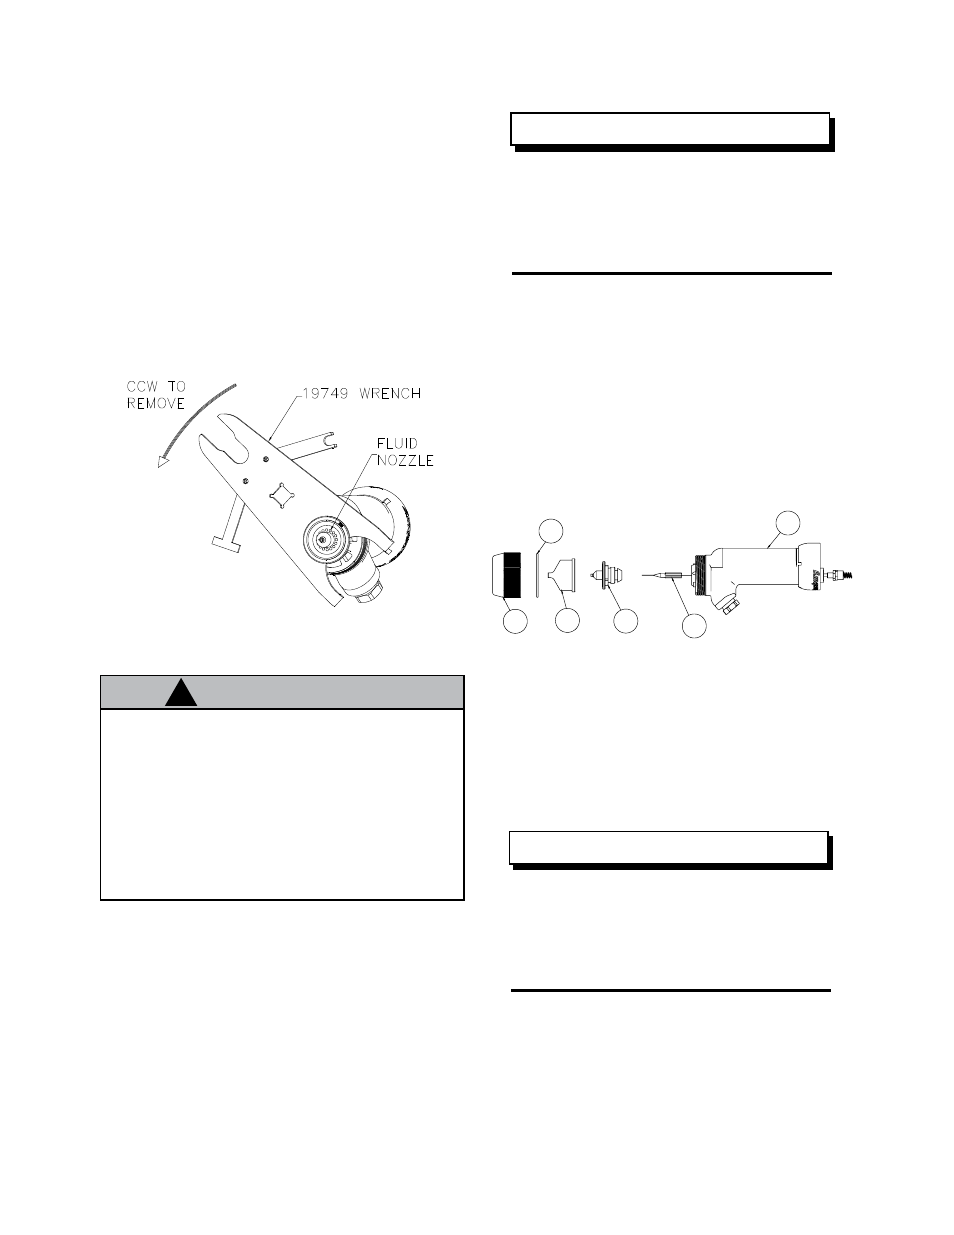
FLUID NOZZLE
(Refer to Figure 24)
Removal
1. Remove the air cap from the applicator (refer to
"Air Cap - Removal" in the "Maintenance" section).
2. Tilt the applicator forward and pull the trigger to
make sure that all fluid in the applicator is drained
out.
3. While holding the applicator assembly with the
trigger pulled back, remove the fluid nozzle with
the open-end of the special multi-purpose wrench.
The applicator barrel
MUST be tilted
front down to remove the fluid nozzle. Fail-
ure to do so may allow paint to enter the
air passages, thereby reducing airflow and
damaging the applicator barrel. Applicators
may be flushed in lieu of tilting. However,
they
MUST be either flushed or tilted during
nozzle removal!
C A U T I O N
!
If the fluid nozzle is replaced, there is
a good chance that the needle/electrode
assembly will need to be replaced also. A
worn needle/electrode assembly may not
always seat well in a new fluid nozzle.
NOTE
Figure 9: Air Cap, Fluid Nozzle, and Nut
Figure 8: Removal of Fluid Nozzle
To keep the needle/electrode from
unscrewing from the needle shaft, the
applicator's trigger should be actuated
to pull the needle/electrode away from
the fluid nozzle.
NOTE
1 - Retaining Ring
2 - O-Ring, PTFE Encapsulated
3 - Air Cap
4 - Fluid Nozzle
5 - Electrode Assembly
6 - Barrel Assembly
1
2
3
4
5
6