Viewing a marker pulse – Agilent Technologies E8267D PSG User Manual
Page 122
108
Chapter 3
Basic Digital Operation
Using Waveform Markers
The markers are enabled or disabled per your selections, and the changes have been saved to the
selected sequence file.
Viewing a Marker Pulse
When a waveform plays (
), you can detect a set and enabled marker’s pulse at the rear panel
event connector that corresponds to that marker number. This example demonstrates how to view a
marker pulse generated by a waveform segment that has at least one marker point set (
).
The process is the same for a waveform sequence.
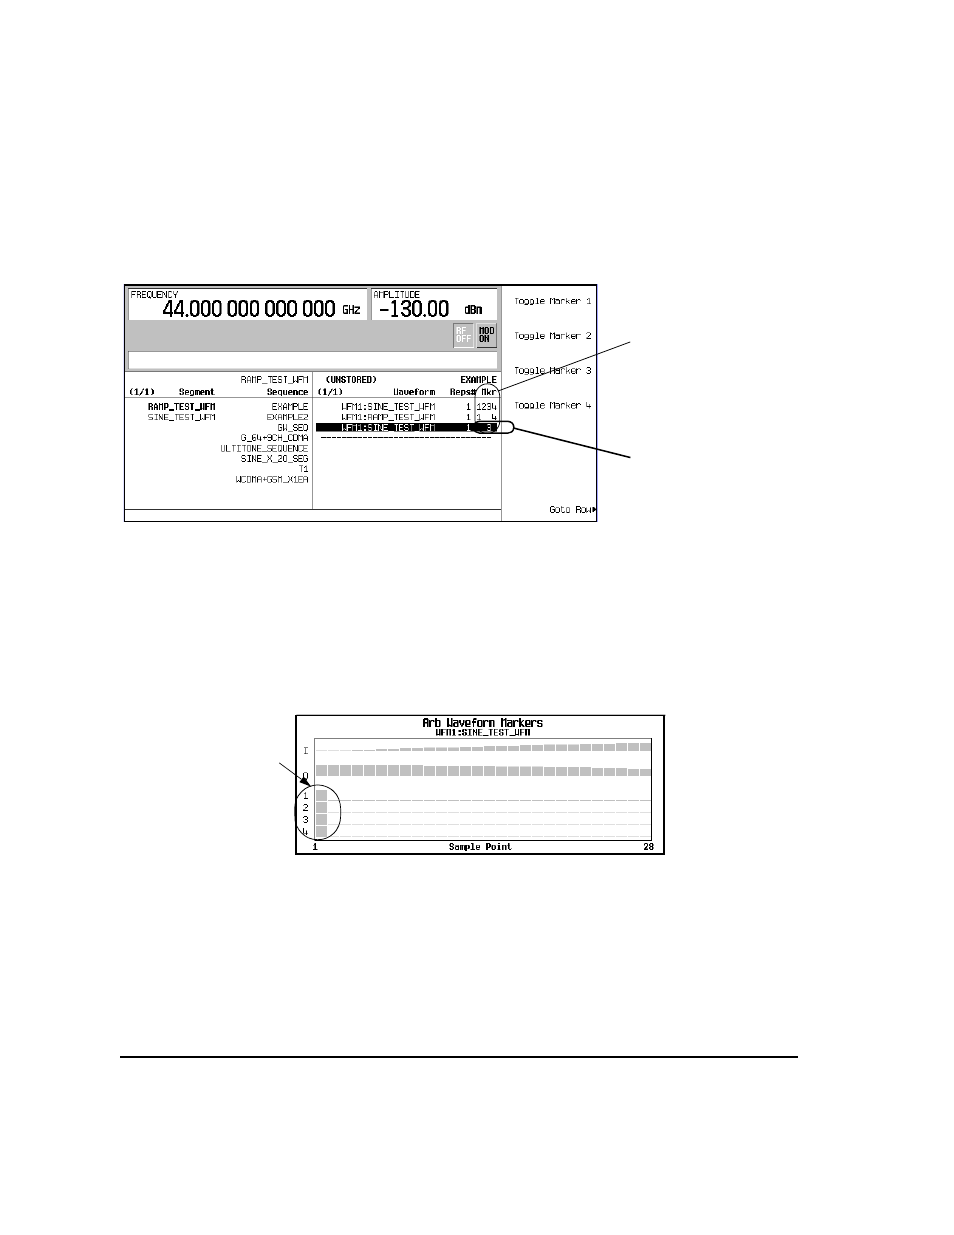
This example uses the factory–supplied segment, SINE_TEST_WFM in the Dual ARB Player.
Factory–supplied segments have a marker point on the first sample point for all four markers, as
shown.
1.
Press
Mode
>
Dual ARB
>
Select Waveform
, and highlight the desired segment (in this example,
SINE_TEST_WFM
).
2.
Press
ARB Off On
to On.
3.
Connect an oscilloscope input to the EVENT 1 connector, and trigger on the Event 1 signal.
When a marker is present, the oscilloscope displays a marker pulse, as shown in the following
example.
Sequence Marker Column
This entry shows that only
marker 3 is enabled for this
segment.
Marker points on
first sample point of
waveform segment
Viewing markers is described on