System monitor – Luminex xPONENT 3.1 Rev 2 (IVD) User Manual
Page 19
• Tab - The elements on the left side of the window are “Tabs”. Click a tab to go to that
section. Some tabs require you to go in order, and will not let you click a tab further down
without performing a task on the current tab.
• Right-Click Menu - Certain sections of the software such as tables, lists, and text boxes
have right-click option menus. Menus are different depending upon the item you right-
clicked.
• Print All - Prints all sections or cells of the item.
• Print Selection - Prints only the selected section or cell.
• Import - Imports a file.
• Export - Opens a File dialog box. Use the Browse button to select a location, and type
a file name. The export is in .CSV format. This exports all data from the right-clicked
item.
• Cut - Cuts the selected data.
• Copy All - Copies all data.
• Copy - Copies only the selected data.
• Paste - Pastes previously copied text or data into the box.
• Delete - Erases text or data from the selection.
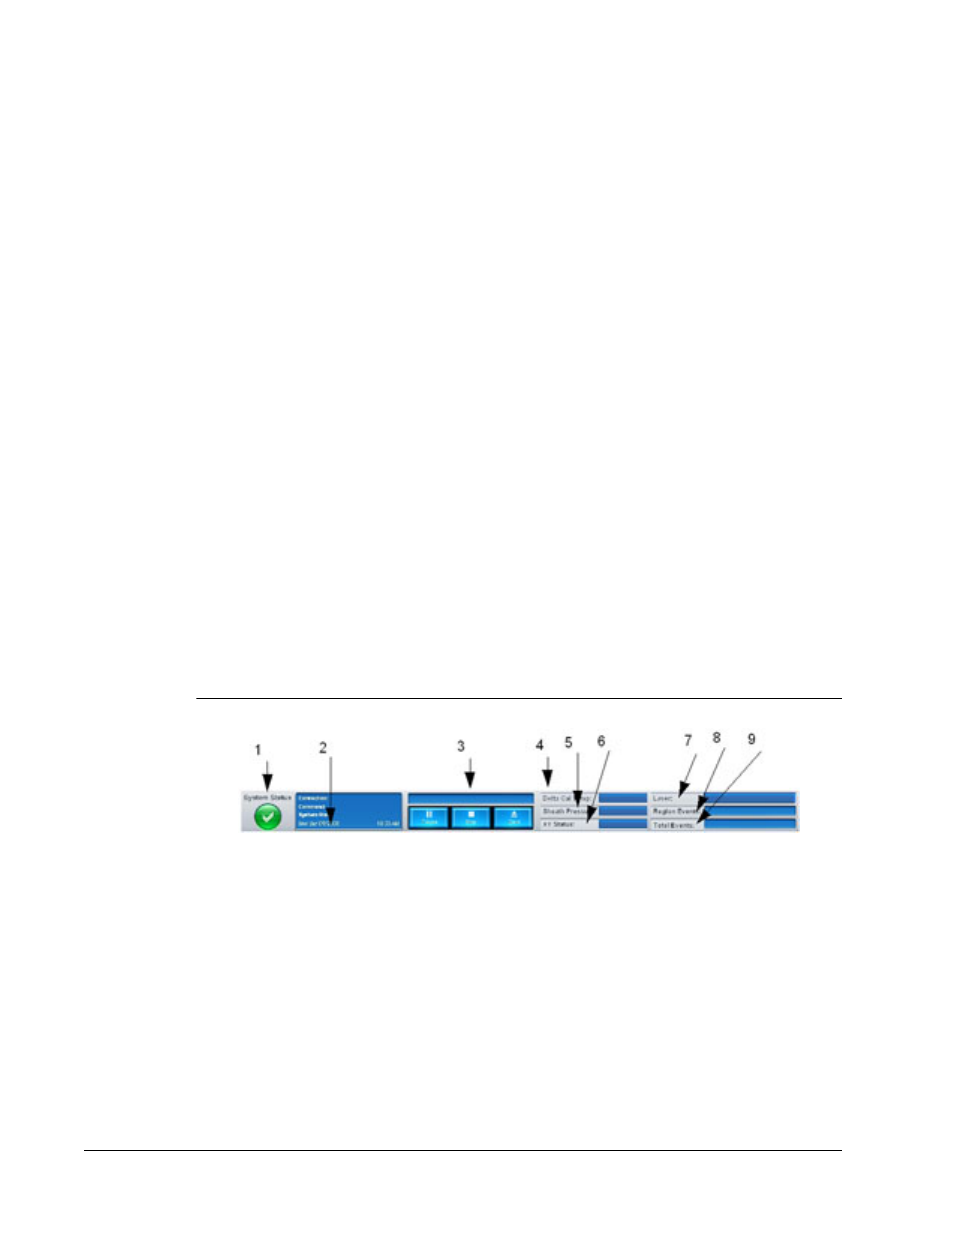
System Monitor
The System Monitor remains at the bottom of all xPONENT windows. It displays the physical
state of the Luminex analyzer. The values displayed are reported directly from the Luminex
system.
FIGURE 2.
System Monitor
1 System Status button
2 Command display
3 Progress bar and buttons 4 Delta Cal Temp status button
5 Sheath Pressure status
6 XY status
7 Laser status
8 Region Events status
9 Total Events status
• System Status - This button has two functions: When clicked, it opens the system log (see
System Status Tab). It also displays the current status of the system. If there are no
warnings or errors, the System Status button is green with a check mark. If there is a
warning, error, or other important user-notification, the button turns yello with an
exclamation point.
• Command - Displays the command currently running on the system.
For In Vitro Diagnostic Use
Touring the Software
9