Plate layout subtab – Luminex xPONENT for MAGPIX 4.2 User Manual
Page 61
• Assay Control Information - Lists the selected control reagents. The list displays the
Reagent, Name, Lot Number, Expiration, and Manufacturer. Existing control lot
information can be applied or new information can be typed manually.
• Apply Ctrl Lot - Opens the Select Lot dialog box. Select a lot from the list and then
click OK.
• Show Concentration - Expected, Low, and High set the expected, lowest, or highest
acceptable concentration of the analyte in the sample.
• Apply Values - Applies a value down or across the list of analytes.
• Cancel - Returns to the Batches tab.
• Back - Returns to the previous tab.
• Next - Continues to the Plate Layout tab.
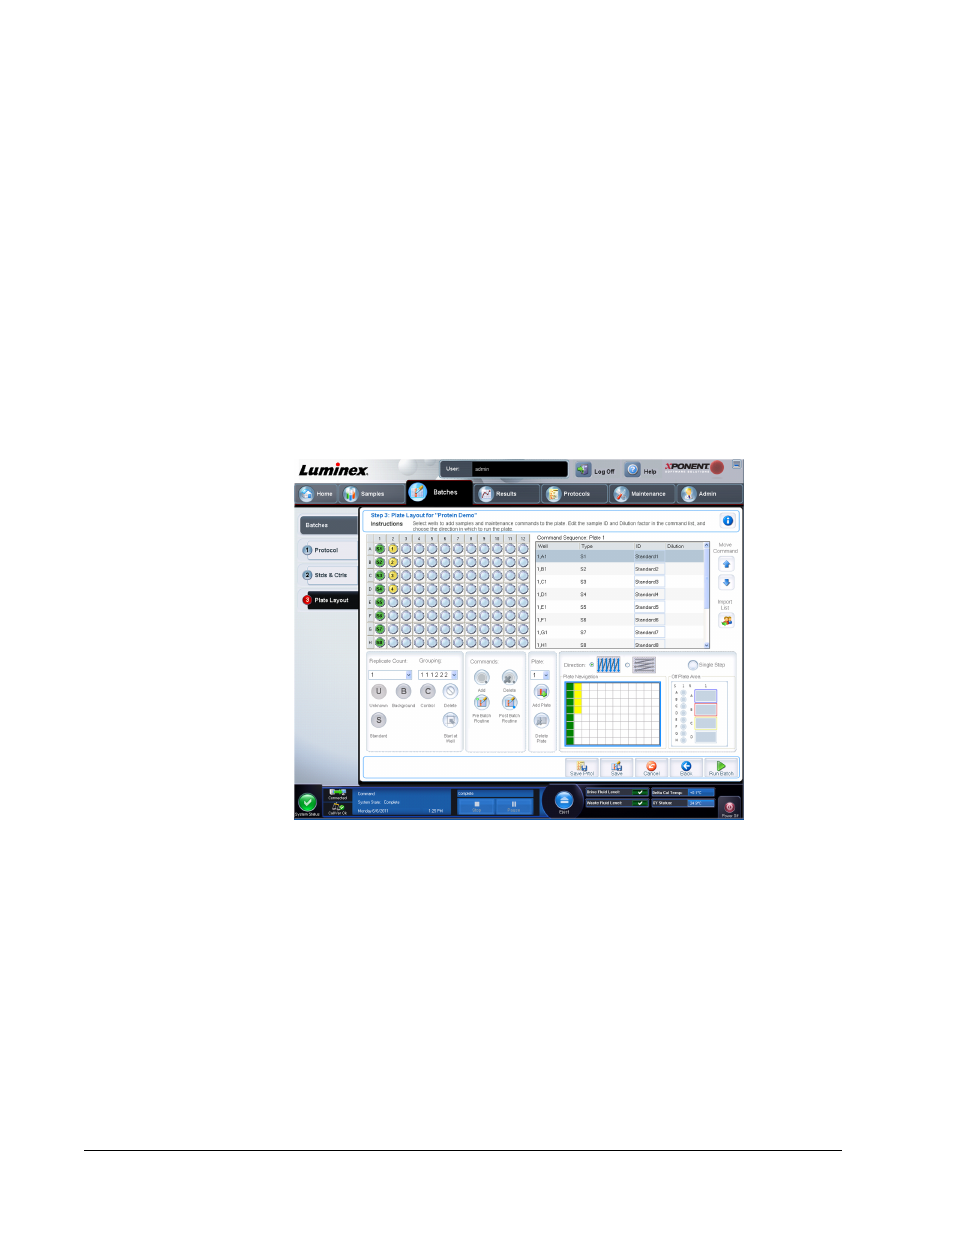
Plate Layout Subtab
Batches > Batches > Plate Layout
Use this tab to define commands that apply to one or more wells. You can also define off-
plate and maintenance commands. This tab contains the following:
• Plate Image - This is a representation of the plate. Each well is displayed as a circle on the
grid. Well commands appear in the appropriate circles as you assign them to wells on the
plate.
• Command Sequence - Contains the command sequence for the active plate. The list
includes all active wells, the type of command (Unknown, Standard, Control, Background,
or assigned maintenance command), ID, and dilution factor. Double-click the ID field to
type an ID. Double-click the Dilution field to type a dilution factor.
NOTE: A command's ID and Dilution fields have a blue border around them
if they can be double-clicked to type information.
• Move Command - These arrows move a selected command up or down in the Command
Sequence list, changing the acquisition order.
xPONENT for MAGPIX 4.2 Software User Manual
48