Adjusting the sample probe height – Luminex 100 User Manual Version 1.7 User Manual
Page 38
Luminex 100 User Manual Version 1.7
x
MAP Technology
4 - 4
PN 89-00002-00-063 Rev. A
Adjusting the
Sample Probe
Height
You must adjust the Sample Probe vertical height each time you
install a Sample Probe, change the type or style of microtiter plate,
or move the instrument.
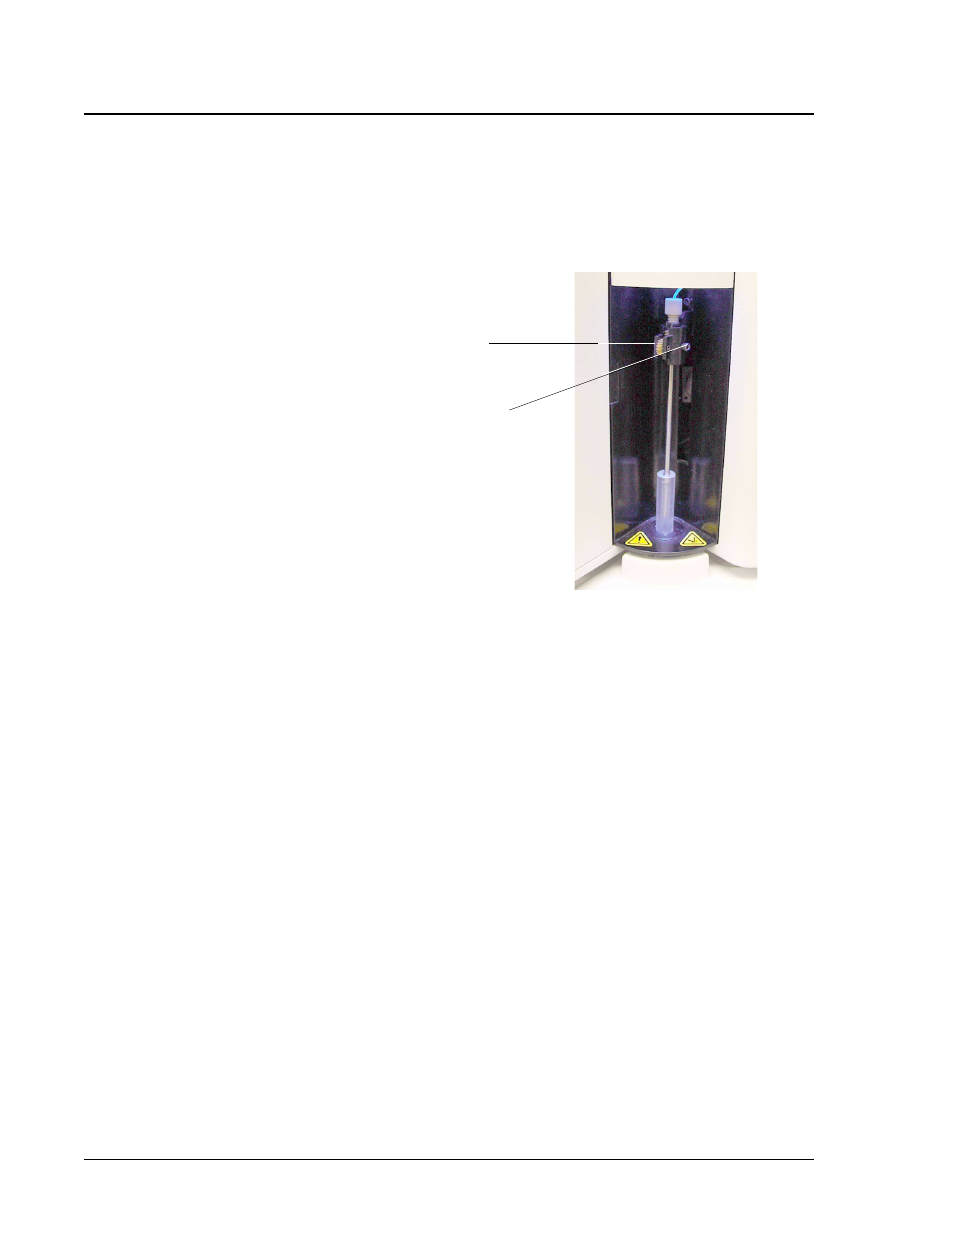
Figure 4-4. Sample Probe Height Adjustment Tools
To adjust the Sample Probe’s vertical height:
1. Turn on the Luminex XYP and the Luminex 100 analyzer, and
PC. Wait for the Luminex Data Collector software to start.
2. If already installed, remove the clear plastic shield covering the
sample probe area.
3. In a 96-well microtiter plate where overall height is no more than
0.75 inches, place the appropriate alignment tool in the plate.
•
For a standard plate with flat-bottomed wells, stack two of
the larger (5.08 mm diameter) alignment disks in well A1.
•
For filter-bottom plates, stack three of the larger alignment
disks into well A1.
•
For half-volume plates with flat-bottomed wells, stack two
small (3.35 mm diameter) alignment disks in well A1.
•
For a plate with conical wells, place one alignment sphere
into well A1.
•
For round-bottom wells, stack 2 small disks in well A1.
4. Click Eject.
Height Adjustment
Locking Screw
Thumb Wheel
Note:
Adjusting the sample probe
vertical height is critical.